P
r
o
t
e
c
t
e
d
b
y
c
o
p
y
r
i
g
h
t
.
C
o
p
y
i
n
g
f
o
r
p
r
i
v
a
t
e
o
r
c
o
m
m
e
r
c
i
a
l
p
u
r
p
o
s
e
s
,
i
n
p
a
r
t
o
r
i
n
w
h
o
l
e
,
i
s
n
o
t
p
e
r
m
i
t
t
e
d
u
n
l
e
s
s
a
u
t
h
o
r
i
s
e
d
b
y
V
o
l
k
s
w
a
g
e
n
A
G
.
V
o
l
k
s
w
a
g
e
n
A
G
d
o
e
s
n
o
t
g
u
a
r
a
n
t
e
e
o
r
a
c
c
e
p
t
a
n
y
l
i
a
b
i
l
i
t
y
w
i
t
h
r
e
s
p
e
c
t
t
o
t
h
e
c
o
r
r
e
c
t
n
e
s
s
o
f
i
n
f
o
r
m
a
t
i
o
n
i
n
t
h
i
s
d
o
c
u
m
e
n
t
.
C
o
p
y
r
i
g
h
t
b
y
V
o
l
k
s
w
a
g
e
n
A
G
.
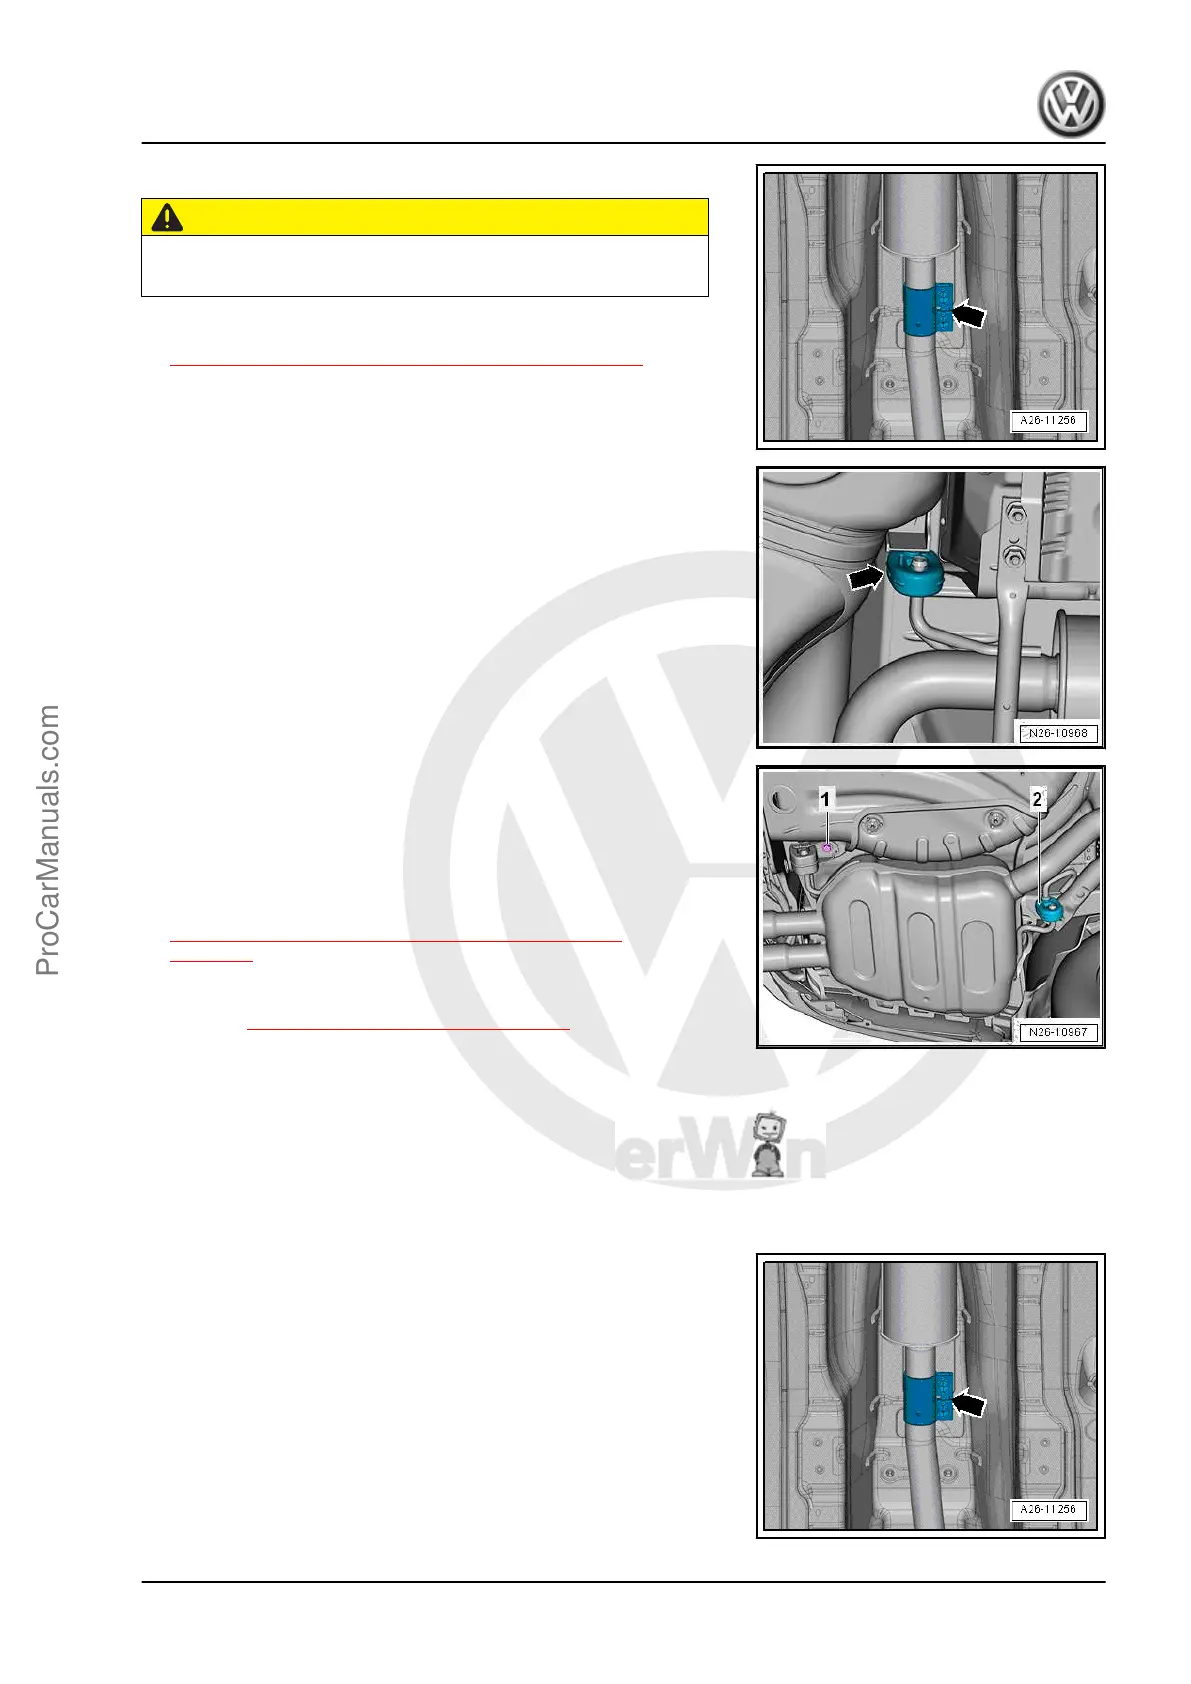
– Loosen the screws for the front clamping sleeve -arrow-.
CAUTION
Risk of accident due to the heavy weight of the muffler.
– A second technician is required for the following work steps.
– Disconnect the exhaust pipe. Refer to
⇒ 1.2 Exhaust Pipes/Mufflers, Separating, page 342 .
– Disengage the retaining loop -arrow-.
– Disengage the retaining loop -2- and remove the bolt -1-.
– Remove the muffler.
Installing
Install in reverse order of removal. Note the following:
– Install the exhaust system free of tension. Refer to
⇒ 1.4 Exhaust System, Installing without Tension,
page 345 .
Tightening Specifications
♦ Refer to ⇒ 1.1 Overview - Muffler, page 338
♦ Refer to ⇒ Body Exterior; Rep. Gr. 66 ; Underbody Panel;
Overview - Underbody Panels .
1.4 Exhaust System, Installing without Ten‐
sion
Procedure
• Align the exhaust system when cold.
– Loosen the screws for the front clamping sleeve -arrow-.
Golf 2015 ➤ , Golf Variant 2015 ➤
Engine Mechanical, Fuel Injection and Ignition - Edition 04.2015
1. Exhaust Pipes/Mufflers 345
ProCarManuals.com
 Loading...


