P
r
o
t
e
c
t
e
d
b
y
c
o
p
y
r
i
g
h
t
.
C
o
p
y
i
n
g
f
o
r
p
r
i
v
a
t
e
o
r
c
o
m
m
e
r
c
i
a
l
p
u
r
p
o
s
e
s
,
i
n
p
a
r
t
o
r
i
n
w
h
o
l
e
,
i
s
n
o
t
p
e
r
m
i
t
t
e
d
u
n
l
e
s
s
a
u
t
h
o
r
i
s
e
d
b
y
V
o
l
k
s
w
a
g
e
n
A
G
.
V
o
l
k
s
w
a
g
e
n
A
G
d
o
e
s
n
o
t
g
u
a
r
a
n
t
e
e
o
r
a
c
c
e
p
t
a
n
y
l
i
a
b
i
l
i
t
y
w
i
t
h
r
e
s
p
e
c
t
t
o
t
h
e
c
o
r
r
e
c
t
n
e
s
s
o
f
i
n
f
o
r
m
a
t
i
o
n
i
n
t
h
i
s
d
o
c
u
m
e
n
t
.
C
o
p
y
r
i
g
h
t
b
y
V
o
l
k
s
w
a
g
e
n
A
G
.
26 – Exhaust System, Emission Controls
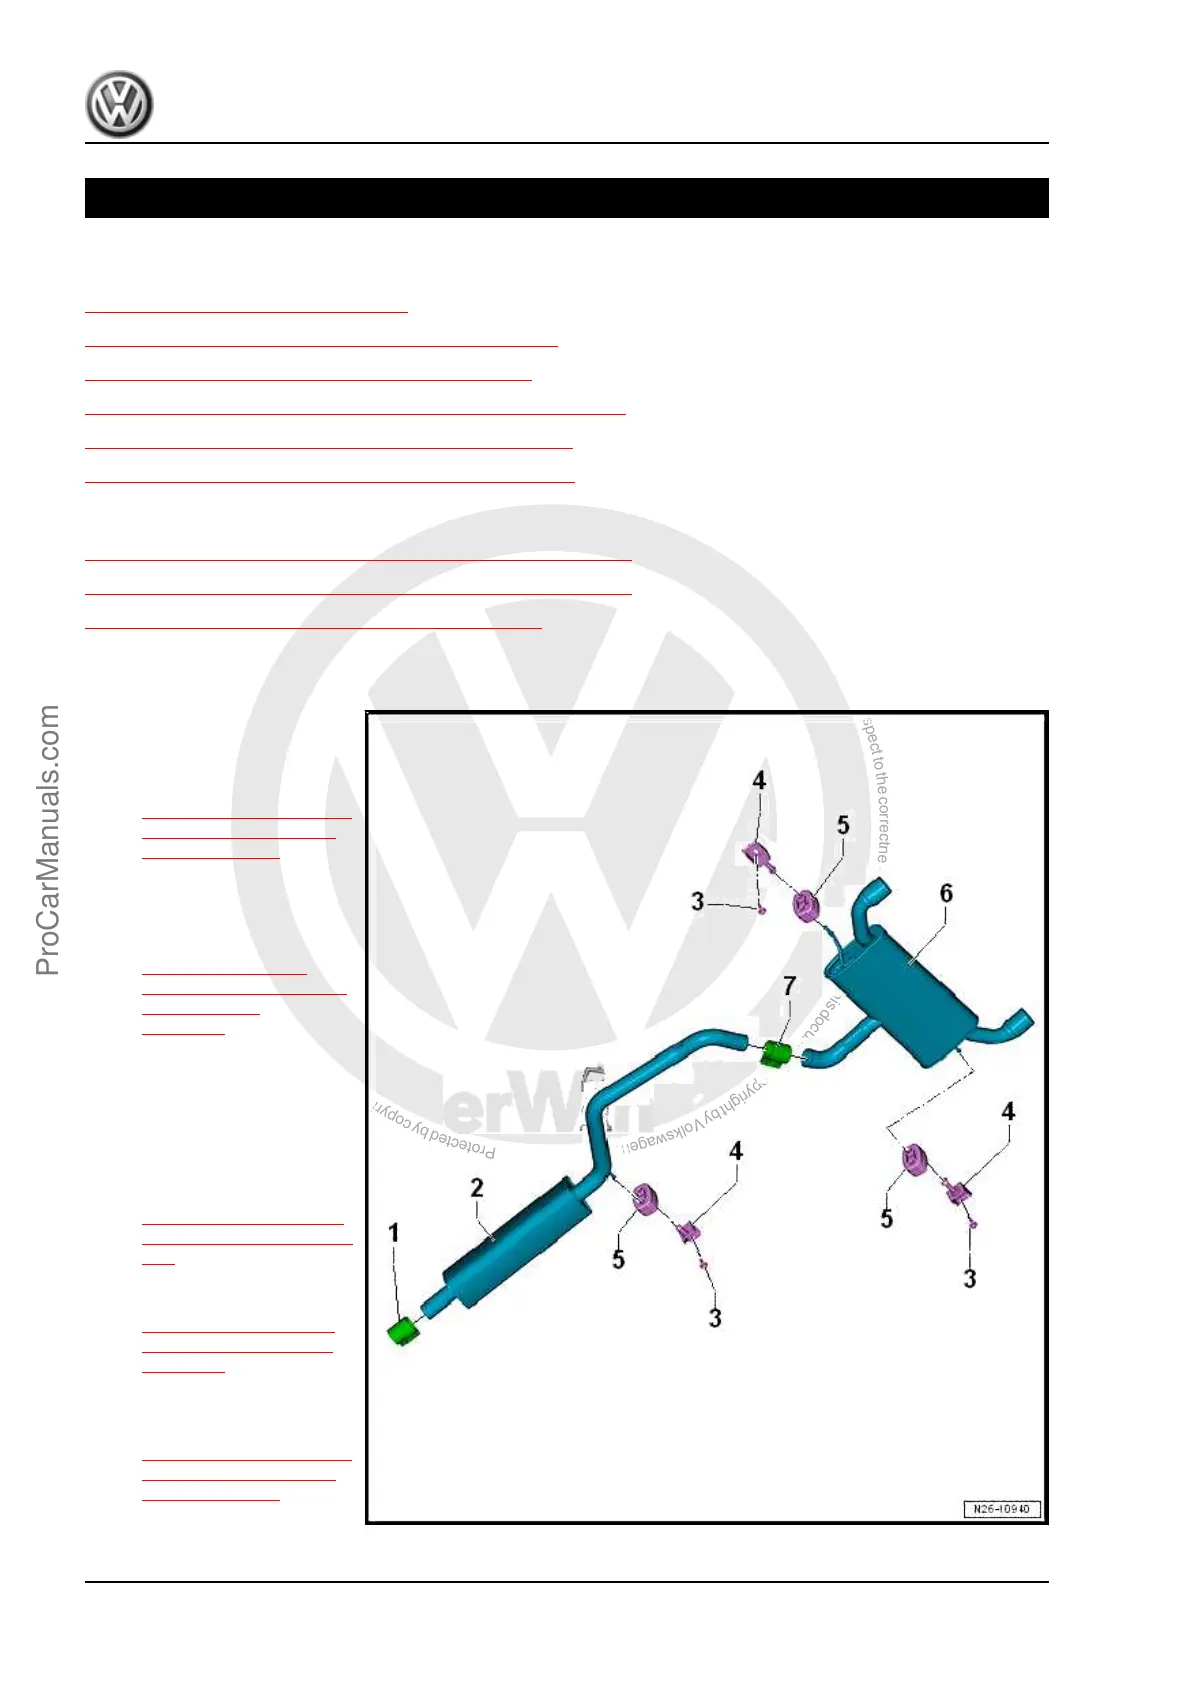
1 Exhaust Pipes/Mufflers
⇒ 1.1 Overview - Muffler, page 338
⇒ 1.2 Exhaust Pipes/Mufflers, Separating, page 342
⇒ 1.3 Muffler, Removing and Installing, page 343
⇒ 1.4 Exhaust System, Installing without Tension, page 345
⇒ 1.5 Exhaust System, Checking for Leaks, page 346
⇒ 1.6 Clamping Sleeve Installation Position, page 347
1.1 Overview - Muffler
⇒ 1.1.1 Overview - Muffler, Golf with 2.0L Engine , page 338
⇒ 1.1.2 Overview - Muffler, Golf with 1.8L Engine , page 340
⇒ 1.1.3 Overview - Muffler, Golf Wagon, page 341
1.1.1 Overview - Muffler, Golf with 2.0L Engine
1 - Front Clamping Sleeve
❑ Before tightening, align
exhaust system free of
tension. Refer to
⇒ 1.4 Exhaust System,
Installing without Ten‐
sion, page 345 .
❑ Tighten threaded con‐
nections evenly.
❑ Tightening specifica‐
tion. Refer to
⇒ Fig. Tightening
Specification of Clamp‐
ing Sleeve ,
page 347 .
2 - Center Muffler
❑ Original equipment as
one unit with rear muf‐
fler. For repairs, replace
each separately
❑ Removing and instal‐
ling. Refer to
⇒ 1.3 Muffler, Remov‐
ing and Installing, page
343 .
❑ Separating point. Refer
to
⇒ 1.2 Exhaust Pipes/
Mufflers, Separating,
page 342 .
❑ Exhaust System, Instal‐
ling without Tension.
Refer to
⇒ 1.4 Exhaust System,
Installing without Ten‐
sion, page 345 .
Golf 2015 ➤ , Golf Variant 2015 ➤
Engine Mechanical, Fuel Injection and Ignition - Edition 04.2015
338 Rep. Gr.26 - Exhaust System, Emission Controls
ProCarManuals.com
 Loading...


