P
r
o
t
e
c
t
e
d
b
y
c
o
p
y
r
i
g
h
t
.
C
o
p
y
i
n
g
f
o
r
p
r
i
v
a
t
e
o
r
c
o
m
m
e
r
c
i
a
l
p
u
r
p
o
s
e
s
,
i
n
p
a
r
t
o
r
i
n
w
h
o
l
e
,
i
s
n
o
t
p
e
r
m
i
t
t
e
d
u
n
l
e
s
s
a
u
t
h
o
r
i
s
e
d
b
y
V
o
l
k
s
w
a
g
e
n
A
G
.
V
o
l
k
s
w
a
g
e
n
A
G
d
o
e
s
n
o
t
g
u
a
r
a
n
t
e
e
o
r
a
c
c
e
p
t
a
n
y
l
i
a
b
i
l
i
t
y
w
i
t
h
r
e
s
p
e
c
t
t
o
t
h
e
c
o
r
r
e
c
t
n
e
s
s
o
f
i
n
f
o
r
m
a
t
i
o
n
i
n
t
h
i
s
d
o
c
u
m
e
n
t
.
C
o
p
y
r
i
g
h
t
b
y
V
o
l
k
s
w
a
g
e
n
A
G
.
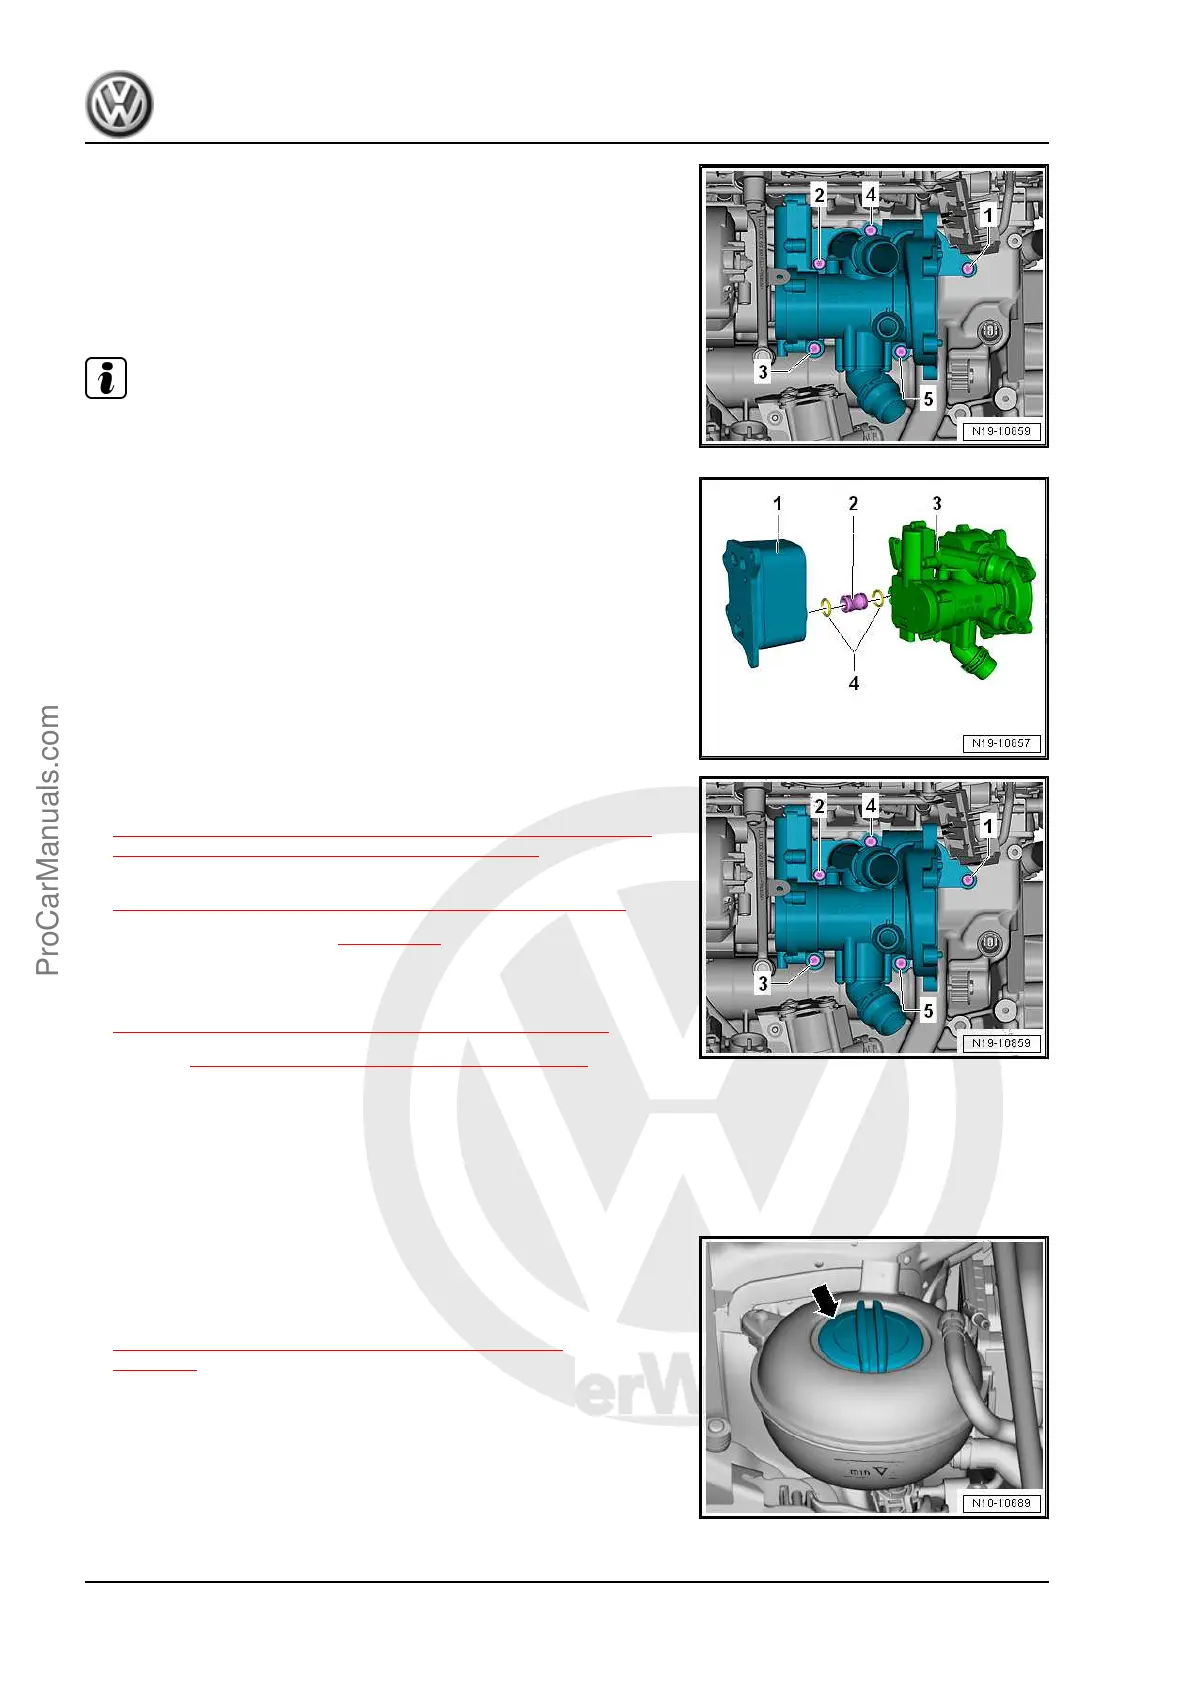
– Remove the bolts -1 to 5-.
– Remove the Engine Temperature Control Actuator - N493-
from the centering pin and disconnect it from the engine oil
cooler.
Installing
Install in reverse order of removal. Note the following:
Note
Replace the seals and O-rings.
– Coat the new O-rings -4- with coolant.
– Make sure both centering pins are installed in the cylinder
block.
– Install the connection piece -2- into the engine oil cooler -1-.
– Push the Engine Temperature Control Actuator - N493- -3-
into the connection piece and onto the centering pins in the
cylinder block.
– Tighten the bolts for the Engine Temperature Control Actuator
- N493- . Refer to
⇒ Fig. Engine Temperature Control Actuator -N493- - Tight‐
ening Specifications and Sequence , page 225 .
– Install the coolant pump. Refer to
⇒ 2.7 Coolant Pump, Removing and Installing, page 232 .
– Fill with coolant. Refer to ⇒ page 218 .
Tightening Specifications
♦ Refer to
⇒ 2.1 Overview - Coolant Pump/Thermostat, page 223 .
♦ Refer to ⇒ 4.1 Overview - Intake Manifold, page 296 .
2.10 Engine Coolant Temperature Sensor -
G62- , Removing and Installing
Removing
• Engine is cold.
– Quickly open the coolant expansion tank cap -arrow- and re‐
lease any remaining pressure in the cooling system and then
close it again until it locks.
– Remove the air filter housing. Refer to
⇒ 3.2 Air Filter Housing, Removing and Installing,
page 294 .
Golf 2015 ➤ , Golf Variant 2015 ➤
Engine Mechanical, Fuel Injection and Ignition - Edition 04.2015
238 Rep. Gr.19 - Cooling System
ProCarManuals.com
 Loading...


