P
r
o
t
e
c
t
e
d
b
y
c
o
p
y
r
i
g
h
t
.
C
o
p
y
i
n
g
f
o
r
p
r
i
v
a
t
e
o
r
c
o
m
m
e
r
c
i
a
l
p
u
r
p
o
s
e
s
,
i
n
p
a
r
t
o
r
i
n
w
h
o
l
e
,
i
s
n
o
t
p
e
r
m
i
t
t
e
d
u
n
l
e
s
s
a
u
t
h
o
r
i
s
e
d
b
y
V
o
l
k
s
w
a
g
e
n
A
G
.
V
o
l
k
s
w
a
g
e
n
A
G
d
o
e
s
n
o
t
g
u
a
r
a
n
t
e
e
o
r
a
c
c
e
p
t
a
n
y
l
i
a
b
i
l
i
t
y
w
i
t
h
r
e
s
p
e
c
t
t
o
t
h
e
c
o
r
r
e
c
t
n
e
s
s
o
f
i
n
f
o
r
m
a
t
i
o
n
i
n
t
h
i
s
d
o
c
u
m
e
n
t
.
C
o
p
y
r
i
g
h
t
b
y
V
o
l
k
s
w
a
g
e
n
A
G
.
Installing
Install in reverse order of removal. Note the following:
– Note the installed position of the Knock Sensor 1 - G61- .
– Install the Engine Temperature Control Actuator - N493- . Re‐
fer to
⇒ 2.9 Engine Temperature Control Actuator N493 , Remov‐
ing and Installing, page 237 .
Tightening Specifications
♦ Refer to ⇒ 1.1 Overview - Ignition System, page 356 .
1.5 Camshaft Position Sensor, Removing
and Installing
⇒ 1.5.1 Camshaft Position Sensor G40 , Removing and Instal‐
ling, page 360
⇒ 1.5.2 Camshaft Position Sensor 3 G300 , Removing and In‐
stalling, page 360
1.5.1 Camshaft Position Sensor - G40- , Re‐
moving and Installing
Removing
– Remove the engine cover. Refer to
⇒ 3.1 Engine Cover, Removing and Installing, page 38 .
– Remove the intake manifold. Refer to
⇒ 4.3 Intake Manifold, Removing and Installing, page 304 .
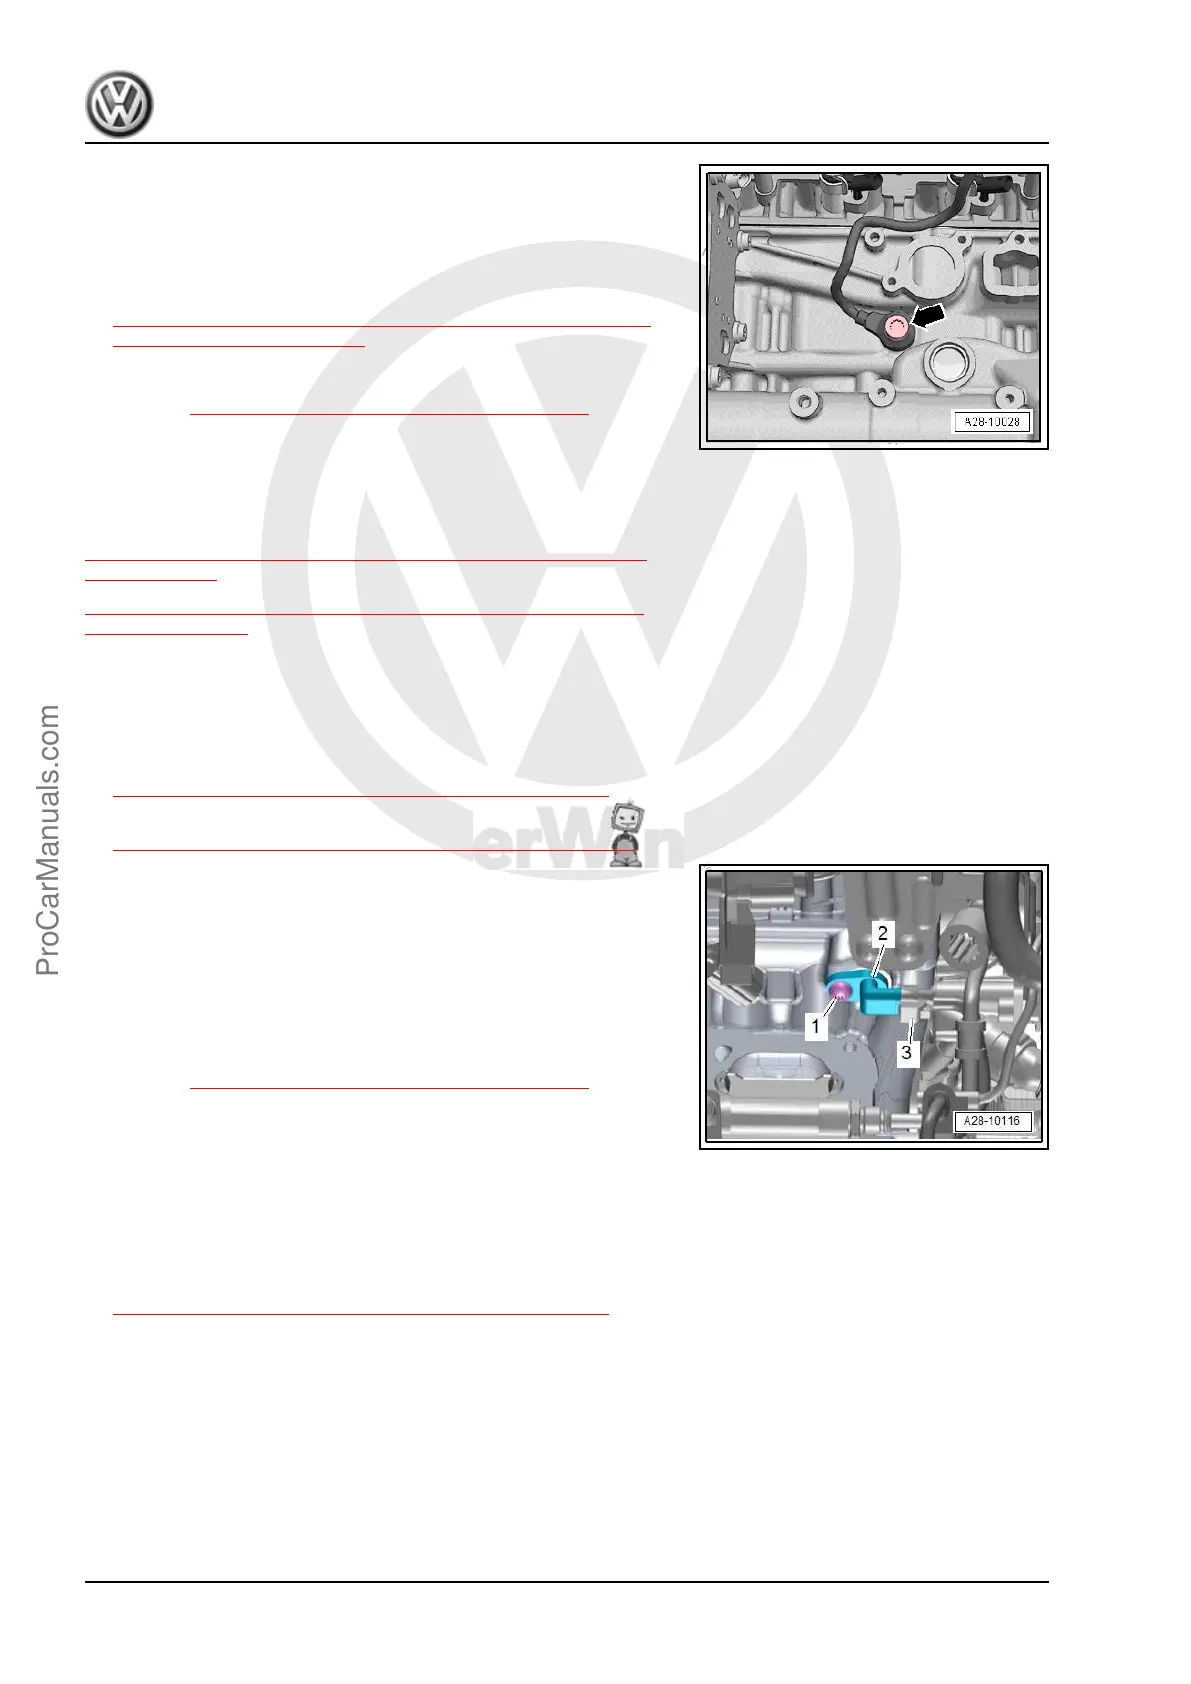
– Disconnect the connector -3-.
– Remove the bolt -1- and camshaft position sensor -2-.
Installing
Install in reverse order of removal. Note the following:
– Replace the O-ring.
Tightening Specifications
♦ Refer to ⇒ 1.1 Overview - Ignition System, page 356 .
1.5.2 Camshaft Position Sensor 3 - G300- ,
Removing and Installing
Removing
– Remove the engine cover. Refer to
⇒ 3.1 Engine Cover, Removing and Installing, page 38 .
– Disconnect the connector -3-.
Golf 2015 ➤ , Golf Variant 2015 ➤
Engine Mechanical, Fuel Injection and Ignition - Edition 04.2015
360 Rep. Gr.28 - Ignition/Glow Plug System
ProCarManuals.com
 Loading...


