P
r
o
t
e
c
t
e
d
b
y
c
o
p
y
r
i
g
h
t
.
C
o
p
y
i
n
g
f
o
r
p
r
i
v
a
t
e
o
r
c
o
m
m
e
r
c
i
a
l
p
u
r
p
o
s
e
s
,
i
n
p
a
r
t
o
r
i
n
w
h
o
l
e
,
i
s
n
o
t
p
e
r
m
i
t
t
e
d
u
n
l
e
s
s
a
u
t
h
o
r
i
s
e
d
b
y
V
o
l
k
s
w
a
g
e
n
A
G
.
V
o
l
k
s
w
a
g
e
n
A
G
d
o
e
s
n
o
t
g
u
a
r
a
n
t
e
e
o
r
a
c
c
e
p
t
a
n
y
l
i
a
b
i
l
i
t
y
w
i
t
h
r
e
s
p
e
c
t
t
o
t
h
e
c
o
r
r
e
c
t
n
e
s
s
o
f
i
n
f
o
r
m
a
t
i
o
n
i
n
t
h
i
s
d
o
c
u
m
e
n
t
.
C
o
p
y
r
i
g
h
t
b
y
V
o
l
k
s
w
a
g
e
n
A
G
.
8 Heated Oxygen Sensor
⇒ 8.1 Overview - Heated Oxygen Sensor, page 333 .
⇒ 8.2 Oxygen Sensor 1 before Catalytic Converter GX10 , Re‐
moving and Installing, page 333 .
⇒ 8.3 Oxygen Sensor 1 after Catalytic Converter GX7 , Remov‐
ing and Installing, page 334 .
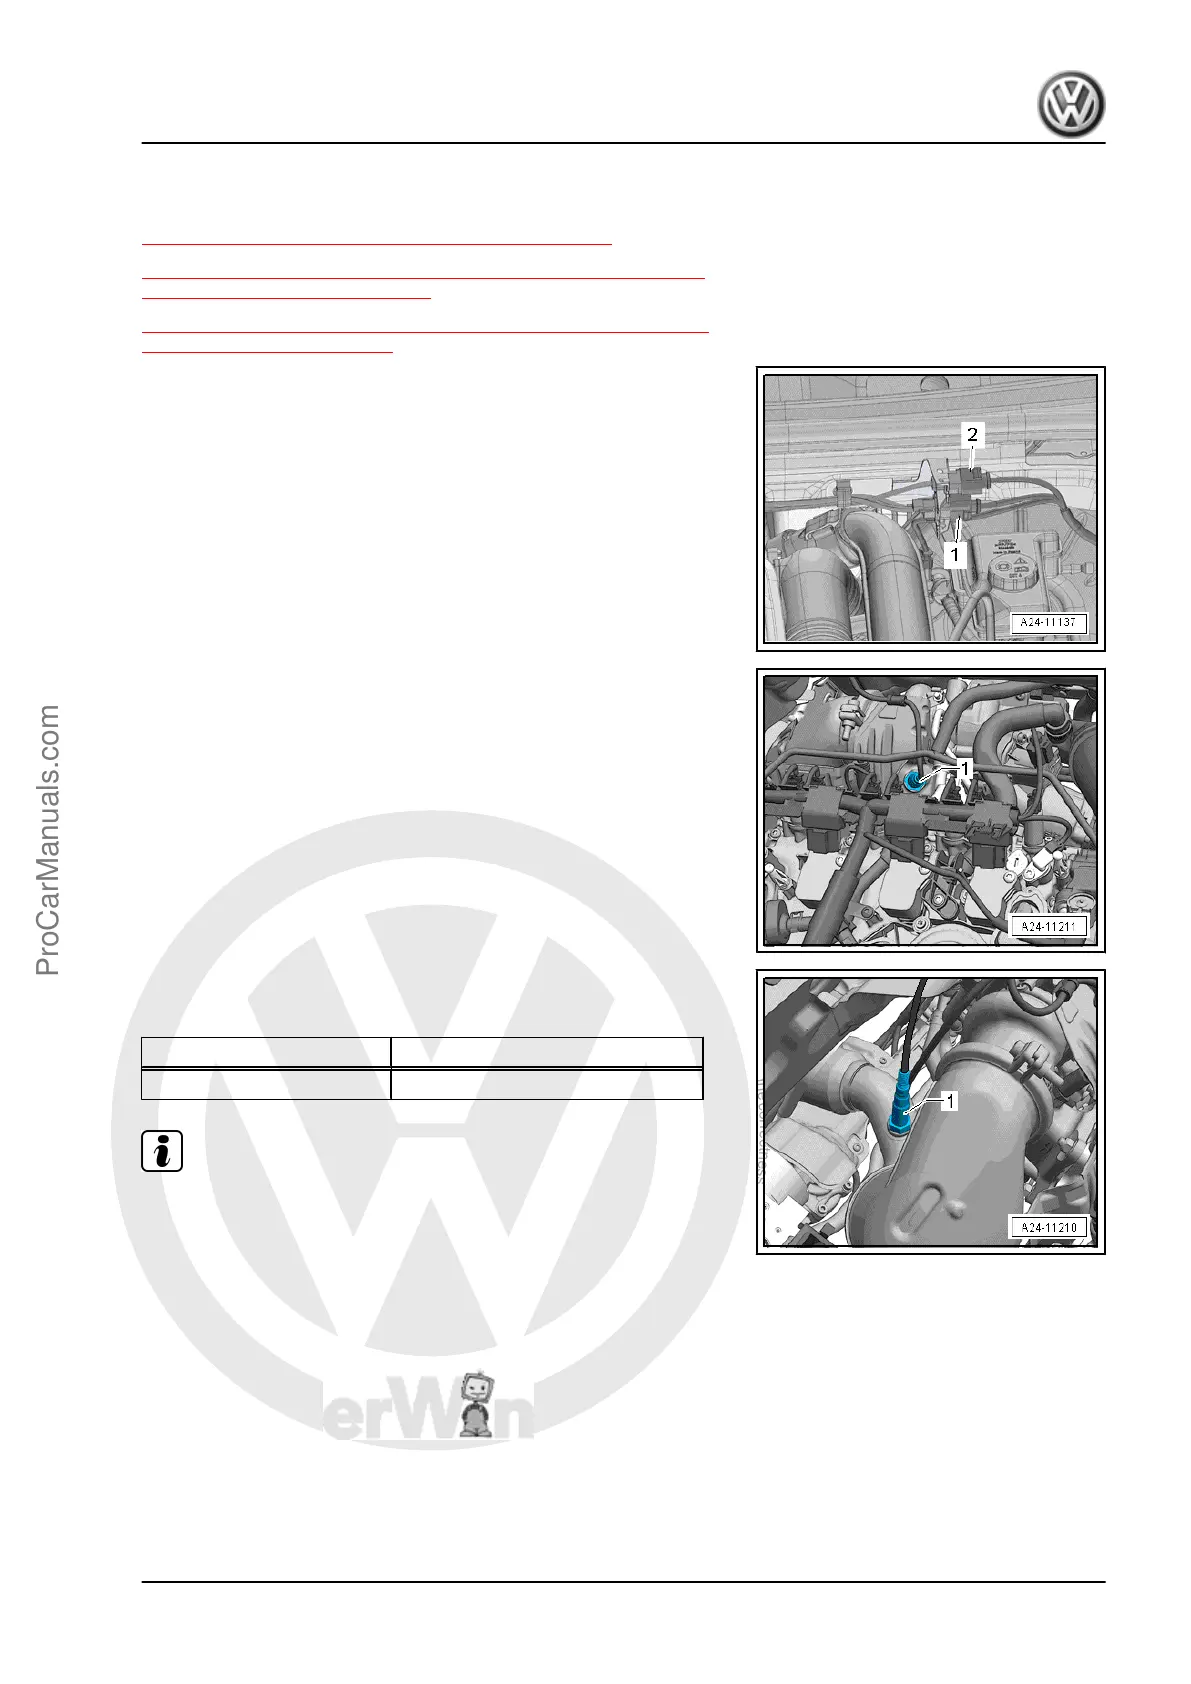
8.1 Overview - Heated Oxygen Sensor
Oxygen Sensor Electrical Connectors
1 - Oxygen Sensor 1 after Catalytic Converter - GX7- connector
2 - Oxygen Sensor 1 before Catalytic Converter - GX10- connec‐
tor
Oxygen Sensor 1 before Catalytic Converter - GX10- -1-
Oxygen Sensor 1 after Catalytic Converter - GX7- -1-
Tightening Specifications
Component Tightening Specification
Heated Oxygen Sensor 55 Nm
Note
♦
Coat new oxygen sensors with an assembly paste. This paste
must not come into contact with oxygen sensor slots.
♦
For a used oxygen sensor, only coat threads with hot bolt
paste. This paste must not come into contact with oxygen
sensor slots. Hot bolt paste. Refer to the Parts Catalog
♦
The oxygen sensor wire must always be attached at the same
location when installing. Do not let the electrical wire connec‐
tion come in contact with the exhaust pipe.
8.2 Oxygen Sensor 1 before Catalytic Con‐
verter - GX10- , Removing and Installing
Special tools and workshop equipment required
♦ Ring Wrench 7-Piece Set - 3337-
Golf 2015 ➤ , Golf Variant 2015 ➤
Engine Mechanical, Fuel Injection and Ignition - Edition 04.2015
8. Heated Oxygen Sensor 333
ProCarManuals.com
 Loading...


