P
r
o
t
e
c
t
e
d
b
y
c
o
p
y
r
i
g
h
t
.
C
o
p
y
i
n
g
f
o
r
p
r
i
v
a
t
e
o
r
c
o
m
m
e
r
c
i
a
l
p
u
r
p
o
s
e
s
,
i
n
p
a
r
t
o
r
i
n
w
h
o
l
e
,
i
s
n
o
t
p
e
r
m
i
t
t
e
d
u
n
l
e
s
s
a
u
t
h
o
r
i
s
e
d
b
y
V
o
l
k
s
w
a
g
e
n
A
G
.
V
o
l
k
s
w
a
g
e
n
A
G
d
o
e
s
n
o
t
g
u
a
r
a
n
t
e
e
o
r
a
c
c
e
p
t
a
n
y
l
i
a
b
i
l
i
t
y
w
i
t
h
r
e
s
p
e
c
t
t
o
t
h
e
c
o
r
r
e
c
t
n
e
s
s
o
f
i
n
f
o
r
m
a
t
i
o
n
i
n
t
h
i
s
d
o
c
u
m
e
n
t
.
C
o
p
y
r
i
g
h
t
b
y
V
o
l
k
s
w
a
g
e
n
A
G
.
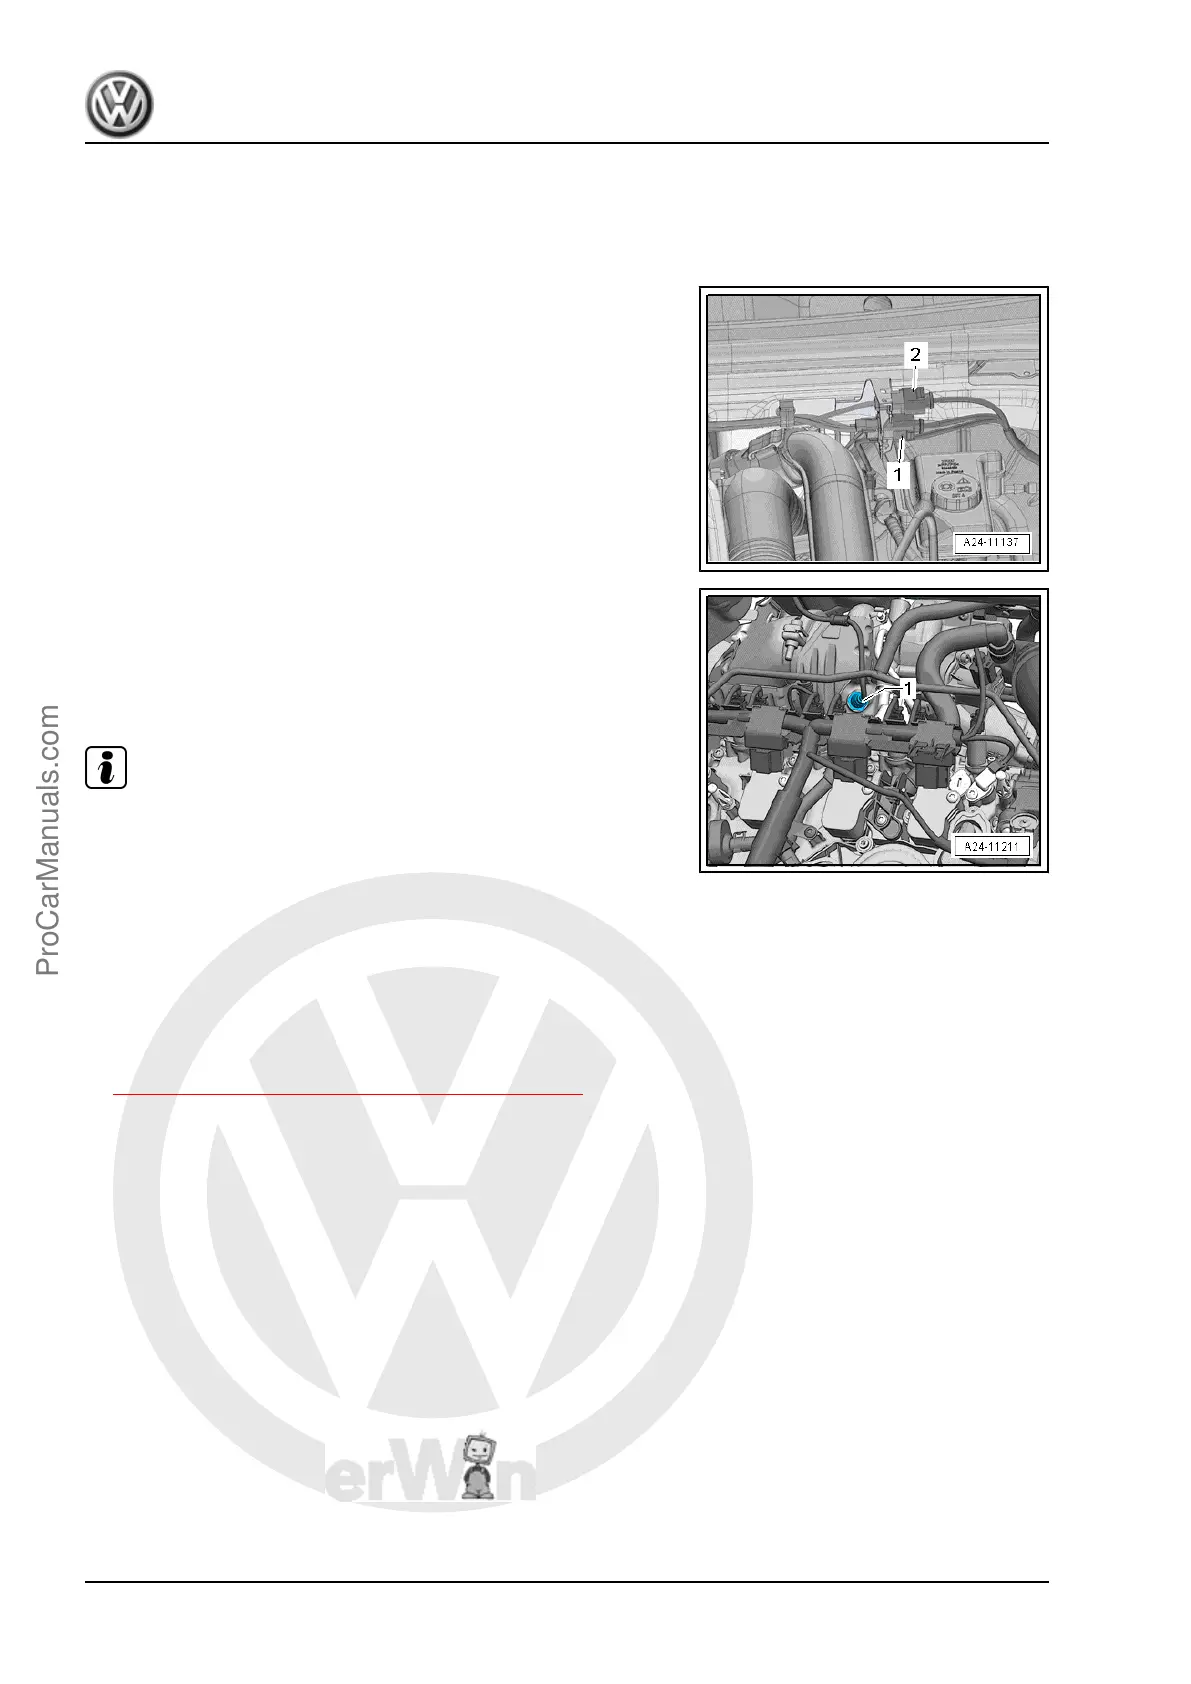
The Oxygen Sensor 1 before Catalytic Converter - GX10- is com‐
posed of:
♦ Heated Oxygen Sensor - G39-
♦ Oxygen Sensor Heater - Z19-
Removing
– Disconnect the connector -2- of the Oxygen Sensor 1 before
Catalytic Converter - GX10- .
– Remove the Oxygen Sensor 1 before Catalytic Converter -
GX10- -1- using a tool from the Ring Wrench 7-Piece Set -
3337- .
Installing
Note the following when installing:
Note
♦
Coat new oxygen sensors with an assembly paste. This paste
must not come into contact with oxygen sensor slots.
♦
For a used oxygen sensor, only coat threads with hot bolt
paste. This paste must not come into contact with oxygen
sensor slots. Hot bolt paste. Refer to the Parts Catalog.
♦
The oxygen sensor wire must always be attached at the same
location when installing. Do not the electrical wire connection
come in contact with the exhaust pipe.
Tightening Specifications
♦ Refer to
⇒ 8.1 Overview - Heated Oxygen Sensor, page 333 .
8.3 Oxygen Sensor 1 after Catalytic Con‐
verter - GX7- , Removing and Installing
The Oxygen Sensor 1 after Catalytic Converter - GX7- is com‐
posed of:
♦ Oxygen Sensor after Three Way Catalytic Converter - G130-
♦ Heater For Oxygen Sensor 2 after Catalytic Converter - Z30-
Special tools and workshop equipment required
♦ Ring Wrench 7-Piece Set - 3337-
Golf 2015 ➤ , Golf Variant 2015 ➤
Engine Mechanical, Fuel Injection and Ignition - Edition 04.2015
334 Rep. Gr.24 - Multiport Fuel Injection
ProCarManuals.com
 Loading...


