Interactive SourceMeter® Instrument Reference Manual Section 3:
2450-901-01 Rev. B/September 2013 3-69
Front-panel limit test
This example is set up to test a box of 100 Ω ±1 % and 100 Ω ±10 % resistors that you want to
separate manually. You can change values as needed to adapt the test to your needs.
Set up the test:
1. Press the FUNCTION key.
2. Under Source Current and Measure, select Resistance.
3. Press the MENU key.
4. Under Measure, select Settings.
5. Next to Limits, select View.
6. To enable limit testing, set the state to On for both Limit 1 and Limit 2.
7. Leave the Auto Clear setting at the default of On for both limits.
8. For Limit 1, set the Low Value to 90
.
9. For Limit 1, set the High Value to 110
.
10. For Limit 2, set the Low Value to 99
.
11. For Limit 2, set the High Value to 101
.
12. Select OK.
13. On the MEASUREMENT SETTINGS screen, set the Sense Mode to 4-Wire. Leave other settings
at the default values.
Run the test:
1. Press the HOME key.
2. Use 4-wire connections to connect the first resistor to the instrument.
3. Press Output ON/OFF to turn the source on.
4. Verify that the instrument is set to Continuous Measurement. If necessary, hold the TRIGGER
key for 3 seconds and select Continuous Measurement.
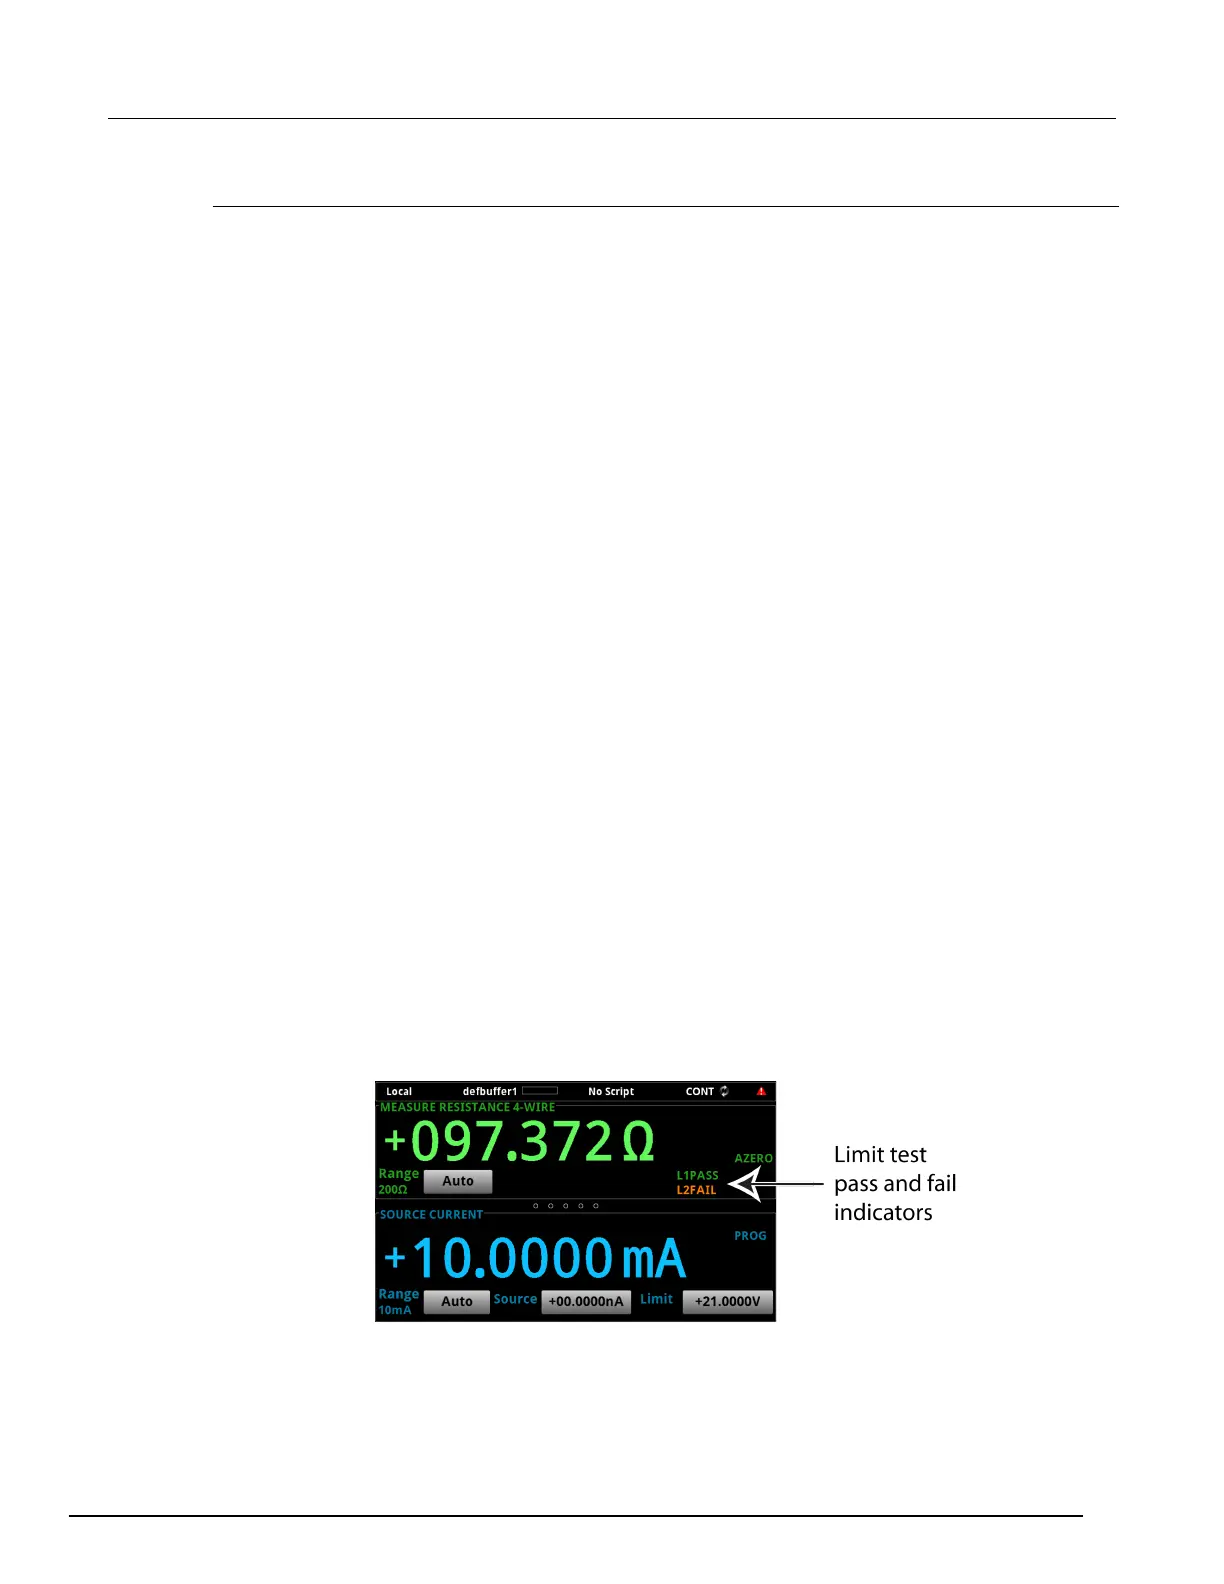
5. Observe the measurements. If the resistor is inside the limits set for Limit 1, L1PASS is displayed.
If the resistor is not within the limits, L1FAIL is displayed. If the resistor is in the limits set for Limit
2, L2PASS is displayed. If the resistor is not within the limits, L2FAIL is displayed. An example of
a test that passed the L1 test but failed the L2 test is shown below.
6. Press Output ON/OFF to turn the source off. Note that the limit indicators are displayed until you
turn limit testing off.
Figure 94: Limit test front panel indicators
 Loading...


