75
2.6 Optical Unit
REGIUS MODEL 190 Service Manual Ver.1.00 2004.11.01
2.6 Optical Unit
2.6.1 Replacement of Photomultiplier (PMT)
Important When handling the PMT, be cautious not
to touch the light collector (glass surface)
with fingers or any object. Once scratch
is generated, it may result in deteriorated
image quality.
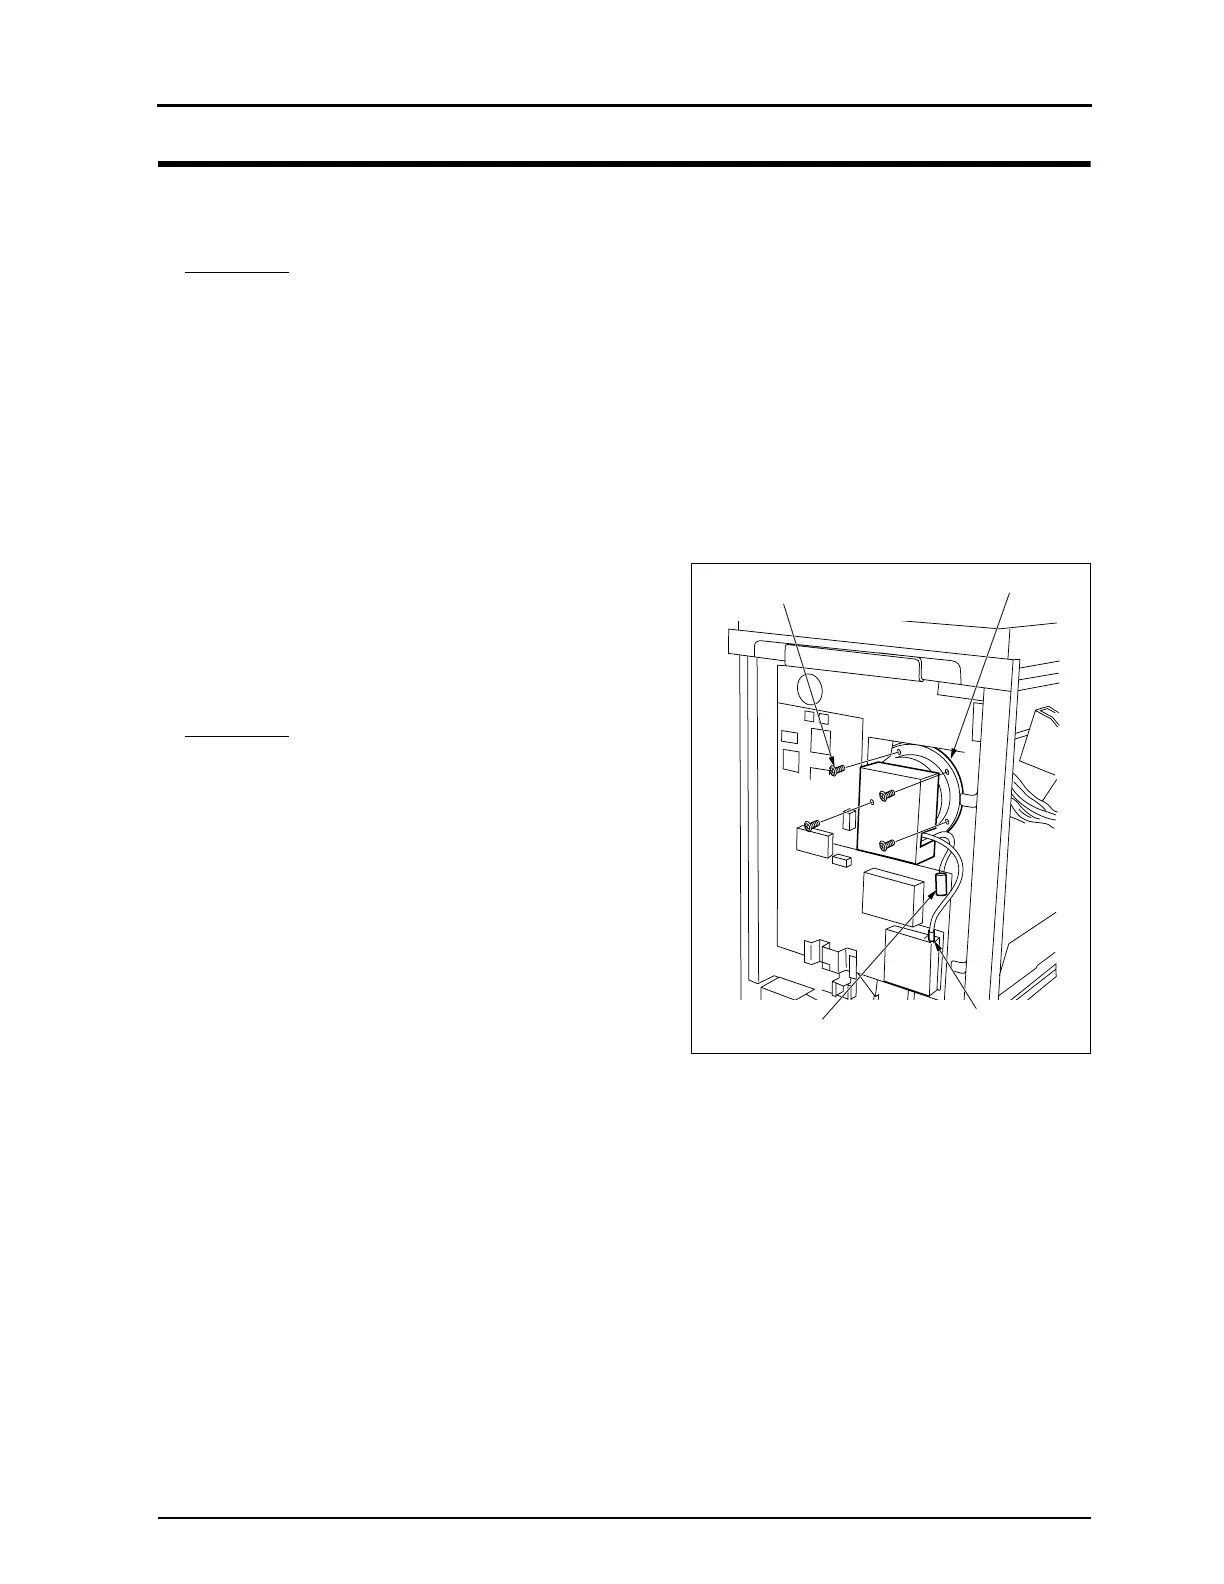
1.
Remove the left cover. ("2.2.2 Removal of the Left & Right
Covers, p.29")
2.
Remove 4 fixing screws, and loosen 2 fixing screws to
remove the board cover.
3.
Unplug two connectors from the analog/digital board
(ADB2).
• J1, J3
4.
Remove four fixing screws, and remove the photomultiplier
from the optical unit.
Impor
tant When placing the photomultiplier on the
table, always place it with its light collec-
tor side (glass surface) facing up.
5.
Carry out reassembly in the reverse order to that described
above.
• Adjustment after replacement
Always carry out the calibration list below following the "Instal-
lation / Service Manual"
or REGIUS Console.
• Uniformity Calibration
• Sensitivity Calibration
Photomultiplier
Connector (J1)
Connector (J3)
Fixing Screws (4pcs)
 Loading...


