120
3.6 Adjusting the Peel-Detection Rollers
REGIUS MODEL 190 Service Manual Ver.1.00 2004.11.01
3.6.2
Adjustment of the Standard Position
The peel detection roller is to be fixed at the standard position
where it comes into contact with the peel detect roller jig.
1.
Move the power-supply breaker to the OFF position.
2.
Remove the rear cover. ("2.2.1 Removal of the Rear
Cover", p.28)
3.
Remove the left and right side covers. ("2.2.2 Removal of
the Left & Right Covers", p.29)
4.
Open the front door.
5.
Manually raise the balance weight to bring the cassette
magnetizing plate to the bottom.
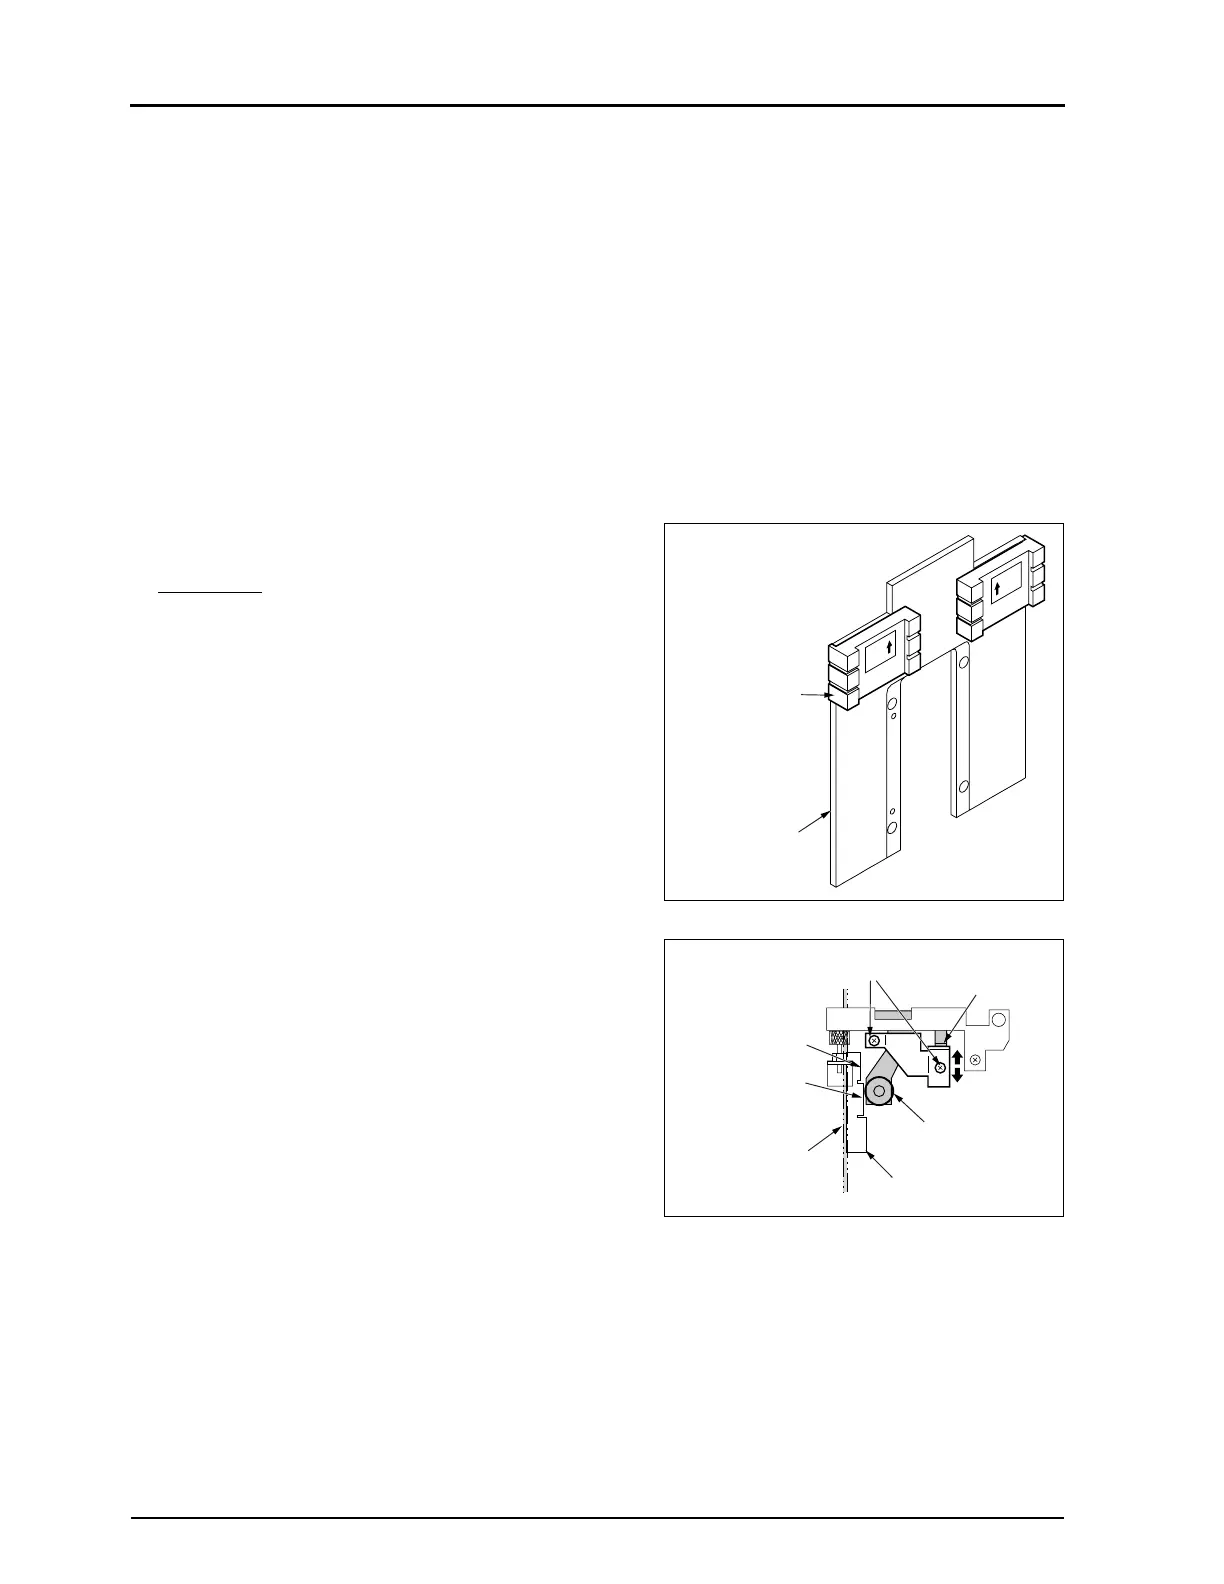
6.
Attach the peel detect roller jig to the both corners of top
edge of the magnetizing plate.
Impor
tant Attach the jig with its arrow pointing
upward.
7.
Loosen two fixing screws "a".
• It is possible to start at either the left or right side.
8.
Slowly lower the balance weight until the peel detection
roller comes into contact with thinner part of the peel detect
roller jig.
9.
Confirm the following and then tighten the fixing screws "a".
• When the peel detect roller jig ascends, the peel detec-
tion roller should not contact with verification part of the
peel detect roller jig.
• The peel detection roller should contact with thinner part
of the peel detect roller jig.
• The peel detection cam should contact with the pro-
jected part of peel detect arm.
10.
In the same way as above, adjust the peel detection mech-
anism on the opposite side.
11.
Proceed to "3.6.3 Adjustment of the Sensor Detect
Position, p.121"
Left
Right
Peel Detection
Roller Test Jig
Magnetizing
Plate
Projected Part
Peel Detect Roller
Magnetizing Plate
Thinner Part
Verification Part
Peel Detect Roller Jig
Fixing Screw "a"
 Loading...


