29
2.2 Removing the External Covers
REGIUS MODEL 190 Service Manual Ver.1.00 2004.11.01
2.2.2 Removal of the Left & Right Covers
The methods for removal of the left and right covers are symmetrically opposite.
Danger When the left and/or right covers are removed, there is a danger that reading by the optical
system and other similar operations could lead to the laser beam being directed outside the
REGIUS 190. In order to prevent accidental loss of eyesight as a result, be sure to confirm
the optical system's current operating condition when these covers are to be removed.
Impor
tant Sems screws (M4 x 12mm) are used to
retain the right and left covers. Be cau-
tious not to loose them, nor to use them
for other purpose.
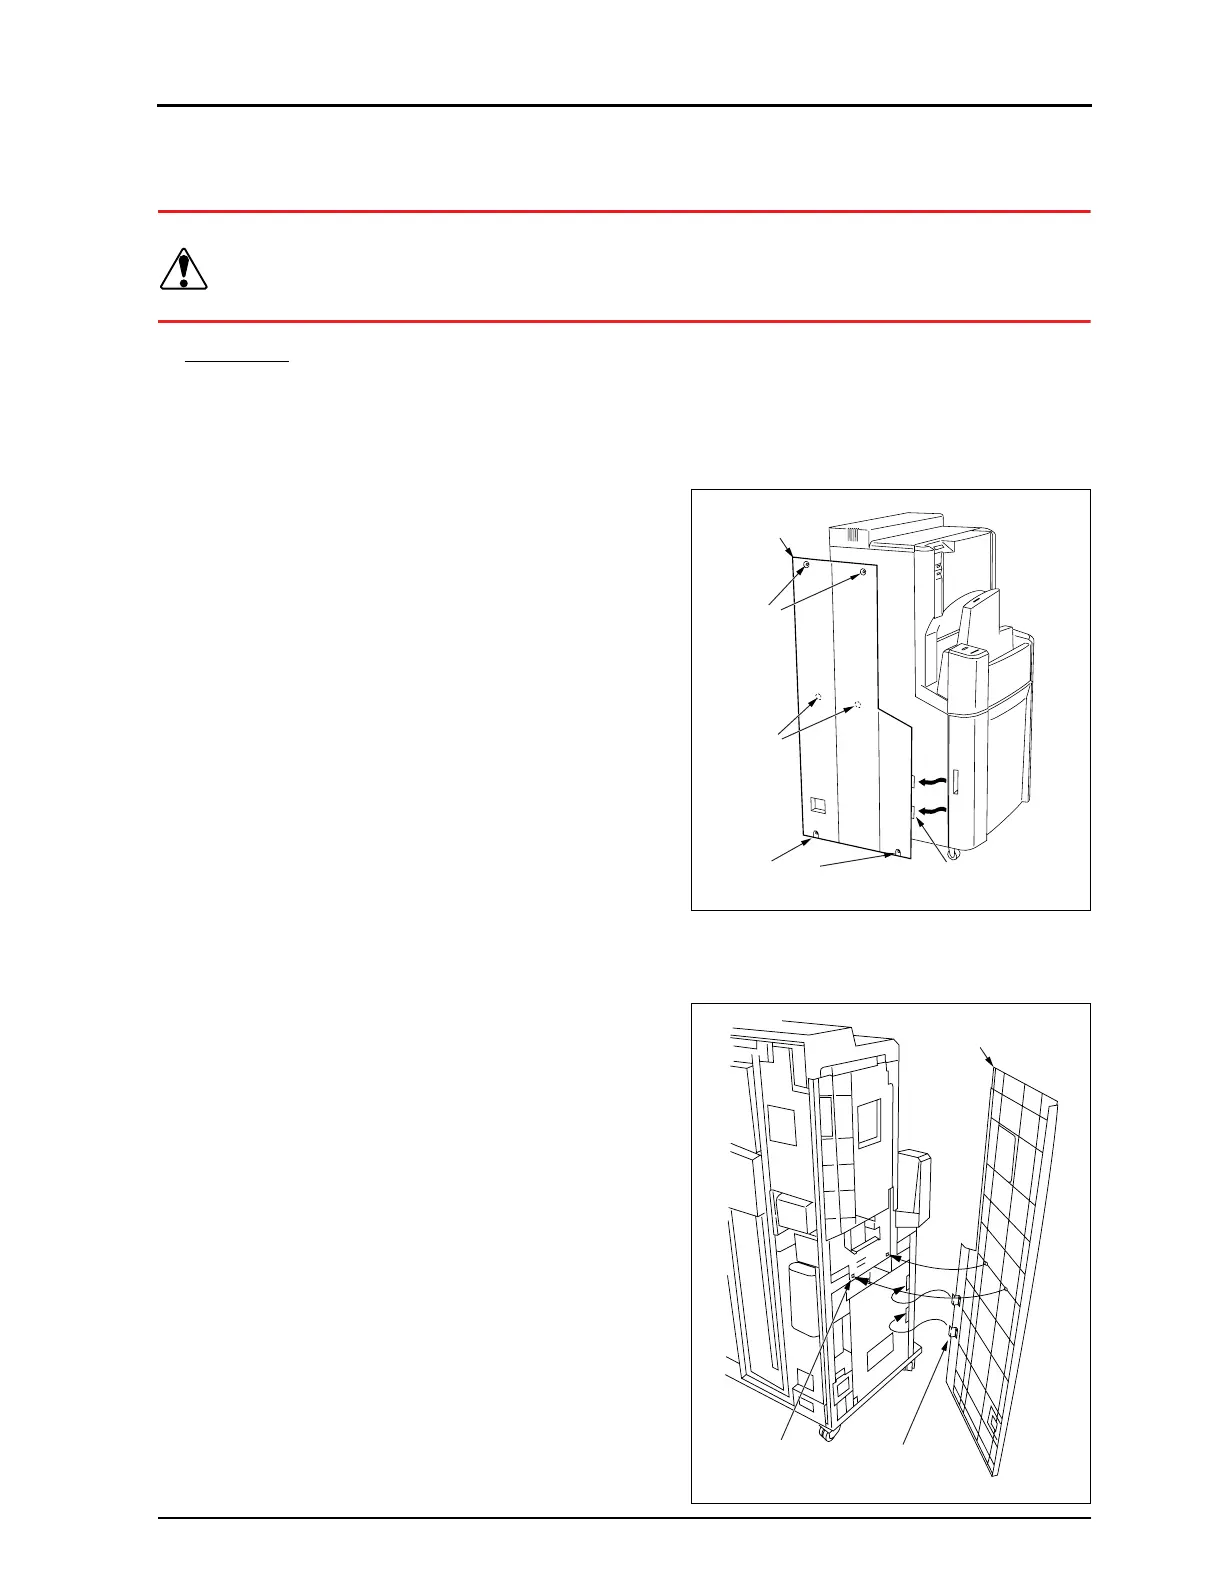
1.
Unscrew and remove the four fixing screws.
2.
Slide the cover towards the rear and remove. (Left and right)
• It will not be possible to remove the left or right cover
unless the two hooks on the front side are detached from
the main body.
• Reassembly
1.
Insert the protrusions on the rear side of the left or right
cover into the holes in the main unit.
2.
Insert the two hooks on the front side of the cover into the
square holes in the main unit.
3.
Secure the left or right cover in place using the four fixing
screws.
Boss
(Rear)
Hook (2 locations)
Fixing
Scres
Left Cover
Fixing Screws
Hook
(2 locations)
Receptor Hole
(2 locations)
Left Cover
 Loading...


