37
2.3 Insertion / Ejection Unit
REGIUS MODEL 190 Service Manual Ver.1.00 2004.11.01
2.3.2 Removal of the Insertion/Ejection Unit
1.
Open the front door.
2.
Remove the left and right cover. ("2.2.2 Removal of the Left
& Right Covers, p.29")
3.
Remove the front-top cover. ("2.2.3 Removal of the Front-
Top Cover, p.30")
4.
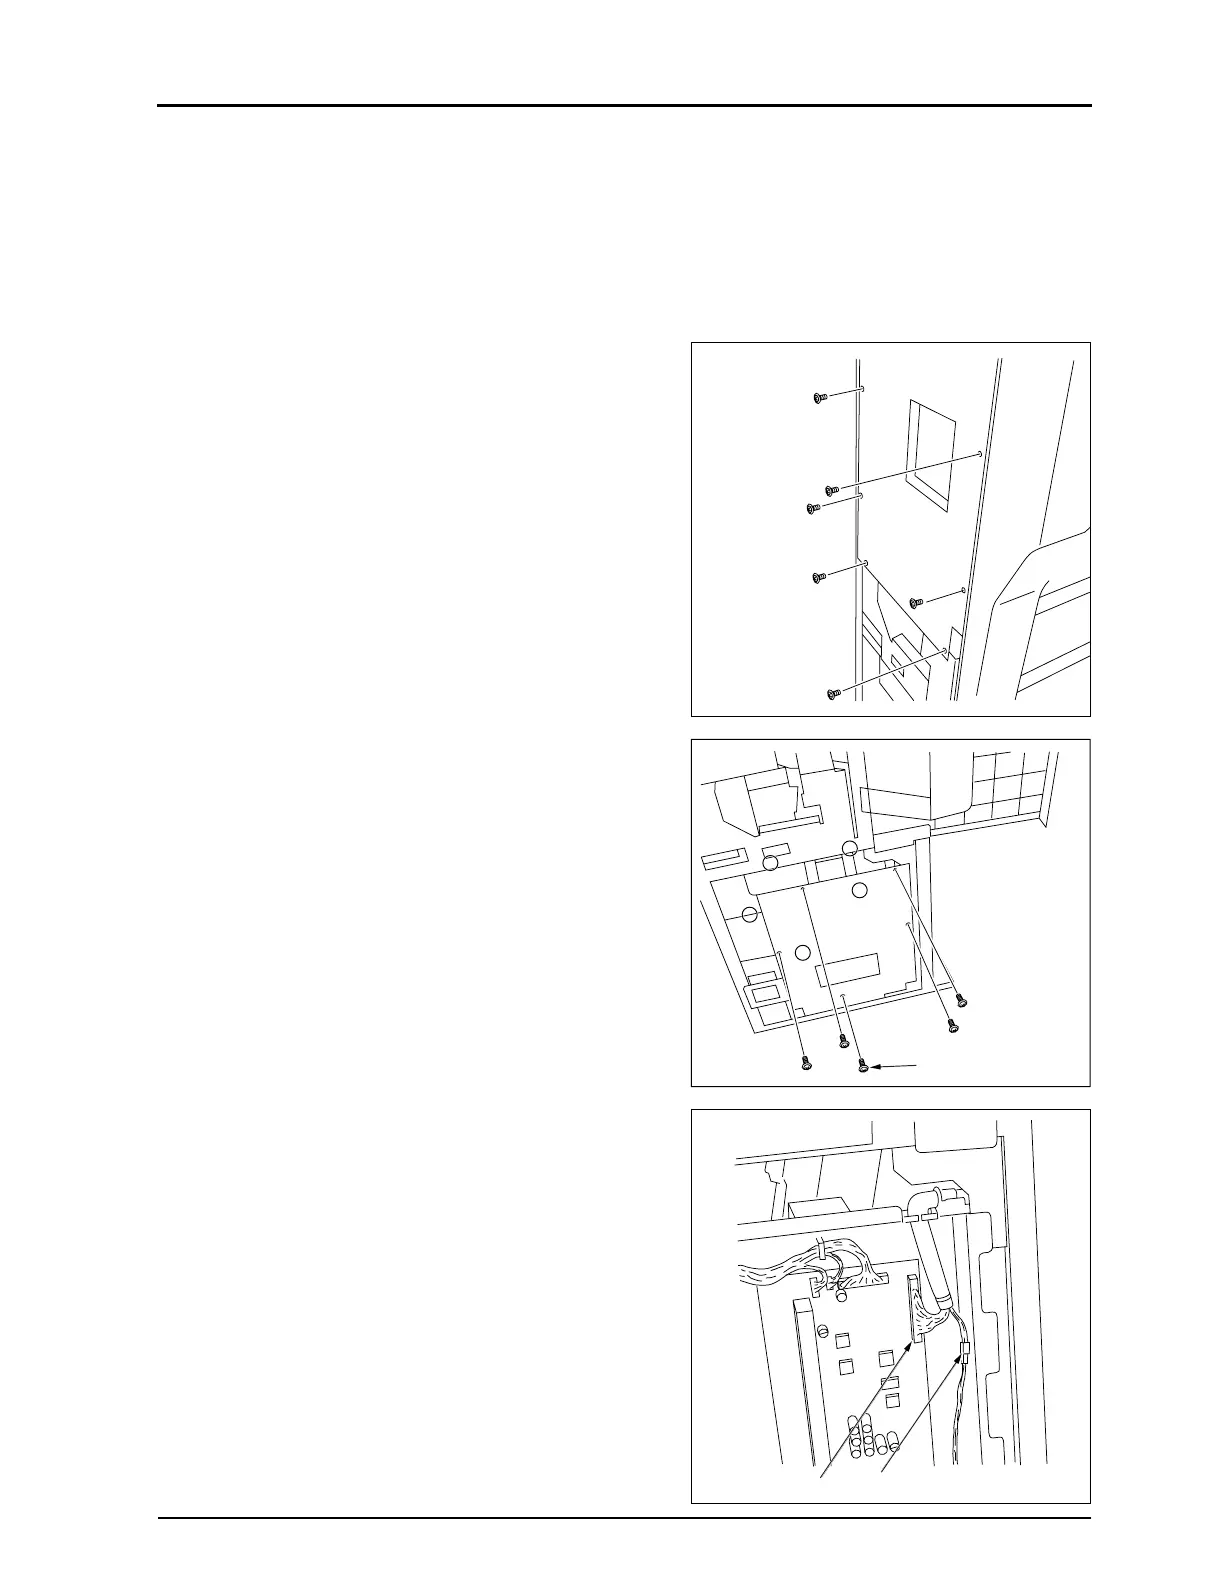
Loosen 6 fixing screws. Then detach board cover.
5.
Loosen the 5 fixing screws and then remove the lid of the
mechanical control box.
6.
Unplug a relay connector.
• JJ26
7.
Unplug a connector from the MCB2 (Mechanical Control
Board).
• CN10
Fixing Screw 6pcs)
(loosen)
Fixing Screws (5pcs)
Connector Relay Connector
 Loading...


