41
2.3 Insertion / Ejection Unit
REGIUS MODEL 190 Service Manual Ver.1.00 2004.11.01
2.3.5 Replacement of Insertion Nip Rollers
Follow the procedures below to replace the cassette insertion
nip rollers (2pcs).
1.
Open the front cover.
2.
Remove the right and left covers. ("2.2.2 Removal of the
Left & Right Covers, p.29")
3.
Remove the front-top cover. ("2.2.3 Removal of the Front-
Top Cover, p.30")
4.
Remove the insertion / ejection unit. ("2.3.2 Removal of the
Insertion/Ejection Unit, p.37")
5.
Remove the insertion /ejection unit front cover. ("2.2.4
Removal of Insertion / Ejection Front Cover, p.31")
6.
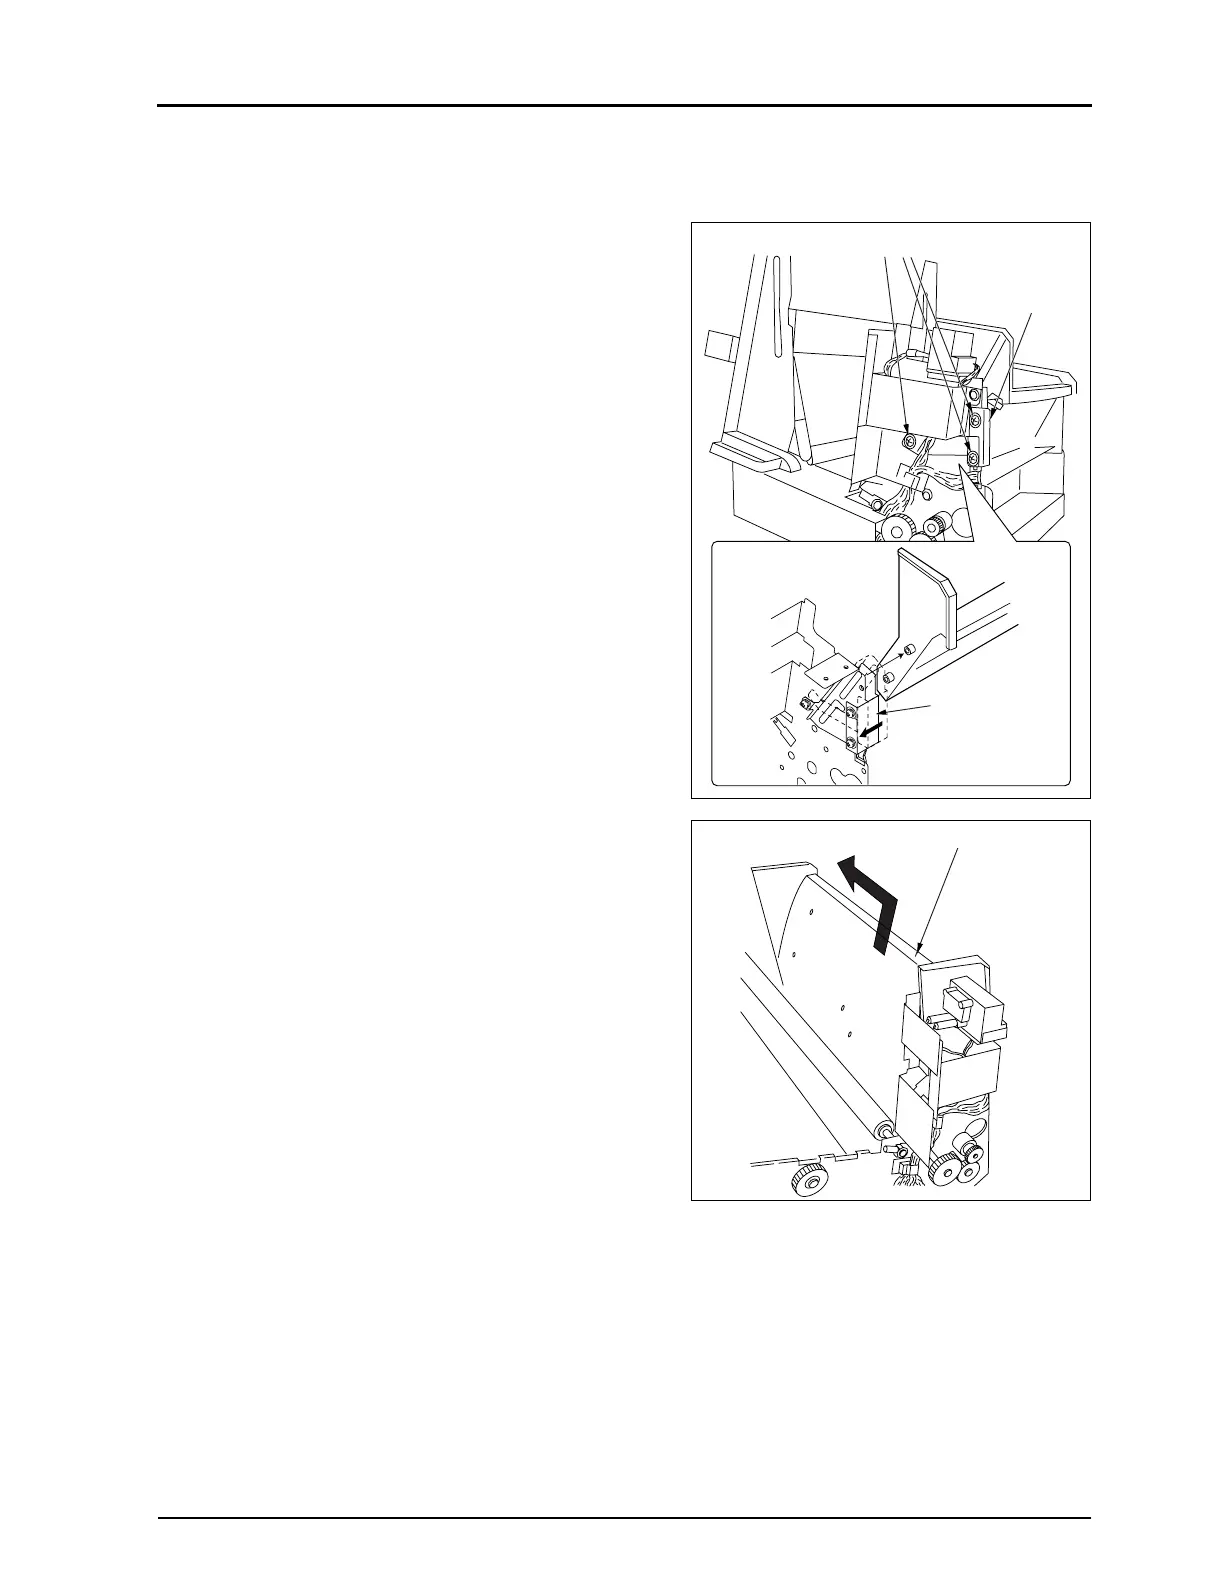
Loosen three fixing screws until the screw end becomes
invisible (insertion guide becomes free).
7.
Slide the reinforcing plate for the side plate outward of the
insertion / ejection unit, and remove.
Fixing Screw
Reinforcing Plate
Reinforcing Plate
Insertion Guide
 Loading...


