30
2.2 Removing the External Covers
REGIUS MODEL 190 Service Manual Ver.1.00 2004.11.01
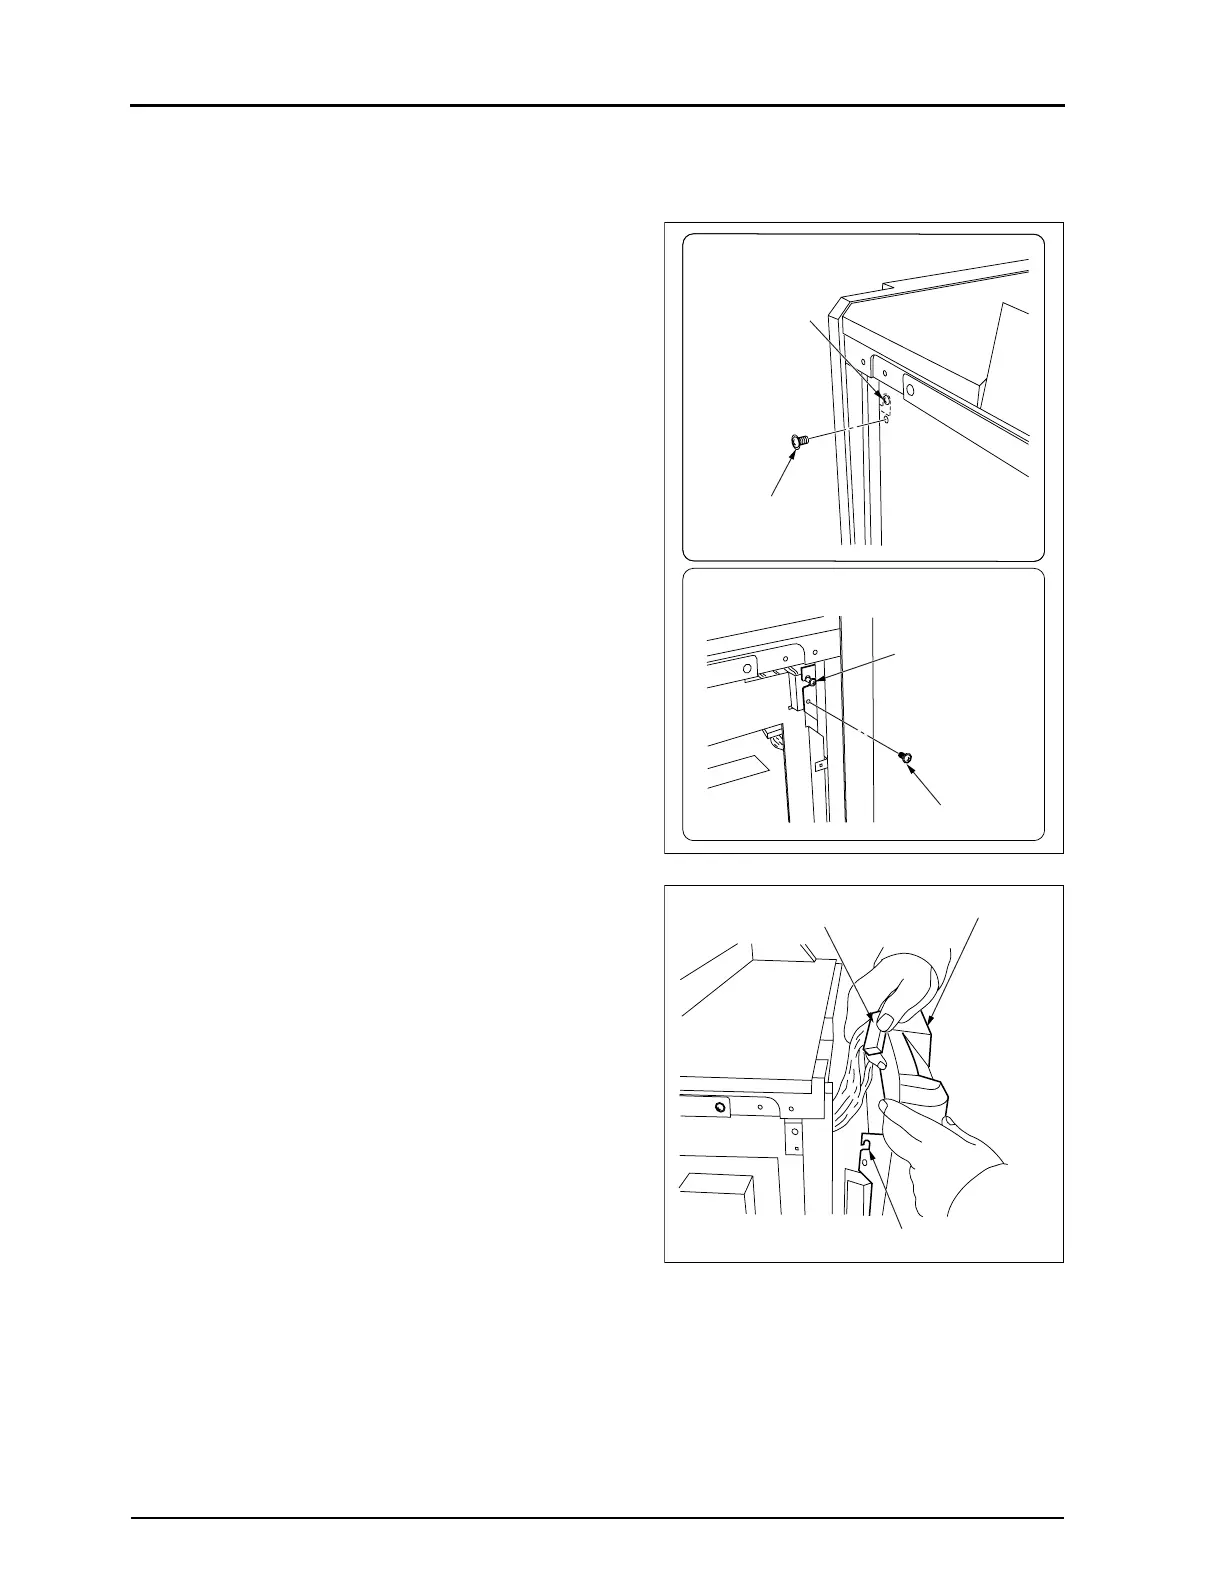
2.2.3 Removal of the Front-Top Cover
1.
Remove the left cover and the right cover.(p.29 )
2.
Unscrew and remove the two fixing screws (one on each
side) which are securing the front-top cover in place.
• On the left side, remove the lower screw of the two on
the line. The upper screw is to receive the hook on the
front-top cover.
3.
Lift the front-top cover 2 ~ 3mm. Then tilt the front-top cover
towards the front until a gap of approximately 100 mm
opens up between that cover and the front cover.
4.
Uncouple the connector from the display section.
• JJ27
5.
Remove the front-top cover.
6.
Carry out reassembly in the reverse order to that described
above.
•To reassemble, first hook the hook on the front-top cover
on the hook receiver (screw), then tighten the fixing
screws.
• There are 4 hooks to be coupled. First start with the
lower hooks.
Left Side
Right Side
Fixing Screw
Hook Receiver
Hook Receiver
Fixing Screw
Connector
Front-Top Cover
Hook
 Loading...


