45
2.3 Insertion / Ejection Unit
REGIUS MODEL 190 Service Manual Ver.1.00 2004.11.01
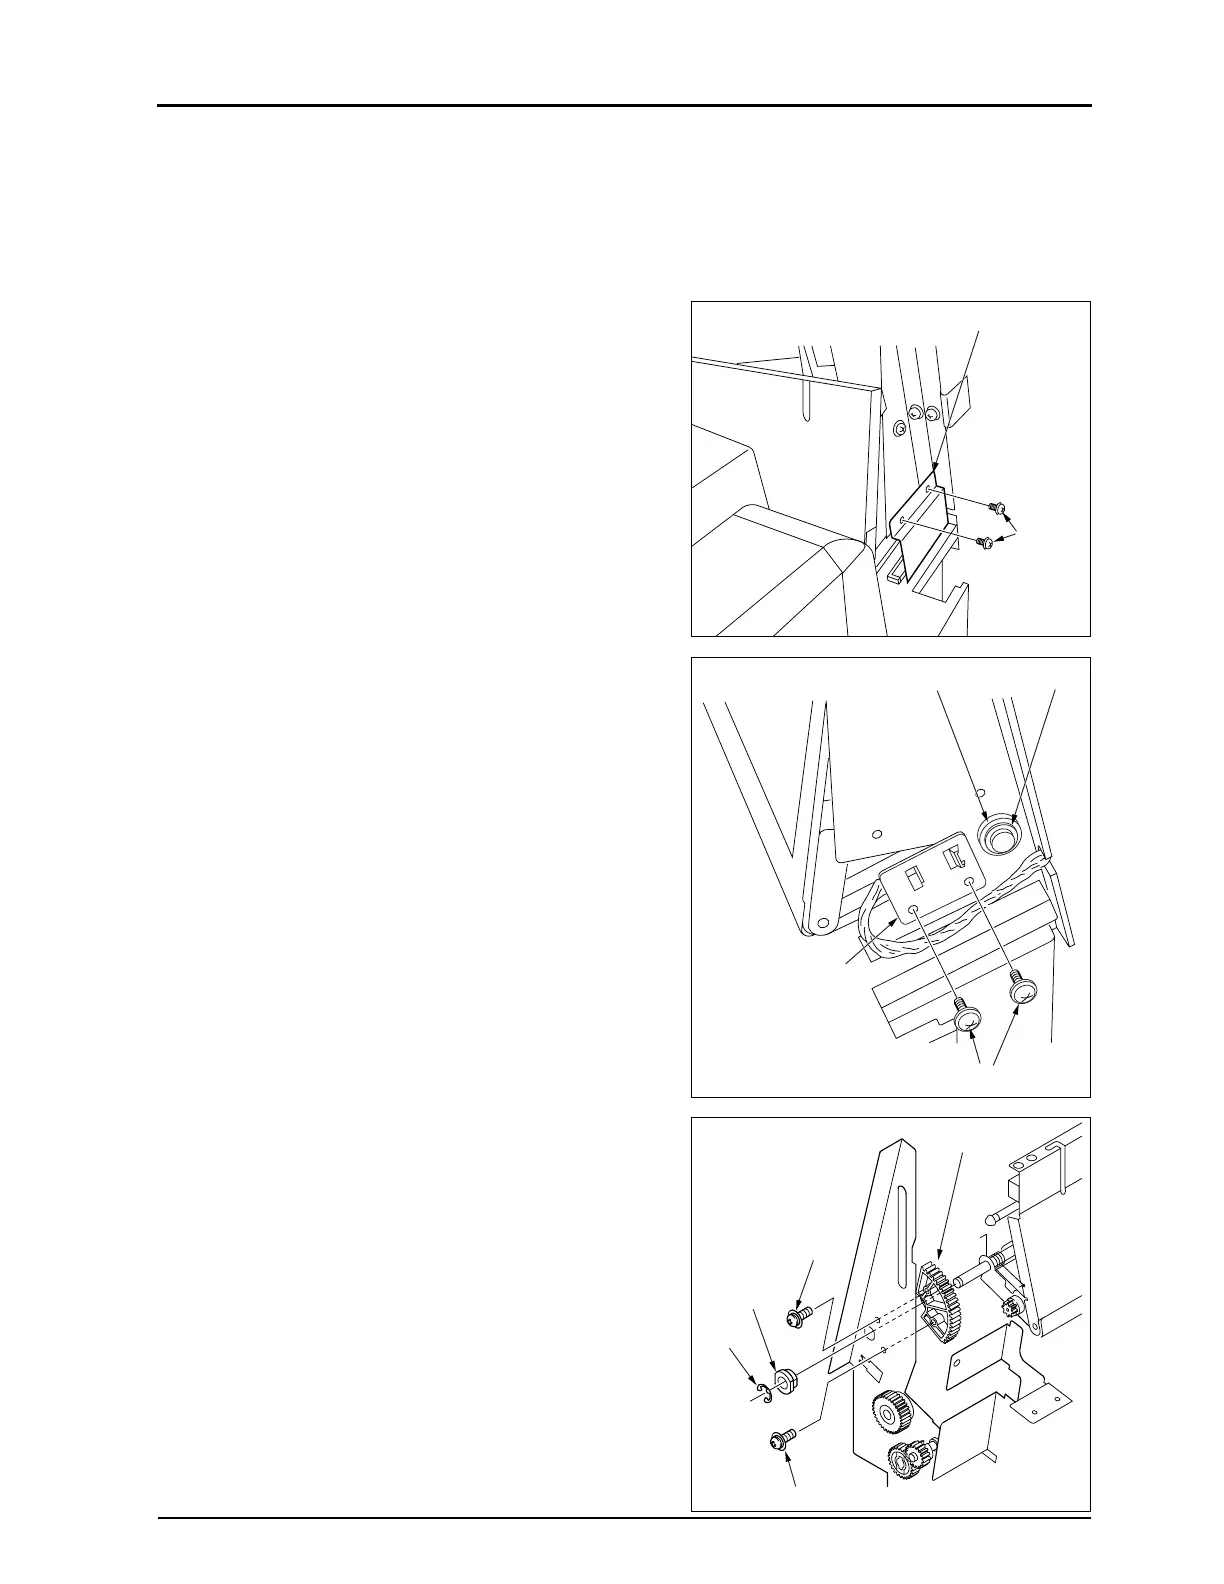
2.3.8 Replacement of Ejection Motor (M3)
1.
Remove the insertion / ejection unit. ("2.3.2 Removal of the
Insertion/Ejection Unit, p.37")
2.
Remove the insertion / ejection unit front cover. ("2.2.4
Removal of Insertion / Ejection Front Cover, p.31")
3.
Remove two fixing screws, and remove the guide plate for
the ejection sensor wiring.
• The fixing screws used here are M3 x 6 (2pcs).
4.
Remove two fixing screws, and remove the ejection sensor
bracket.
5.
Remove an E-ring and two bearing "B" (one on each side).
6.
Remove two fixing screws that attach the damper gear to
the frame.
7.
Remove an E-ring and bearing "B".
Fixing
Screws
Guide Plate for Ejection Sensor Wiring
Bearing "B"
E-Ring
Ejection Sensor Blacket
Fixing Screws
Bearing "B"
E-Ring
Fix. Screw
Fix. Screw
Damper Gear
 Loading...


