ASSEMBLY
PRECAUTION OF INSTALLATION
NOTE:
NOTE:
Before assembling, wash each part in fluid
See NOTE at the beginning of this section.
recommended to use for the car.
Adjust clearance between booster
piston
rod
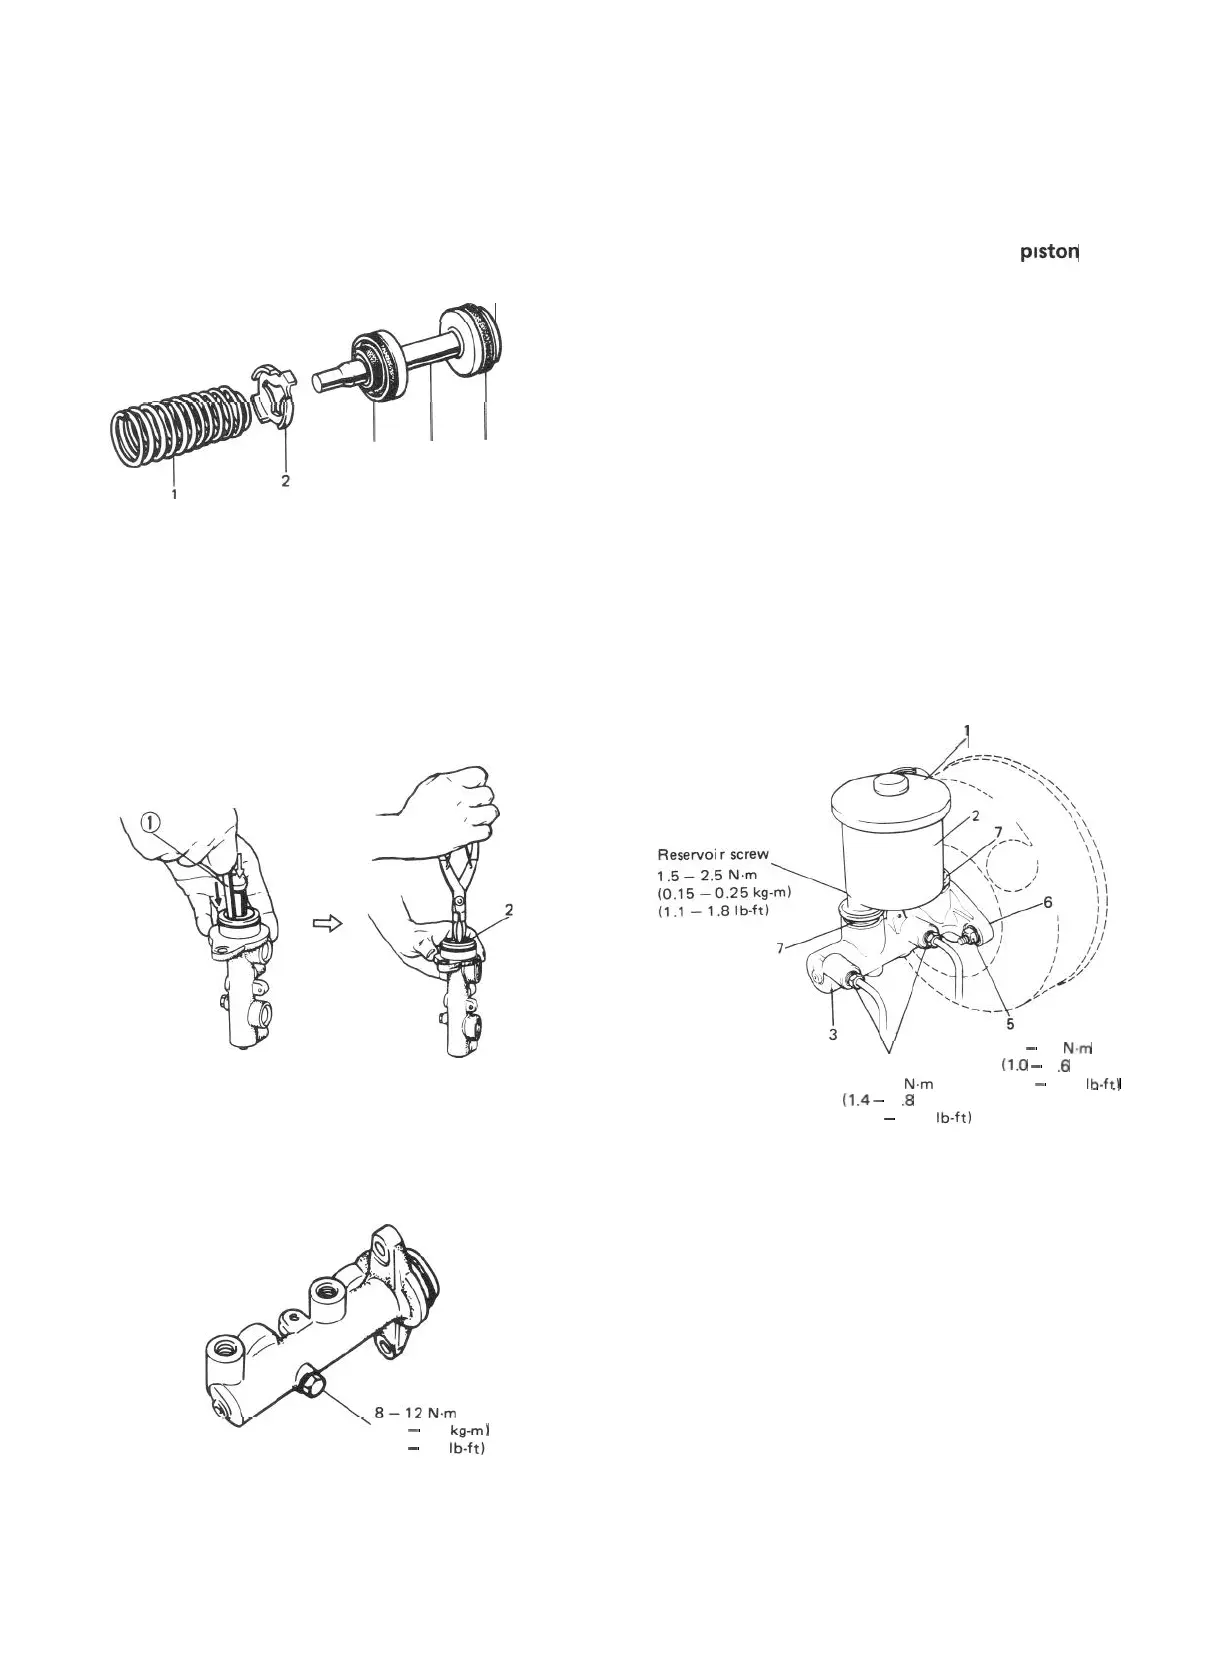
1) Assemble secondary piston as shown below.
FBh
and primary piston with special tool (See page
19-33).
Fig. 19-61
1) Install master cylinder as shown and torque
attaching nuts to specification.
2) Connect 2 hydraulic lines and torque flare
1.
2.
3.
4.
5.
I
I
3
4
5
Secondary piston return spring
Return spring seat
Piston cup
Secondary piston
Piston pressure cap
2) Install secondary piston assembly into cylin-
der.
3) Install primary piston in cylinder.
4) Depress, and install circlip.
nuts to specification.
3) When using new grommets, lubricate them
with the same fluid as the one to fill reser-
voir with. Then press-fit grommets to master
cylinder. Grommets must be seated in place.
4) Install reservoir and tighten screw to specified
torque.
5) Fill reservoir with specified fluid.
After installing, check brake pedal height,
bleed air from system (See p. 19-43 and
p. 19-46) and also check for fluid leakage.
:
Fig. 19-62
2. Circlip
1. Rod
5) Install piston stopper bolt with pistons pushed
in all the way and tighten it to specified
torque.
(0.8
-
1.2
kam)
1. Reservoir
10
-
16 N.m
cap
4
2.
Reservoir
(1
.O
-
1
.6
kg-m)
14-18 N.m
(7.5
-
11.5
lb-ftl
-
-I
3. Master cylinder
(1
.4
-
1
.8
kg-m)
4. Flare nuts
(10.5
-
13.0 lb-ft)
5. Attaching nuts
6.
Gasket
7. Grommets
Fig. 19-64
Fig. 19-63
(6.0
-
8.5 lb-ft).
6) For installation on car, refer to INSTALLA-
TION.
19-29
 Loading...