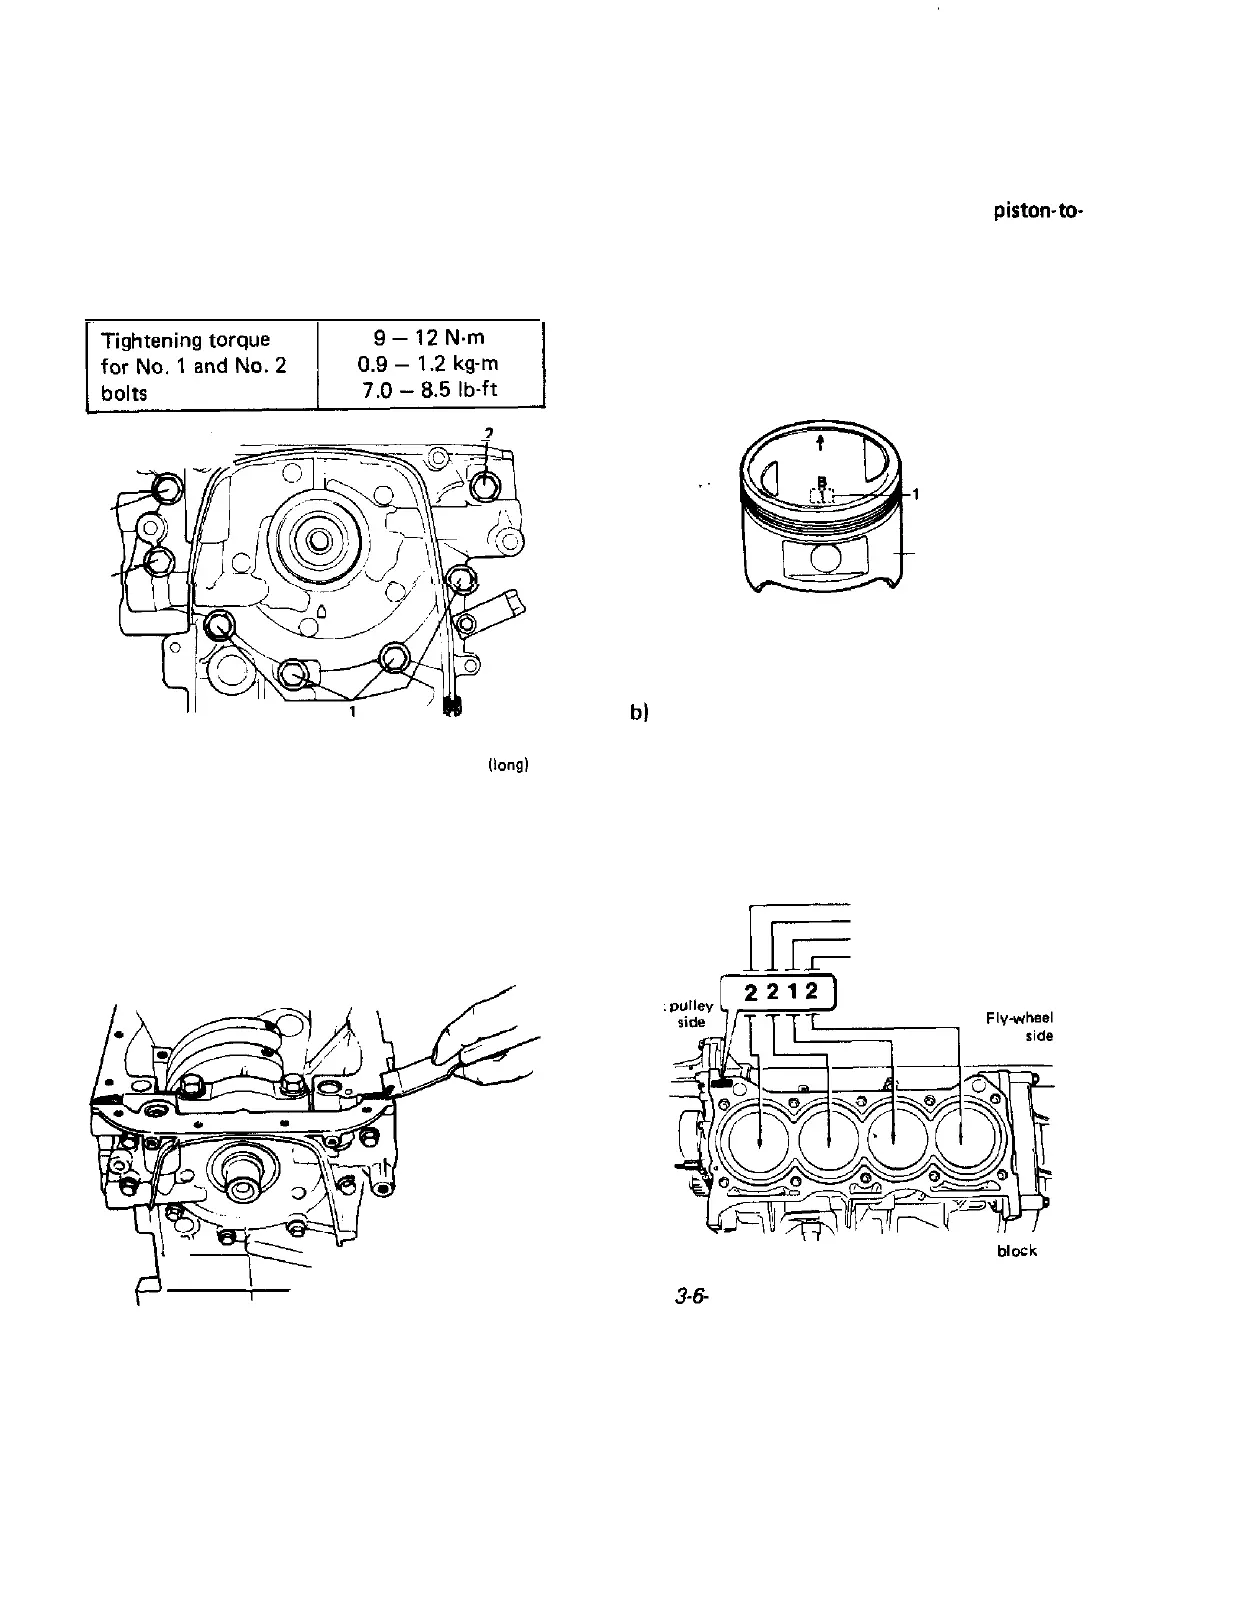
3) Install oil pump to crankshaft and cylinder
block. install No. 1 and No. 2 bolts as shown
in Fig. 3-6-7, and tighten them to specified
torque.
After installing oil pump, check to be sure
that oil seal lip is not upturned, and then
remove special tool.
-
2
2
Fig. 3-6-7
1. NO. 1 bolts (short)
2. No. 2 bolts
(long)
Piston, Connecting Rod and Piston Rings
NOTE:
Two sizes of piston are available as standard size
spare part so as to ensure proper
piston-to-
cylinder clearance. When installing a standard
size piston, make sure to match piston with
cylinder as follows.
a) Each piston has a stamped number 1 or 2 as
shown depending on its outer diameter.
or 2
Piston
Fig. 3-6-9
b)
There are also stamped numbers of 1 and 2
on cylinder block as shown below. First
number indicates inner diameter of No. 1
cylinder, second number of No. 2 cylinder,
third number of No. 3 cylinder and fourth
number of No. 4 cylinder.
4) Edge of oil pump gasket might bulge out: if
it does, cut bulge off with a sharp knife,
making edge smooth and flush with end
faces of the pump case and cylinder block.
Crank
No. 1 Cylinder
No. 2 Cylinder
No. 3 Cylinder
No. 4 Cylinder
Cylinder block
Fig.
3-6-
10
Fig. 3-6-8 Cutting the edge of gaske t
3-38
 Loading...