When it is hard to raise and lower the door glass,
the glass may be slanting towards the door sash.
If this is the case, loosen the screws fastening the
door regulator roller holder, move the holder up
and down so that the glass and sash are brought
in parallel.
Fig. 20-1-17
[Water proof film]
A proof film that is broken a little may be
mended with vinyl tape but should be replaced
with polyethylene film as a rule. Apply bonding
agent all around the circumference and stick on
from the underside.
Fig. 20-1-18
[Regulator handle]
Install the handle at the angle as specified in
below figure with the door window glass closed
(raised all the way up).
Fig. 20-1-19
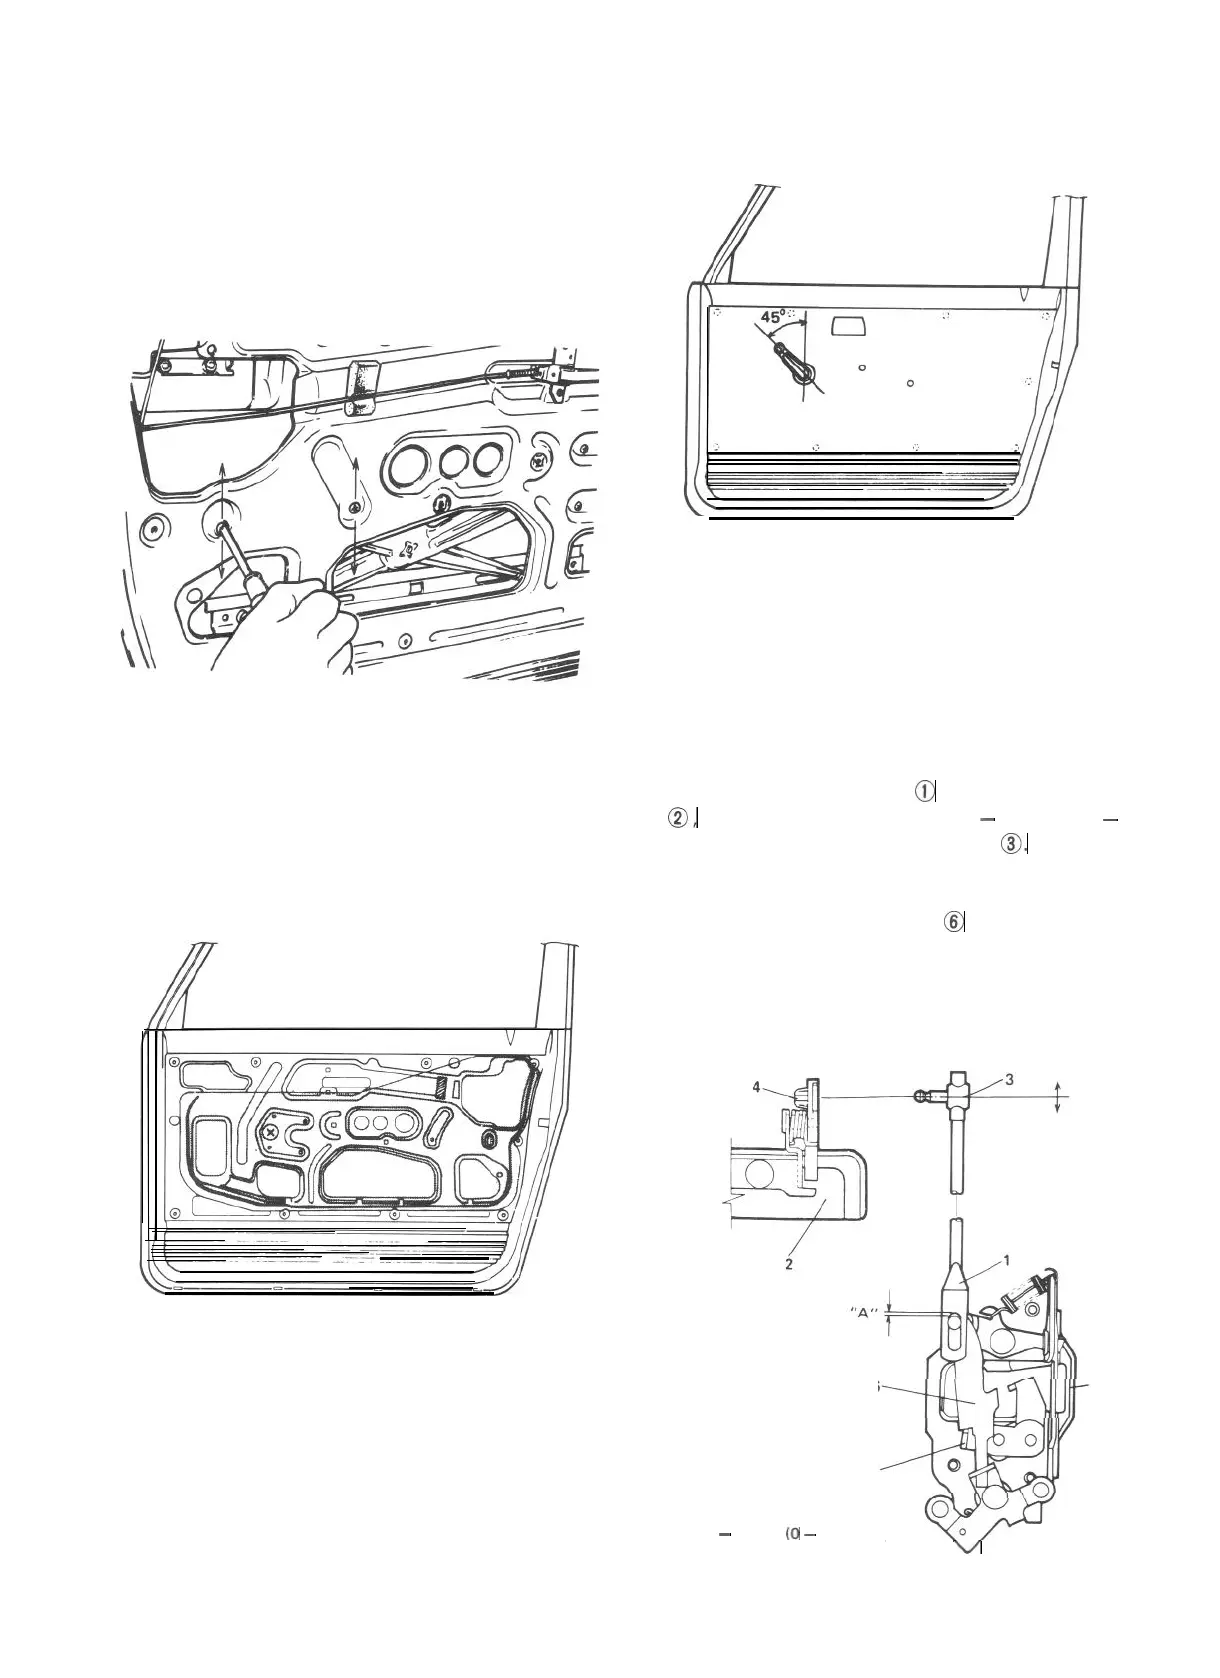
Front Door Lock
Reverse the removal sequence to install the door
lock. However, be careful of the following
points.
[Door outside open rod]
When installing open rod @ on outside handle
0,
adjust clearance
“A” to 0
-
2 mm (0
-
0.079 in) by turning adjusting joint
0.
NOTE:
Don’t push down push plate @ when installing
the open rod.
After installing the open rod, give the outside
handle a trial and check if its play felt then is
appropriate.
1. Door rod
open
6 5
2. Outside handle
3. Adjusting jomt
4. Adjusting joint snap
5. Door lock ass’y
7
6. Push plate
7. Release lever
“A” : 0
-
2 mm (0
-
0.079 in.)
Fig. 20-1-20
v
20-6
 Loading...