Tip
Depending on your system configuration and licenses, system defaults and queue settings may be used
to set contrast. See Working with Queues.
About Lightness/Darkness
The Lighten/Darken control makes all tones lighter or darker. Increasing Lightness/Darkness moves all
tones in the image toward white. Decreasing Lightness/Darkness moves all tones toward black.
Note
When the Text Original Type with Threshold Rendering Option is selected, the Lightness/Darkness
control adjusts the threshold value. Pixels lighter than the threshold value become white, and pixels
darker than the threshold value become black. This often creates the appearance of a contrast change.
Lightness/Darkness controls
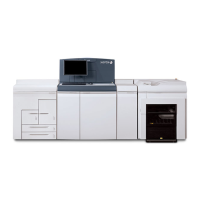
Lightness/Darkness controls, when set to extremes, may cause loss of detail in shadows (darker areas)
or highlights (lighter areas). For example, Figure 1, to get more shadow detail in the phone handset,
move the Lightness/Darkness slider control to the right, making the image brighter.
Figure 15: A dark original image. Notice how shadow detail goes to black areas. Histogram data is justified to
the left.
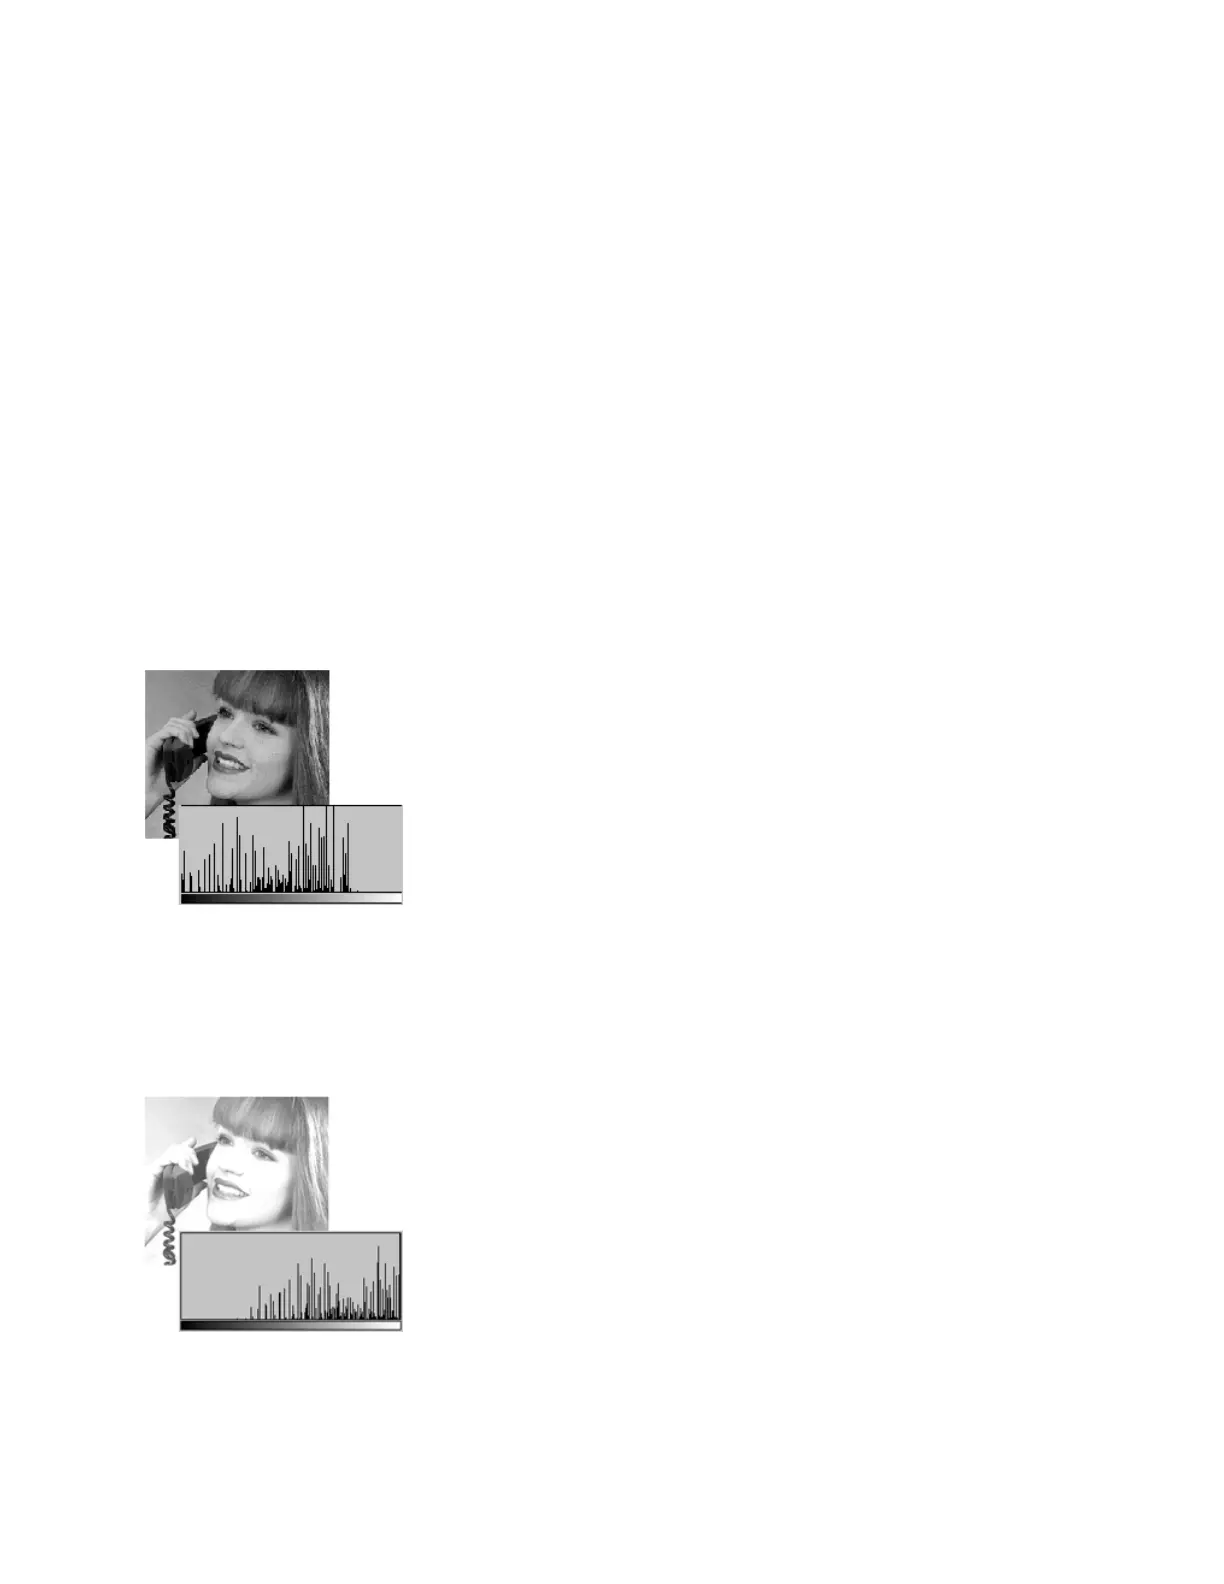
However, as you can see in Figure 2, while shadow detail is gained in the telephone handset, much of
the midtone detail in the woman's face has turned completely white. While desirable tonal correction
enhances details at one end, the saturated tones at the opposite end loose detail.
Figure 16: Too much Lightness applied. Notice how some of the highlight detail has gone to completely white.
Histogram data is justified to the right.
For details on working with the lightness/darkness control, see Adjusting Lightness/Darkness.
14-31Xerox
®
Nuvera
®
User Guide and Training Aid (UGTA)
How Do I...
 Loading...