However, image defects may occur. These image quality problems are usually attributed to a defective
original, or the user applying too much, too little, or the wrong type of image quality control.
Image quality and system maintenance
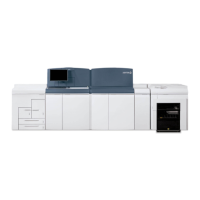
Image defects can also occur because the Xerox Nuvera is in need of maintenance. The condition of
the photoreceptor belt, transfer blade and heat roller can affect the amount of dry ink (toner) transferred
onto the paper.
Click on the links at the left to learn how to differentiate between machine and original problems, and
how to avoid image quality problems.
Solving dark or light image problems
Using the Image Quality selection on the Printer menu, you can globally set the darkness and resolution
levels for system supported file types. Check the Image Quality tab settings if you are having image
quality problems on a consistent basis (for example, your entire job is either too light or too dark).
If you are using the Xerox Nuvera 200/288/314 EA/MX Perfecting Production System, the machine
typically ensures that the print darkness between the print engines is equal and balanced. However, if
you notice light or dark image quality differences between side 1 and side 2 of the print job, check the
dC965 user diagnostic routine before contacting Service
Tip
Before running any jobs, click Printer > Image Quality to quickly determine what global machine
darkness and resolution settings are currently configured.
Note
See your System Administrator to change the darkness and/or resolution settings on the Image Quality
window. If you are using the Xerox Nuvera 200/288/314 EA/MX Perfecting Production System and side
1 of your job is either lighter or darker than side 2, refer to the image quality diagnostic routine, dC965,
for more information.
Tip
If you have programmed and run a job, and received unexpected results, ensure that the system-wide
settings are all set back to their defaults by clicking Clear All or Reset in the user interface. Then proceed
to do the job programming pertinent to your job.
Removing Moiré Patterns from Images (when scanning or copying)
The following excerpt is taken from Real World Scanning and Halftones by Glenn Fleishman, David
Blatner, and Steve Roth:
"Moiré ("mwah-RAY") patterns are caused byour eyes'perception of straight lines and repeating patterns.
Anytime you overlay a bunch of straight lines or grids on top of each other, you have the opportunity
for moiré patterns. One grid, all by its lonesome, never has a problem with these patterns. It's when you
have two or more overlaid on each other that the wires in your perceptual system get crossed, and these
little gremlins start to appear."
18-5Xerox
®
Nuvera
®
User Guide and Training Aid (UGTA)
Problem Solving
 Loading...


