Upgrading Firmware
133
TPI-PRO-DVI - Instruction Manual
Upgrading Firmware
Overview
The process of updating firmware requires a communicating NetLinx Master. The steps for updating firmware to a TPI are virtually
identical to those necessary for updating .KIT f iles to a NetLinx Master, except that the target device is a "panel" instead of a Master.
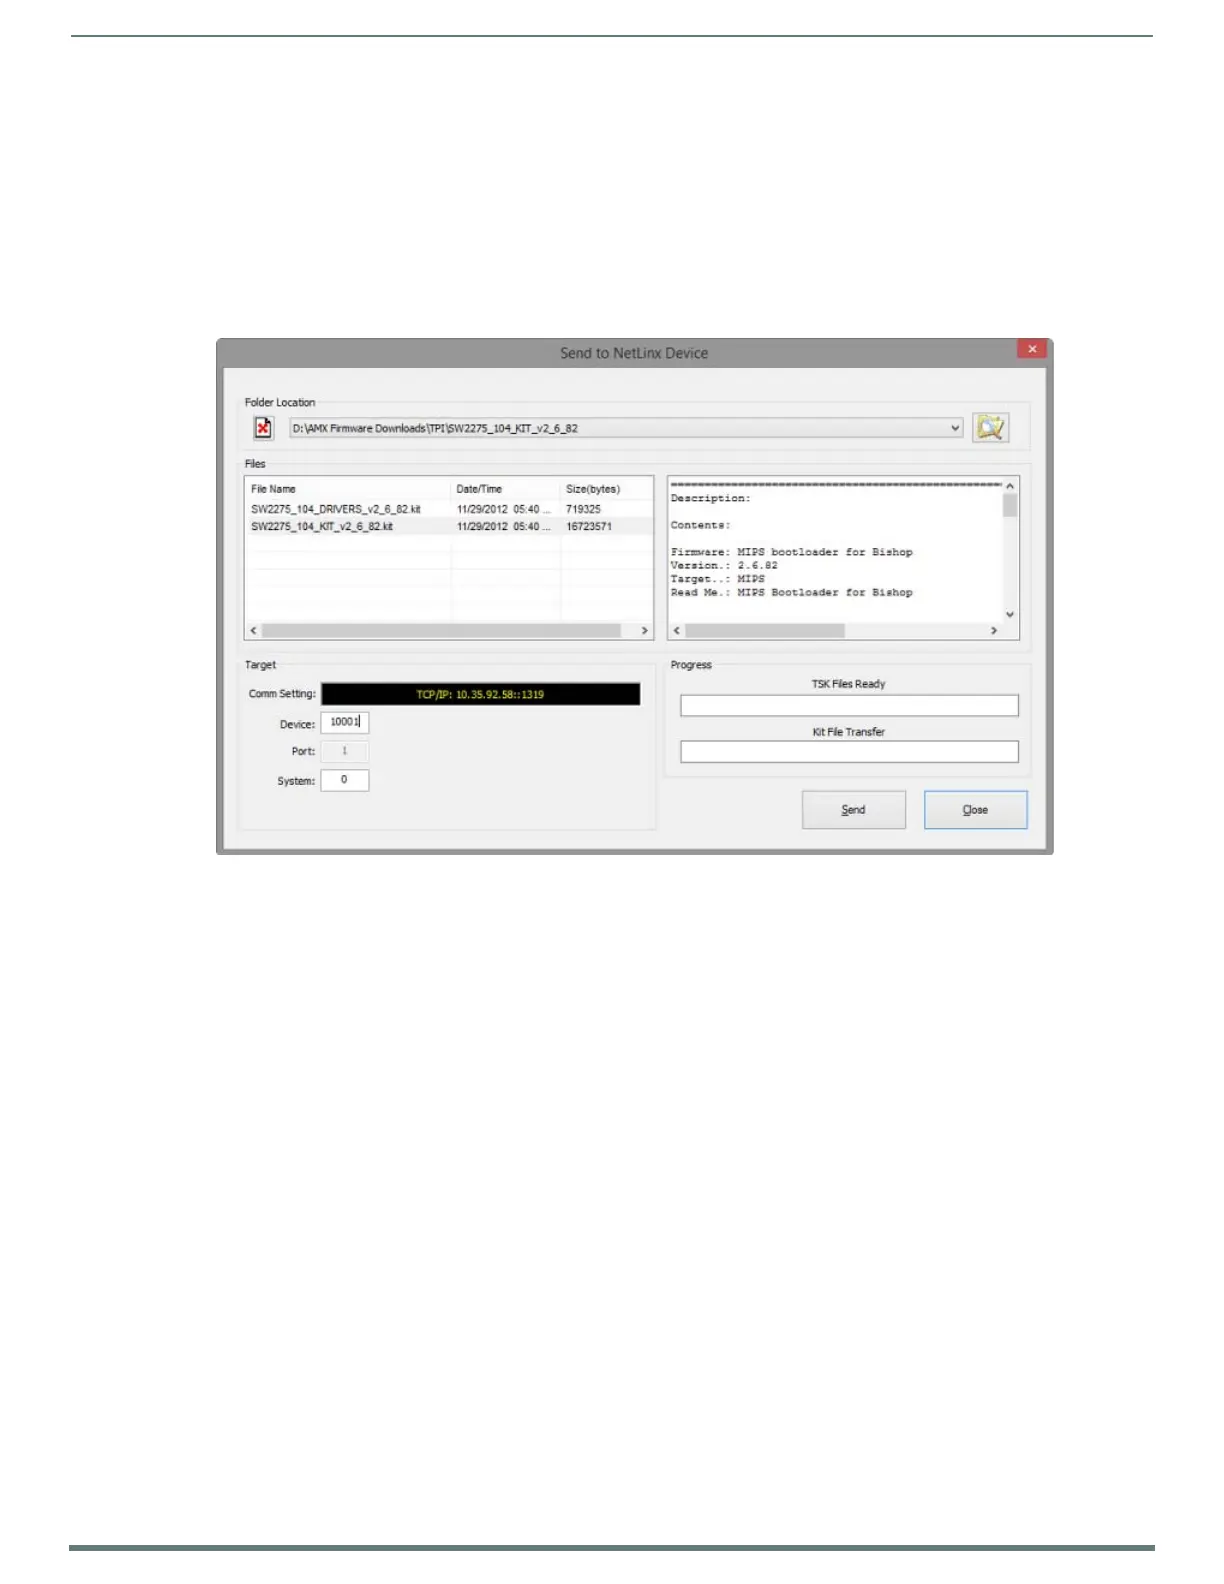
Refer to either your Master’s literature or NetLinx Studio online help for those instructions. Use the Firmware Transfers utility in
NetLinx Studio to transfer firmware upgrades to the TPI. In NetLinx Studio, select Tools > Firmware Upgrades > Send To NetLinx
Device to access the Send To NetLinx Device dialog shown in FIG. 79:
Before beginning the firmware upgrade process:
Setup and configure your NetLinx Master. Refer to your particular NetLinx Master instruction manual for detailed setup
procedures.
Select the correct resolution, touch drivers, and calibrate the TPI (see the Calibrating the TPI section on page 39).
Configure your TPI for direct communication (see the Configuring IP Settings section on page 44 for details regarding
Ethernet communication).
Verify that the TPI is powered and connected to the NetLinx Master via Ethernet.
NOTE: A TPI which is not using a valid username and password will not be able to communicate with a secured Master. If you are
updating the f irmware on a TPI which is not using a username or password f ield, you must first remove the Master Security feature to
establish an unsecured connection. If you are downgrading the firmware to version 2.5.10 or earlier and you are using the
1280x800@60Hz resolution, change the panel page resolution to a different setting since this resolution does not exist in earlier
firmware versions.
Prepare the TPI for Ethernet Communication
1. Open the System Settings page on the TPI:
a. Press the SETUP pushbutton on the front panel to access the Setup page.
b. Press the Protected Setup button to access the Protected Setup page, using the on-screen keypad to enter the password
(default = 1988).
c. Press the System Settings button to open the System Settings page (FIG. 80).
FIG. 79
NetLinx Studio - Firmware Transfer Tool - Send to NetLinx Device dialog

 Loading...


