Configuring the TPI
38
TPI-PRO-DVI - Instruction Manual
Setting the Output Resolution
The TPI’s output resolution must match the output resolution and refresh rate set on the connected monitor.
The default output resolution is 1280 x 1024 @ 60Hz.
The maximum output resolution is 1920 x 1200 @ 60 Hz.
Use the RESOLUTION pushbutton to alter the outgoing resolution to match the output pixel resolution and refresh rate set
on the connected touch monitor.
NOTE: The TPI-PRO-DVI does not provide Component (YPbPr) or Interlaced outputs.
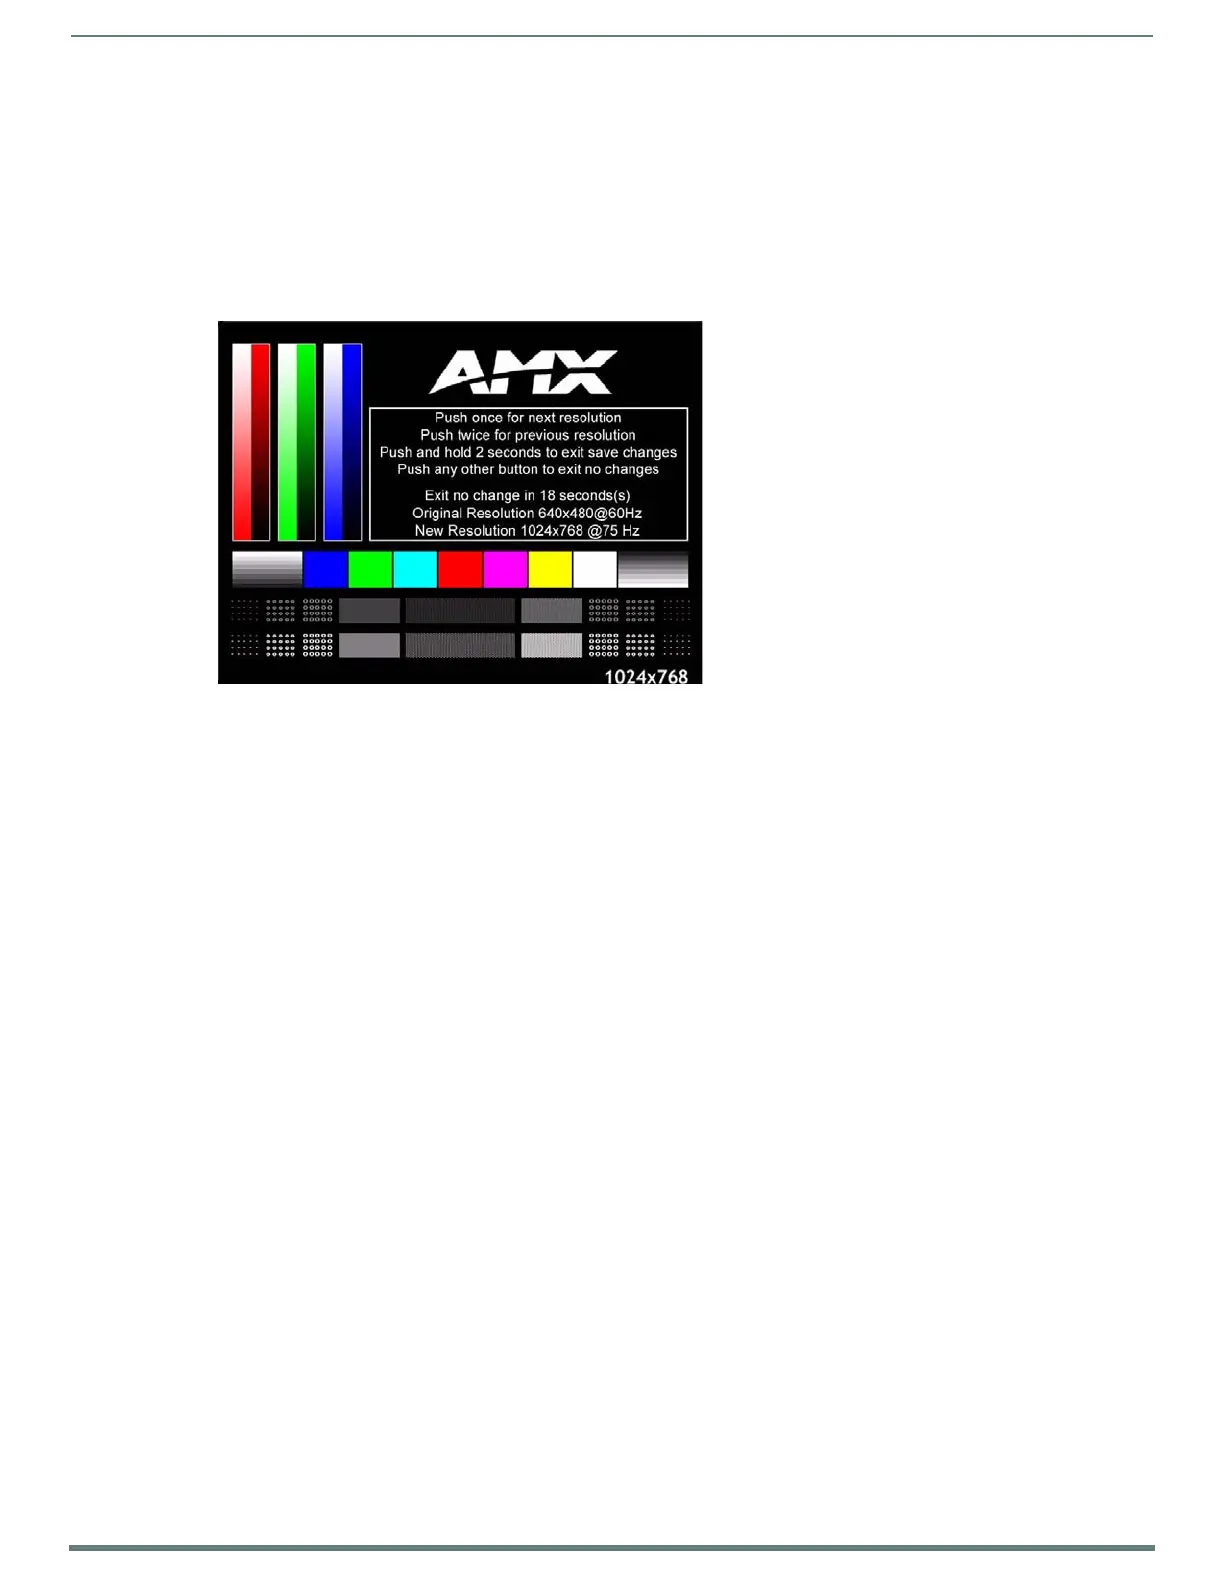
1. Press the RESOLUTION pushbutton to open the Resolution Setup page (FIG. 31).
2. Press the RESOLUTION button again to cycle through the available output resolution settings. Every consecutive button push
cycles the output resolution to the next highest setting.
Double-push the RESOLUTION button to return to the previous setting.
Go to http://www.amx.com//assets/manuals/TPI-PRO.Supported.Touch.Monitors.zip to view/download the most recent List of
Touch Monitors and USB / Serial Touch Drivers Tested with the TPI (including the most current listing of tested USB touch
panel drivers).
NOTE: The listing of compatible touch monitors is subject to change due to hidden changes that touch monitor
manufacturers make to their products over time. Compatibility at a past date does not guarantee compatibility in the future,
and should be verified before deployment.
3. The message "Please wait, loading new resolution..." indicates that the new resolution setting is being saved. Do not cycle or
remove power while the new settings are being saved.
4. Once your resolution is selected, you can use the outer screen area lines on the Resolution Setup page to adjust your
monitor’s visible screen area.
This could involve using the monitor’s video control to stretch and move the incoming video so that the borders follow the
edges of the screen without disappearing.
There are normally 60 seconds before the resolution times-out, but you can press the front panel Resolution button again
to return to the previous resolution pattern and continue setting up the monitor.
5. Press and hold the RESOLUTION button to save the resolution setting and exit the Resolution Setup page.
NOTE: When the new output resolution is applied, there may be some shifting of the default Main page, as it was developed for
1280 x 1024.
Setting the Touch Drivers (Serial Touch Monitors Only)
After matching the resolution between the TPI and panel/monitor, the next step is to select the necessary touch drivers from the
driver set provided by the TPI.
This step only applies to serial touch monitors, as USB monitors are automatically detected.
The touch drivers are set when you connect the TPI to a touch monitor.
The default Touch Input Driver is EloTouch
®
.
If you are using a non-touch monitor, set the Touch Input Driver to NullTouch.
1. Press the TOUCH pushbutton on the front panel to open the Panel Information page (FIG. 32).
FIG. 31
Resolution Setup page

 Loading...


