TPI-PRO-DVI (Total Presentation Interface-DVI)
17
TPI-PRO-DVI - Instruction Manual
Rack-Mounting the TPI-PRO-DVI
NOTE: Read the Safety Instructions before rack-mounting the TPI.
Safety Instructions
Connect the unit only to a properly-rated supply circuit.
DO NOT stand other units directly on top of the TPI when it is rack mounted, as this will place excessive strain on the
mounting brackets.
ALWAYS ensure that the rack enclosure is adequately ventilated. Adequate ventilation is critical for proper operation of the
TPI.
The TPI uses the bottom cover as a heat sink. In most installations it will be necessary to have some amount of airflow
across the bottom cover.
It is good practice to leave 1 RU of empty space above and below the unit.
Placing the unit low in the rack, using vented spacer panels and keeping other heat-generating equipment away from
the unit can also be beneficial.
Depending on the rack enclosure and the surrounding air temperature, it may also be necessary to incorporate rack fans
to increase air flow across the bottom of the unit.
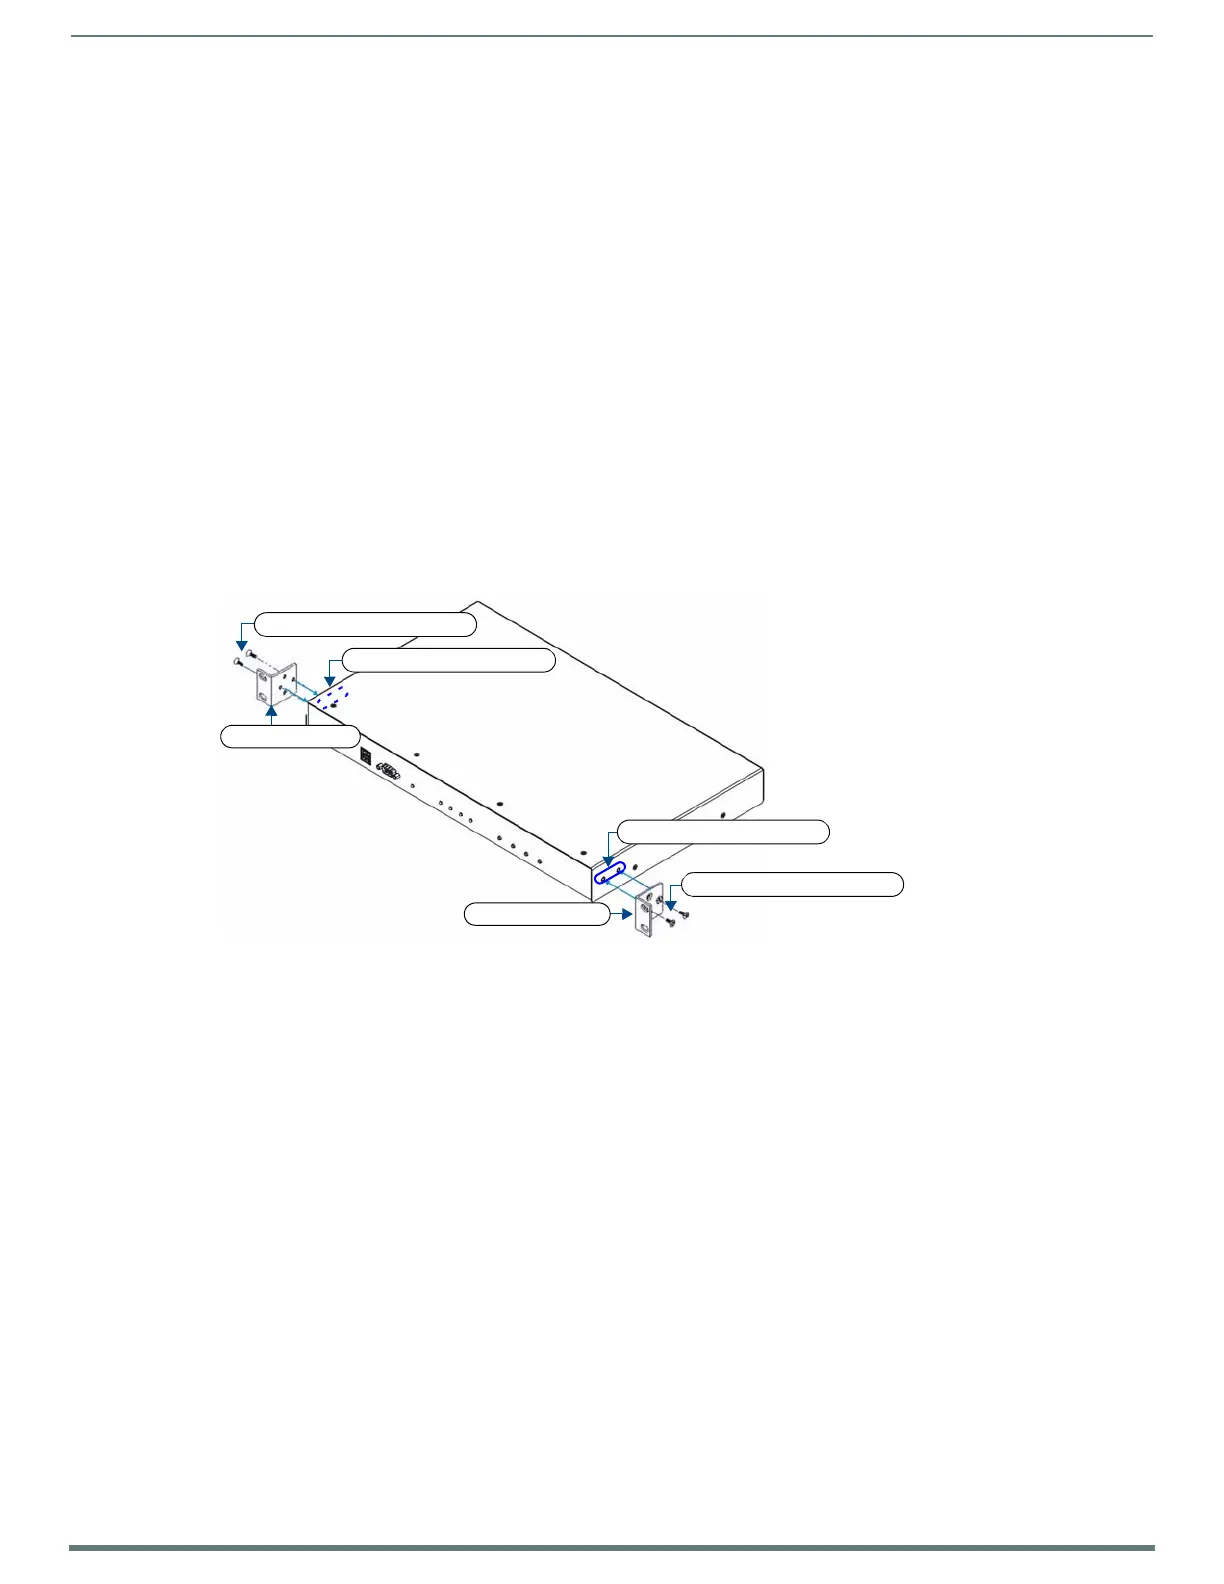
The TPI occupies one rack unit in a standard 19" equipment rack. The included mounting brackets can be rotated 90° in any
direction to accommodate several different mounting options, including tabletop, under/over the table, and vertical wall mounting.
The following steps apply to all of these mounting options.
1. Discharge any static electricity from your body by touching a grounded metal object.
2. Position and install the mounting brackets, as shown in FIG. 3 on page 17, using the supplied mounting screws.
3. Connect any applicable wires to the TPI.
Refer to the Rear Panel Connectors section on page 26 for wiring diagrams and pinout descriptions.
FIG. 3
Rack-Mounting the TPI-PRO-DVI
(front)
Mounting holes (2 per side)
Mounting Bracket
Mounting screws (2 per side)
Mounting Bracket
Mounting screws (2 per side)
Mounting holes (2 per side)

 Loading...


