Using Takenote™
150
TPI-PRO-DVI - Instruction Manual
Hiding TakeNote
You can temporarily hide the TakeNote Menu Bar, TakeNote annotations, or both. Hiding TakeNote removes the TakeNote display
from the screen, but does not delete any annotations.
Hiding the TakeNote Menu Bar
To hide the TakeNote Menu Bar while continuing to display annotations, press the Hide button. In this case, the annotations are
displayed, but the Menu Bar is not.
In this state, you can bring back the TakeNote Menu Bar by pressing the Annotation button at the bottom of the screen. (FIG. 111):
Hiding TakeNote Annotations
To hide the TakeNote Menu Bar and all annotations, press the Ta ke No te icon at the top of the Menu Bar.
In this state, you can bring back the TakeNote Menu Bar and all annotations by pressing the TakeNo te icon a second time
(FIG. 112):
Using The TakeNote Web Application
The TPI includes an internal web application for managing TakeNote screen images that have been captured and saved to the TPI’s
internal (local) disk drive.
NOTE: By default, the TPI is conf igured to save captured TakeNote screen images to a USB stick inserted into any of the USB (Type A)
Input ports. In order to save TakeNote images to the TPI’s internal drive, you must change the Storage Location setting (in the
TakeNote Control page) to Local Disk - see the Changing the Storage Location For Captured TakeNote Screen Images section on
page 144 for details.
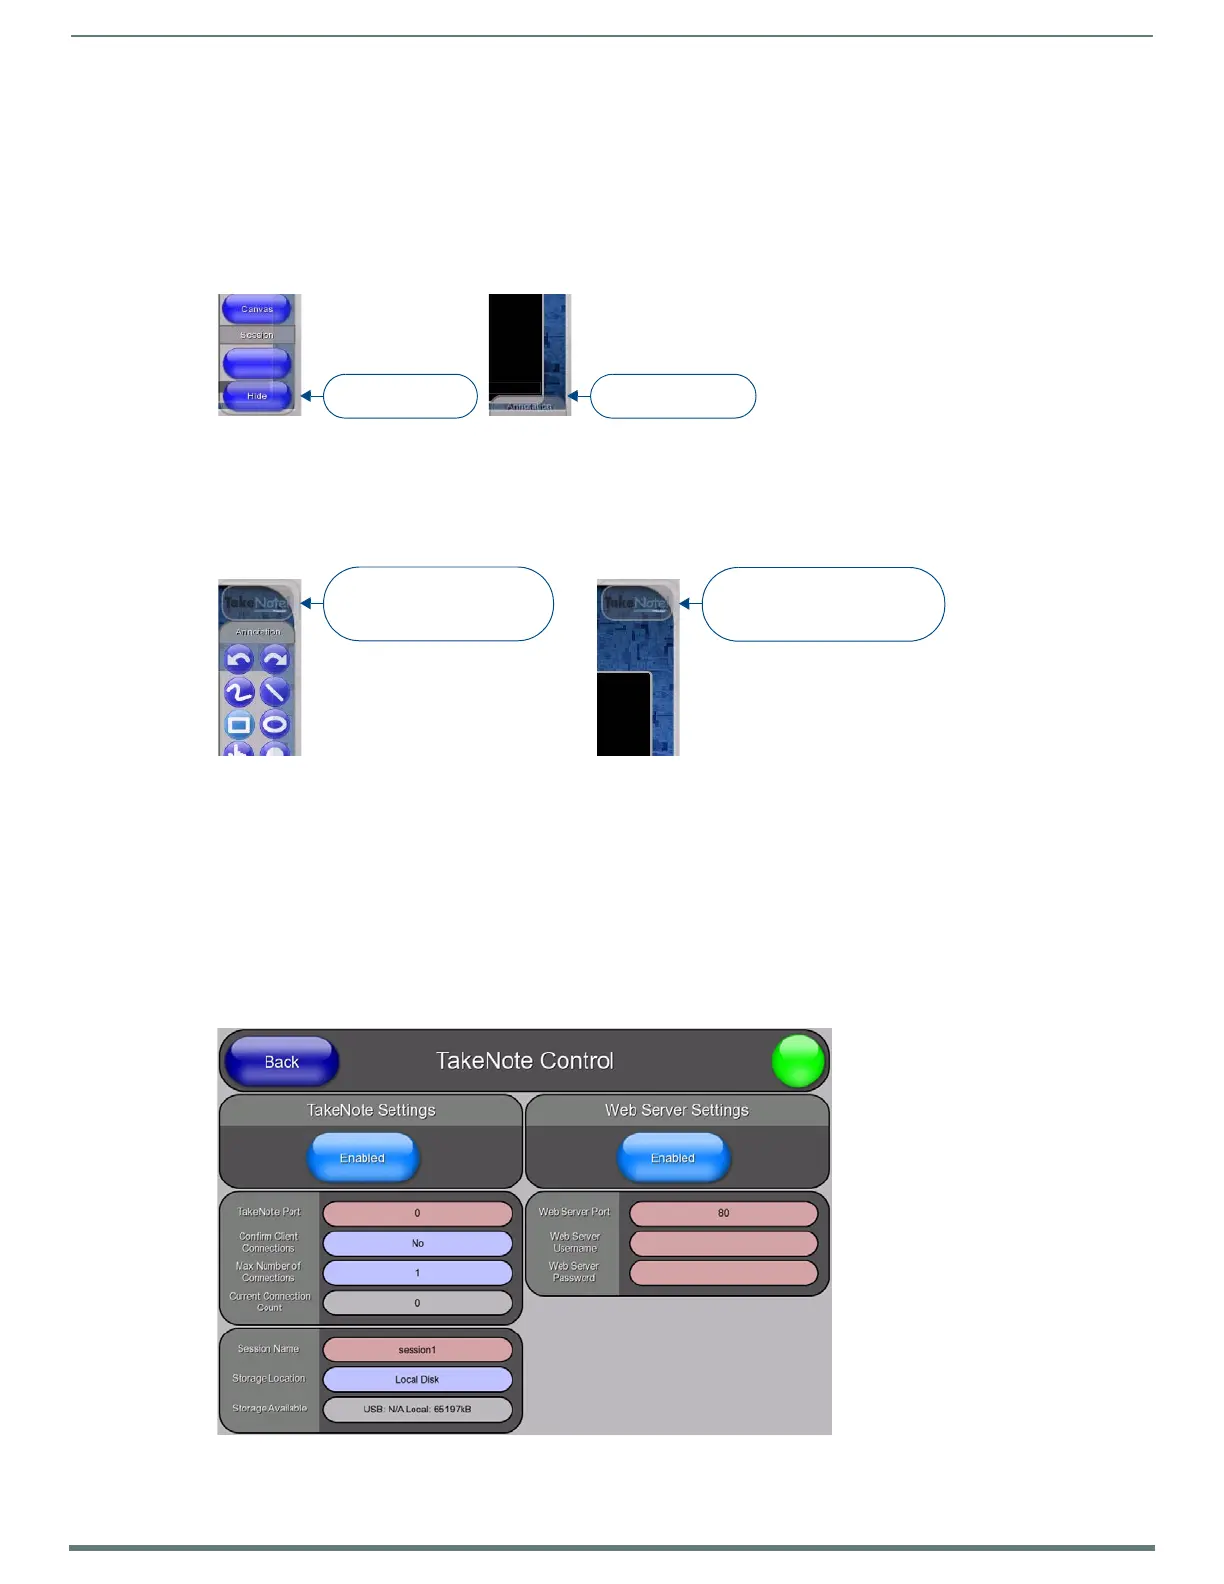
Launching the AMX TakeNote Web Application
1. Verify that the Web Server is enabled in the TakeNote Control page, as shown in FIG. 113.
2. From a PC connected to the LAN on which the TPI resides:
FIG. 111
Take N o te M e nu Bar hidden
FIG. 112 TakeNote Menu Bar and annotations hidden
FIG. 113 TakeNote Control page - Web Server Enabled
Click Hide to hide
the Menu Bar
Click Annotation to
show the Menu Bar
Click the TakeNote icon
to hide the Menu Bar, as well
as all annotations
Click the TakeNote icon again
to show the Menu Bar and
all annotations

 Loading...


