TPI Configuration Pages
57
TPI-PRO-DVI - Instruction Manual
Setup - Time & Date Settings Page
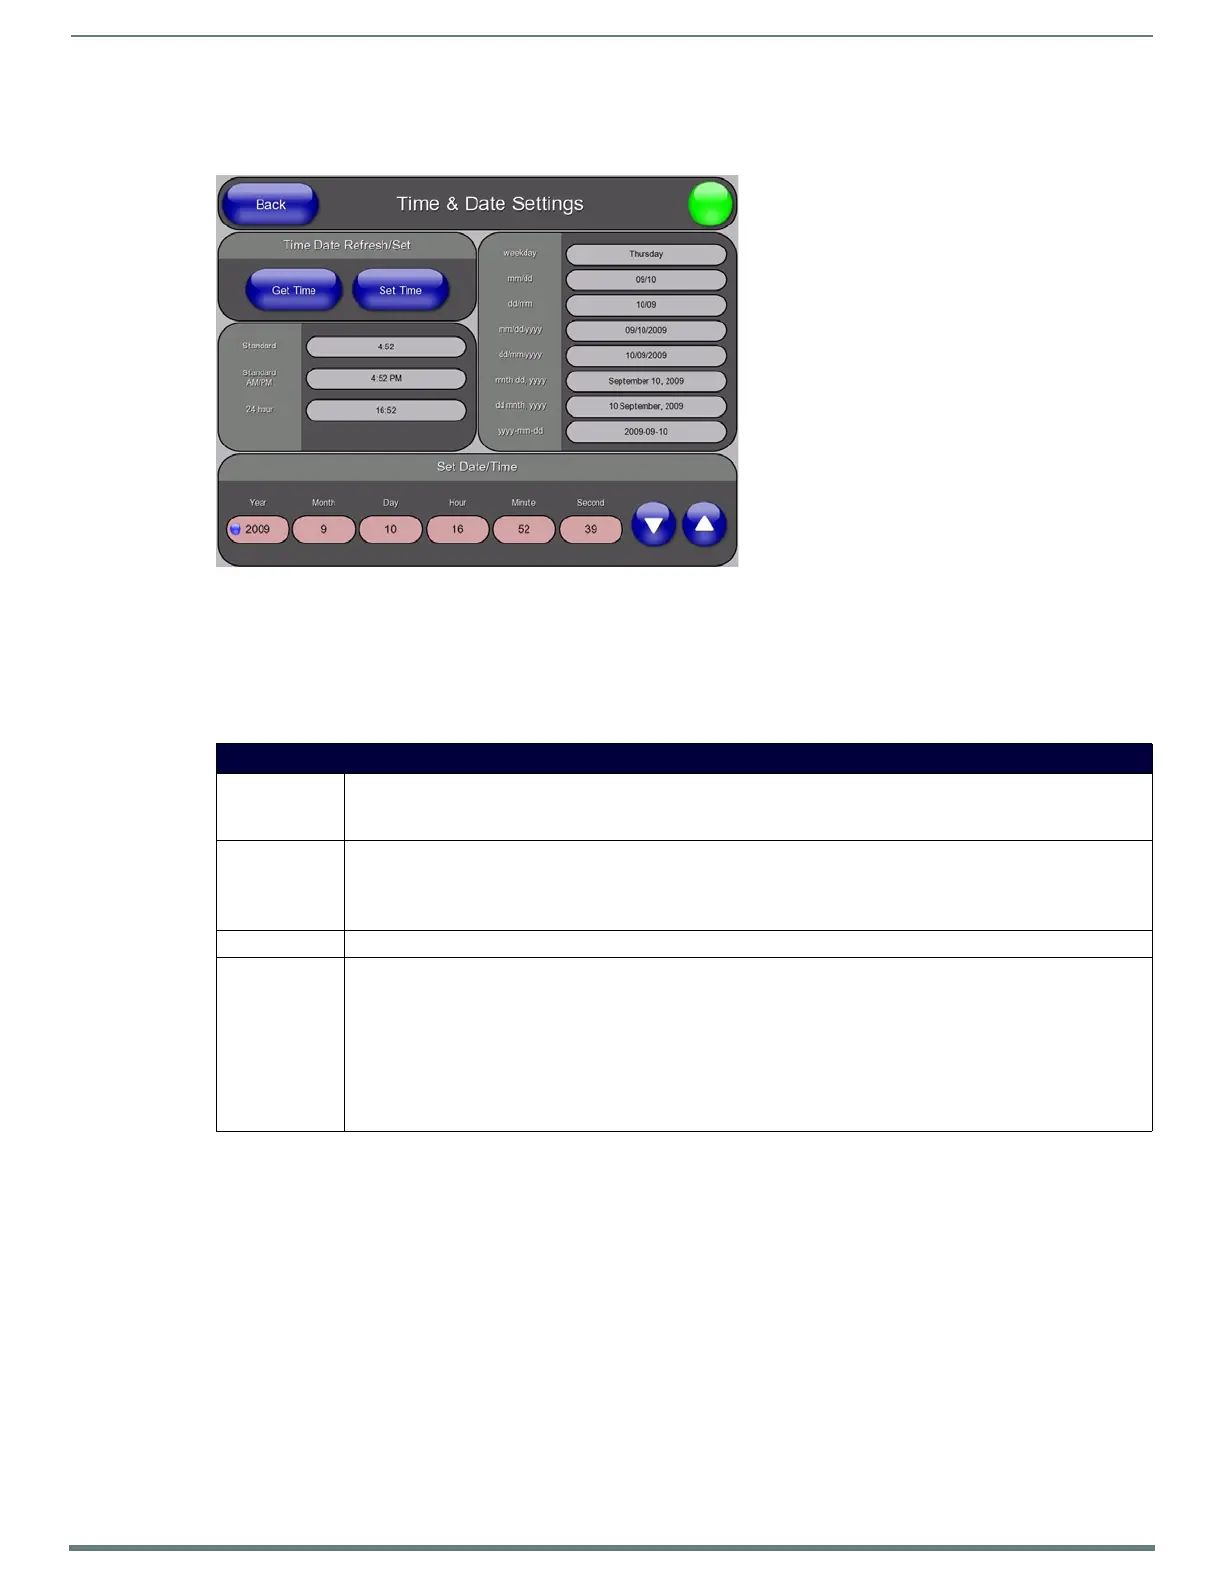
Press the Time button on the Setup Page (see FIG. 56 on page 54) to access the Time & Date Settings Page (FIG. 59).
The options on this page allow you to view, set or edit the time and date information on the NetLinx Master to which the TPI is
connected.
The TPI does not have an on-board clock. This page both receives and sets the time/date of the NetLinx Master.
If either the time or date is modified on this page and then updated to the Master (via the Set Time button), all devices
communicating to that target Master are updated to reflect the new information.
The only way to modify a TPI’s time without altering the Master is to use NetLinx Code.
FIG. 59 Setup - Time & Date Settings Page
Setup - Time & Date Settings Page
•Time Date
Refresh/Set:
•The Ge t T i m e / D at e button retrieves the Time and Date information from the Master.
•The Set Time/Date button sets the Master to retain and save any time or date modifications made on the Time and
Date Setup page.
• Time Display: These fields display the time in 3 formats:
•STANDARD
•STANDARD AM/PM
• 24 HOUR (military)
• Date Display: These fields display the calendar date information in several different formats.
Set Date/Time: This section provides a user with both UP/DN arrow buttons to alter the Master’s calendar date and time.
The blue circle indicates which field is currently selected.
• Year: range = 2000 - 2037
• Month: range = 1 - 12
• Day: range = 1 - 31
• Hour: range = 1-24 (24-hour military)
• Minute: range = 0 - 59
• Second: range = 0 - 59

 Loading...


