Using Takenote™
154
TPI-PRO-DVI - Instruction Manual
4. Select a target printer in the Print dialog and click Print.
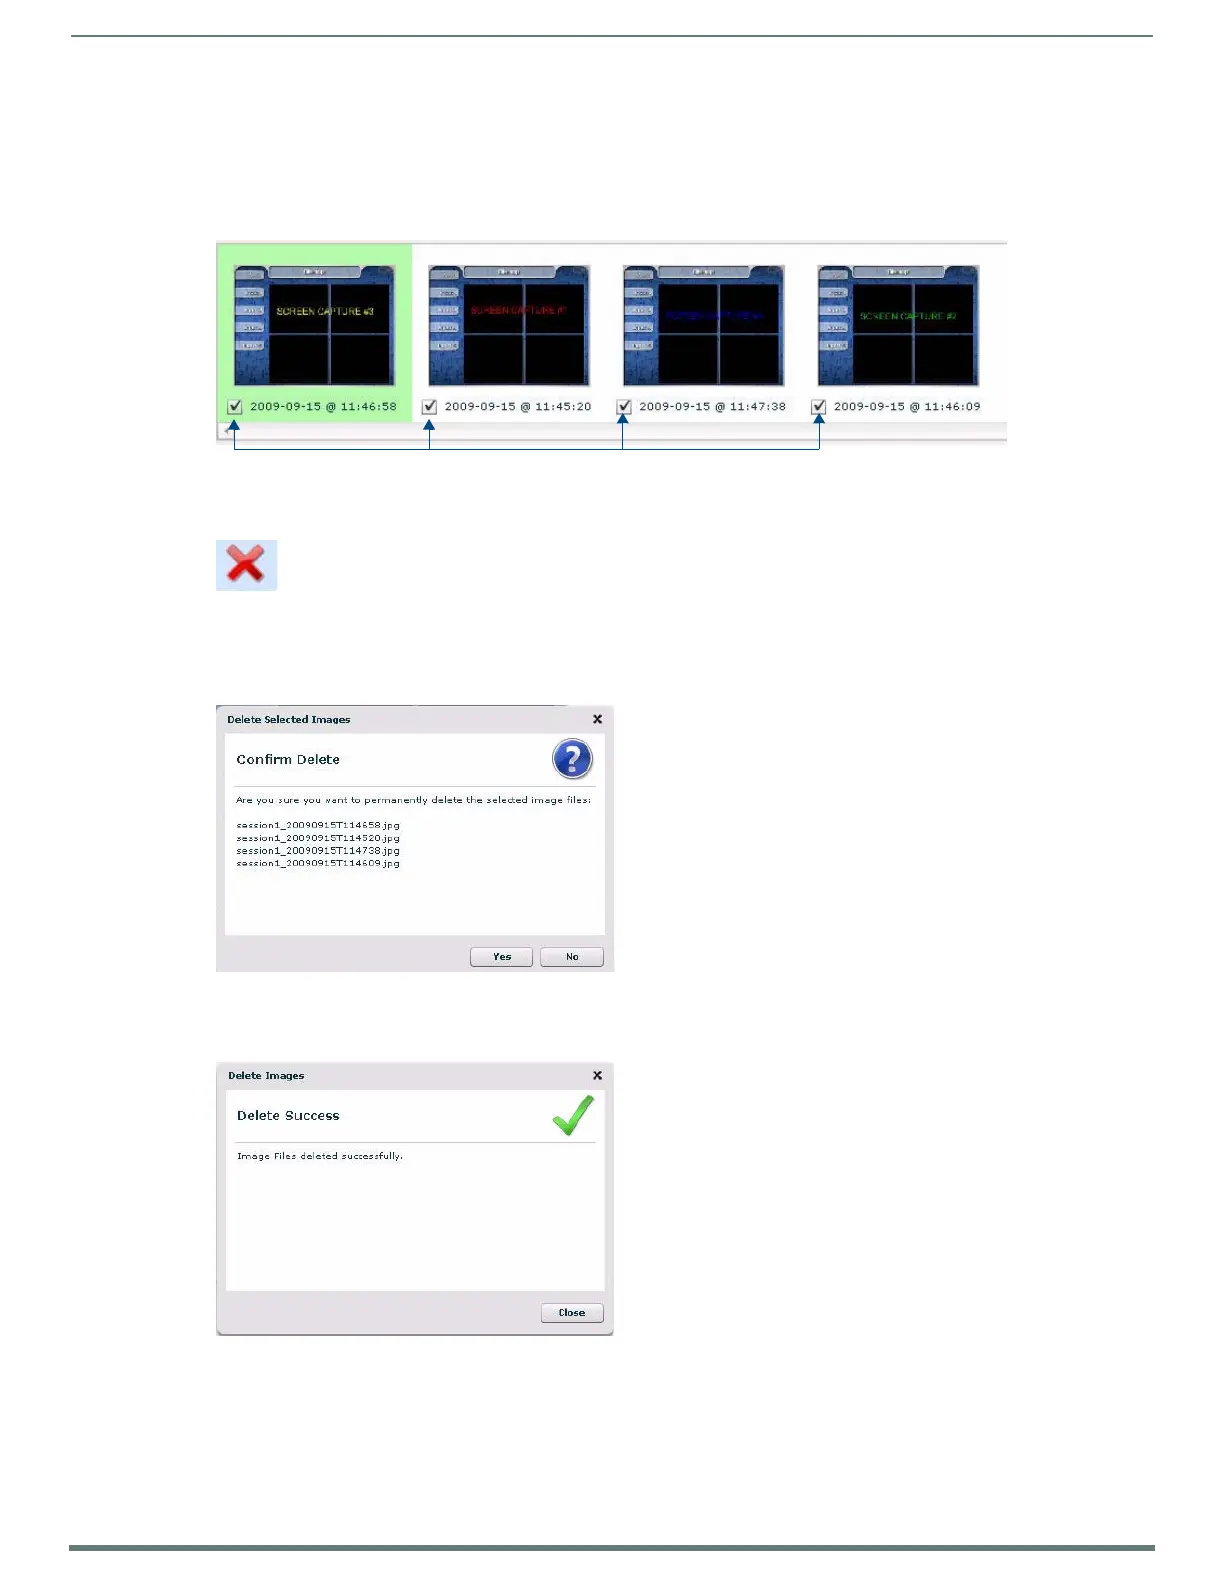
Deleting Captured TakeNote Image Files
1. Launch the AMX TakeNote Web application. If the application is already open, select File > Refresh to refresh the image list.
2. In the Thumbnail Images window, place a check in the checkbox of each image file that you want to permanently delete from
the TPI’s local disk (FIG. 121).
3. Press the Delete button (FIG. 117).
Alternatively, select Image > Delete Image from the Menu Bar.
4. The application prompts you to confirm this action before deleting any files, via the Delete Selected Images dialog - click Yes to
proceed. (FIG. 123):
5. The application notifies you that the selected file(s) have been deleted - click Close to return to the main application window.
(FIG. 124):
FIG. 121
Multiple f iles checked for deletion
FIG. 122 Delete button
FIG. 123 Delete Selected Images dialog
FIG. 124 Delete Images dialog
Place checkmarks on multiple files for deletion

 Loading...


