Protected Setup Page
75
TPI-PRO-DVI - Instruction Manual
Protected Setup - TakeNote Control Page
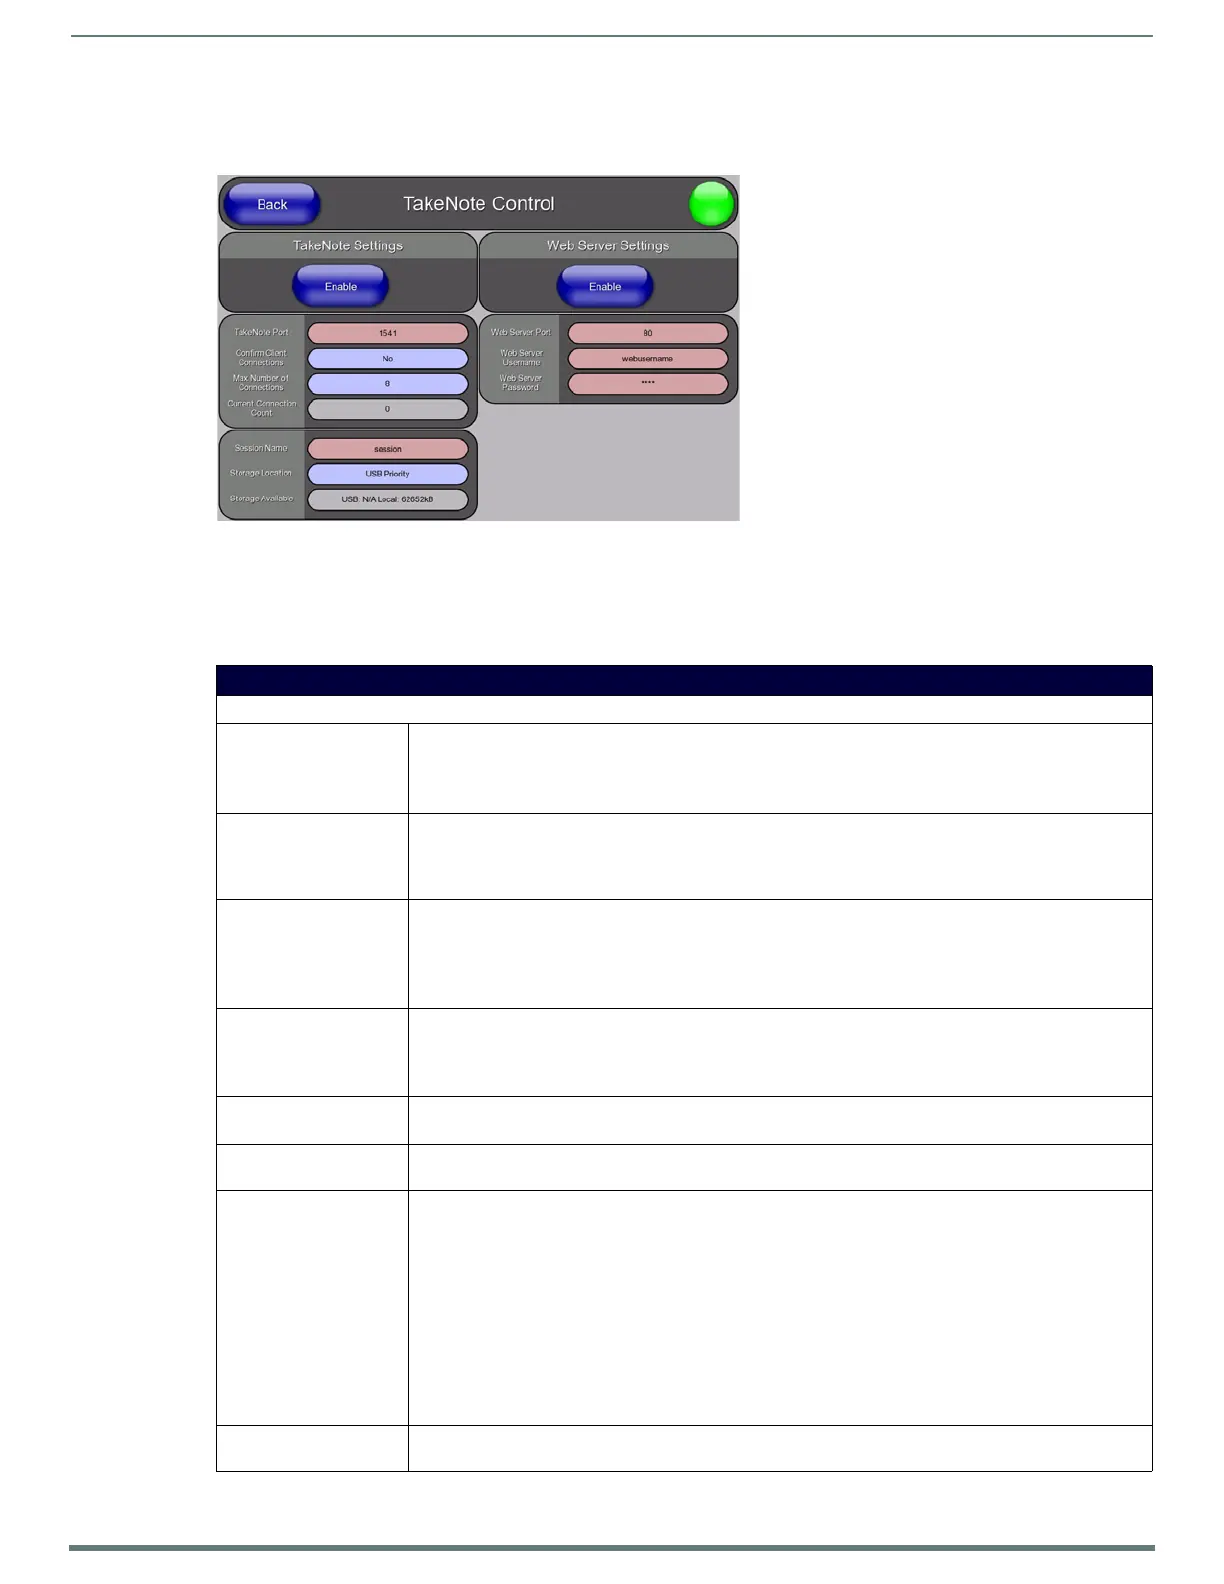
Select TakeNo te on the Protected Setup Page (see FIG. 67 on page 64) to access the TakeNote Control Page (FIG. 70).
The options on the TakeNo te C o nt rol page center around enabling and disabling the TakeNote™ Annotation Application. The
TakeNote application allows you to create on-screen annotations over the displayed video sources, using a Pointing device (i.e. USB
mouse or touch screen) connected to a TPI. The TPI supports up to eight external TakeNote clients simultaneously, in addition to
the internal connection. A remote client can be any other AMX G4 touch panel using either a Computer Control button with
TakeNote enabled, or a TakeNote button.
FIG. 78
Protected Setup - TakeNote Control Page
Protected Setup - TakeNote Control Page
Takenote Settings
• Enable/Enabled: The Enable/Enabled button toggles between the two TakeNote activation settings:
• Enable - deactivates the TakeNote feature on the TPI.
• Enabled - activates the TakeNote feature on the TPI.
Default = Disabled.
• TakeNote Port: Press within this field to invoke the on-screen TakeNote Port keypad, and enter the Port number on the TPI
that will be reserved for use by TakeNote (default = 1541).
This is the port number that remote TakeNote clients must specify in their G4 Computer Control button's
TakeNote properties, or their TakeNote button's properties.
•Confirm Client
Connections:
When a remote client attempts to connect to the device, a dialog is displayed on the screen asking whether
the remote client should be allowed to connect.
• Select Yes on the dialog to allow the connection
• Select No to deny it
Remote clients can connect at any time.
•Max Number of
Connections:
Allows you view and set the maximum number of users (up to 8) that can be simultaneously connected to the
TPI to use TakeNote. Press to cycle through the selection options:
•Range = 1-8.
•Default = 8.
• Current Connection
Count:
This read-only field displays the current number of TakeNote users connected to the TPI.
Note: This value cannot exceed the Maximum Number of Connections field.
• Session Name: Selecting this field will show a keyboard on the screen that allows the name of the current "session" to be
entered. The Session Name is prefix to the file names of any saved images made during that session.
• Storage Location: This option allows you to specify where to save captured TakeNote screen images.
Captured TakeNote screen images are saved as JPG files.
Press to cycle through the selection options:
• USB Priority (default) - This setting saves the image to a USB stick inserted into any of the USB Type A
Input ports on the TPI, if a USB stick is present (see the Wiring and Device Connections section on
page 24).
If a USB stick is not present, images will be saved to the internal local disk.
• Local Disk - This setting saves the image to the TPI’s internal hard drive.
• disabled - This option disables the Save feature.
Note: Refer to the Capturing and Saving the Screen Image section on page 143 for details on saving captured
TakeNote screen images.
• Storage Available: This read-only field indicates the amount of storage space available on the Local Disk, as well as the USB stick
(if present).

 Loading...


