Protected Setup Page
67
TPI-PRO-DVI - Instruction Manual
Refer to the Configuring the Master Connection Settings section on page 43 and Configuring the Ethernet Connection on the
NetLinx Master section on page 46 for instructions on using the System Settings page.
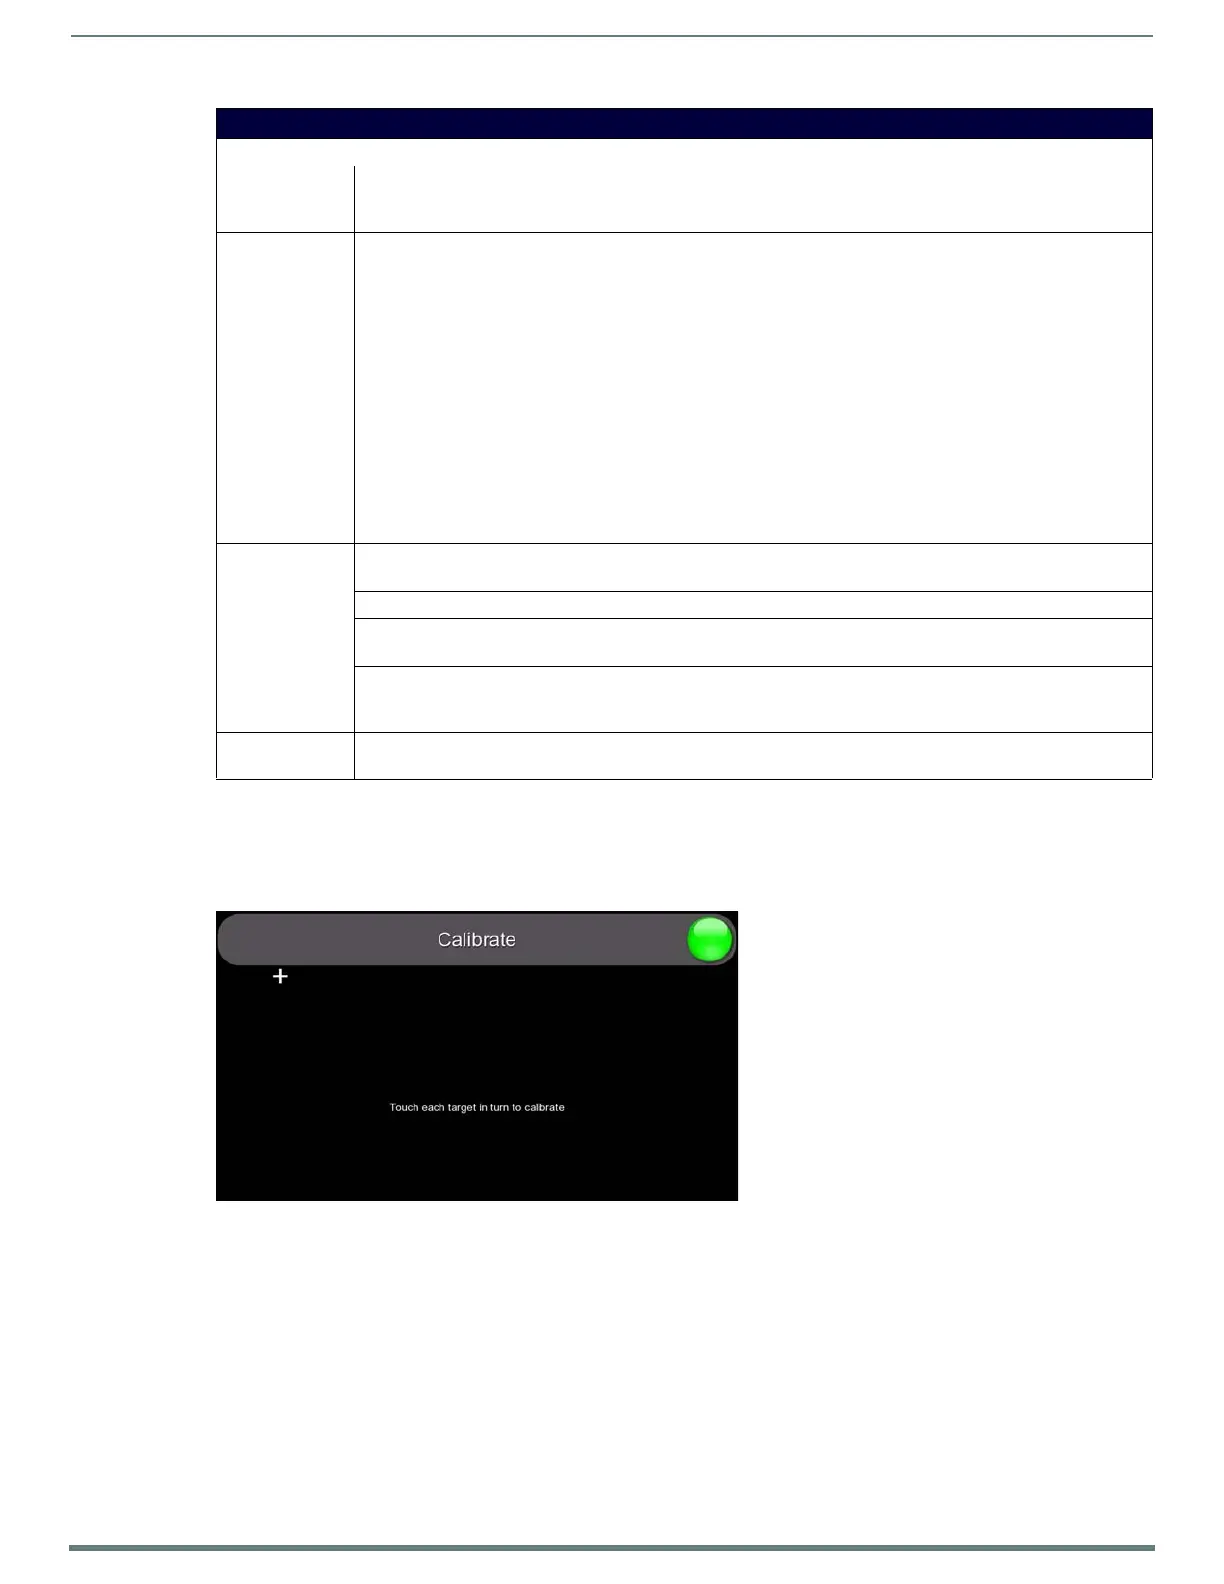
Protected Setup - Calibrate Page
Select Calibrate on the Protected Setup Page (see FIG. 67 on page 64) to access the Calibrate Page (FIG. 69).
The options on this page allow you to calibrate the input touch device (touch monitor) using the selected touch driver.
NOTE: Alternatively, this page can be accessed via the CALIBRATE pushbutton on the front panel. Refer to the Calibrating the
TPI section on page 39 for details.
If no touch device is detected, the Calibration page is not available. In this case, the TPI will ignore any attempt to open the
Calibration page.
If the wrong touch driver is selected prior to the calibration process, press any of the front-panel pushbuttons to exit the
Calibration page (and select a different touch driver).
Press the crosshairs to calibrate the panel.
When the calibration is complete, the Calibrate page closes (returning to the last open Configuration page).
NOTE: If you are using a non-touch enabled monitor, DO NOT PRESS THE CALIBRATE BUTTON. Refer to the Setting the Output
Resolution section on page 38 for screen adjustment procedures.
Protected Setup - System Settings Page (Cont.)
Master Connection:
• Ethernet Type: Sets the NetLinx Master to communicate to the TPI via Ethernet. Ethernet uses a CAT-5 cable (10/100Base T
terminated in an RJ-45 connector) to network computers together and is used in most LAN (local area networks).
This description is also used to refer to both wired and wireless communication.
• Type: Cycles between the different connection modes (URL, Listen, Auto, NDP (UDP), and URL (UDP))
• URL - In this mode, enter the IP Address or DNS Name of the NetLinx Master, as well as the Master Port Number,
and Username/Password (if required).
The System Number field is read-only because the TPI obtains this information from the communicating Master.
• Listen - In this mode, add the TPI address into the URL List in NetLinx Studio and set the connection mode to
Listen.
This mode allows the TPI to "listen" for the Master’s communication signals.
The System Number and Master IP/URL fields are read-only.
• Auto - In this mode, enter the System Number and a username/password (if applicable).
This mode is used when both the TPI and the NetLinx Master are on the same Subnet and the Master has its UDP
feature enabled.
The Master IP/URL field is read-only.
• NDP (UDP) - In this mode, enter the IP/URL, Master Port Number, and username/password (if used) on the Master.
• URL (UDP) - In this mode, enter the IP/URL, Master Port Number, and username/password (if used) on the Master.
•System
Number:
Allows you to enter a system number.
•Default value is 0 (zero).
• Master IP/URL: Sets the Master IP or URL of the NetLinx Master.
•Master Port
Number:
Allows you to enter the port number used with the NetLinx Master.
•Default value is 1319.
•Username/
Password:
If the target Master has been previously secured, enter the alpha-numeric string (into each field) assigned to a pre-
configured user profile on the Master.
This profile should have the pre-defined level of access/configuration rights.
• NDP Name: Displays the Name that is shown on the Master's Manage NetLinx Web Page associated with the device File Name
(read-only).
FIG. 69 Calibrate Page

 Loading...


