Using G4 Web Control®
136
TPI-PRO-DVI - Instruction Manual
Using G4 Web Control
®
Overview
G4 Web Control allows you to use a PC to interact with an AMX G4 Touch Panel (including the
TPI) via the web. The TPI can support up to four simultaneous G4 Web Control connections.
Refer to the Protected Setup - G4 Web Control Page section on page 68 for descriptions of all of the options on the G4 Web.
Control page.
Refer to the NI Series NetLinx Integrated Controllers WebConsole & Programming Guide for more detailed information on
NetLinx Security.
Verify your NetLinx Master has the latest firmware (*.KIT) file loaded.
Verify your NetLinx Master’s IP Address and System Number have been properly entered into the Master Connection
section of the System Settings page (see the Configuring the Master Connection Settings section on page 43).
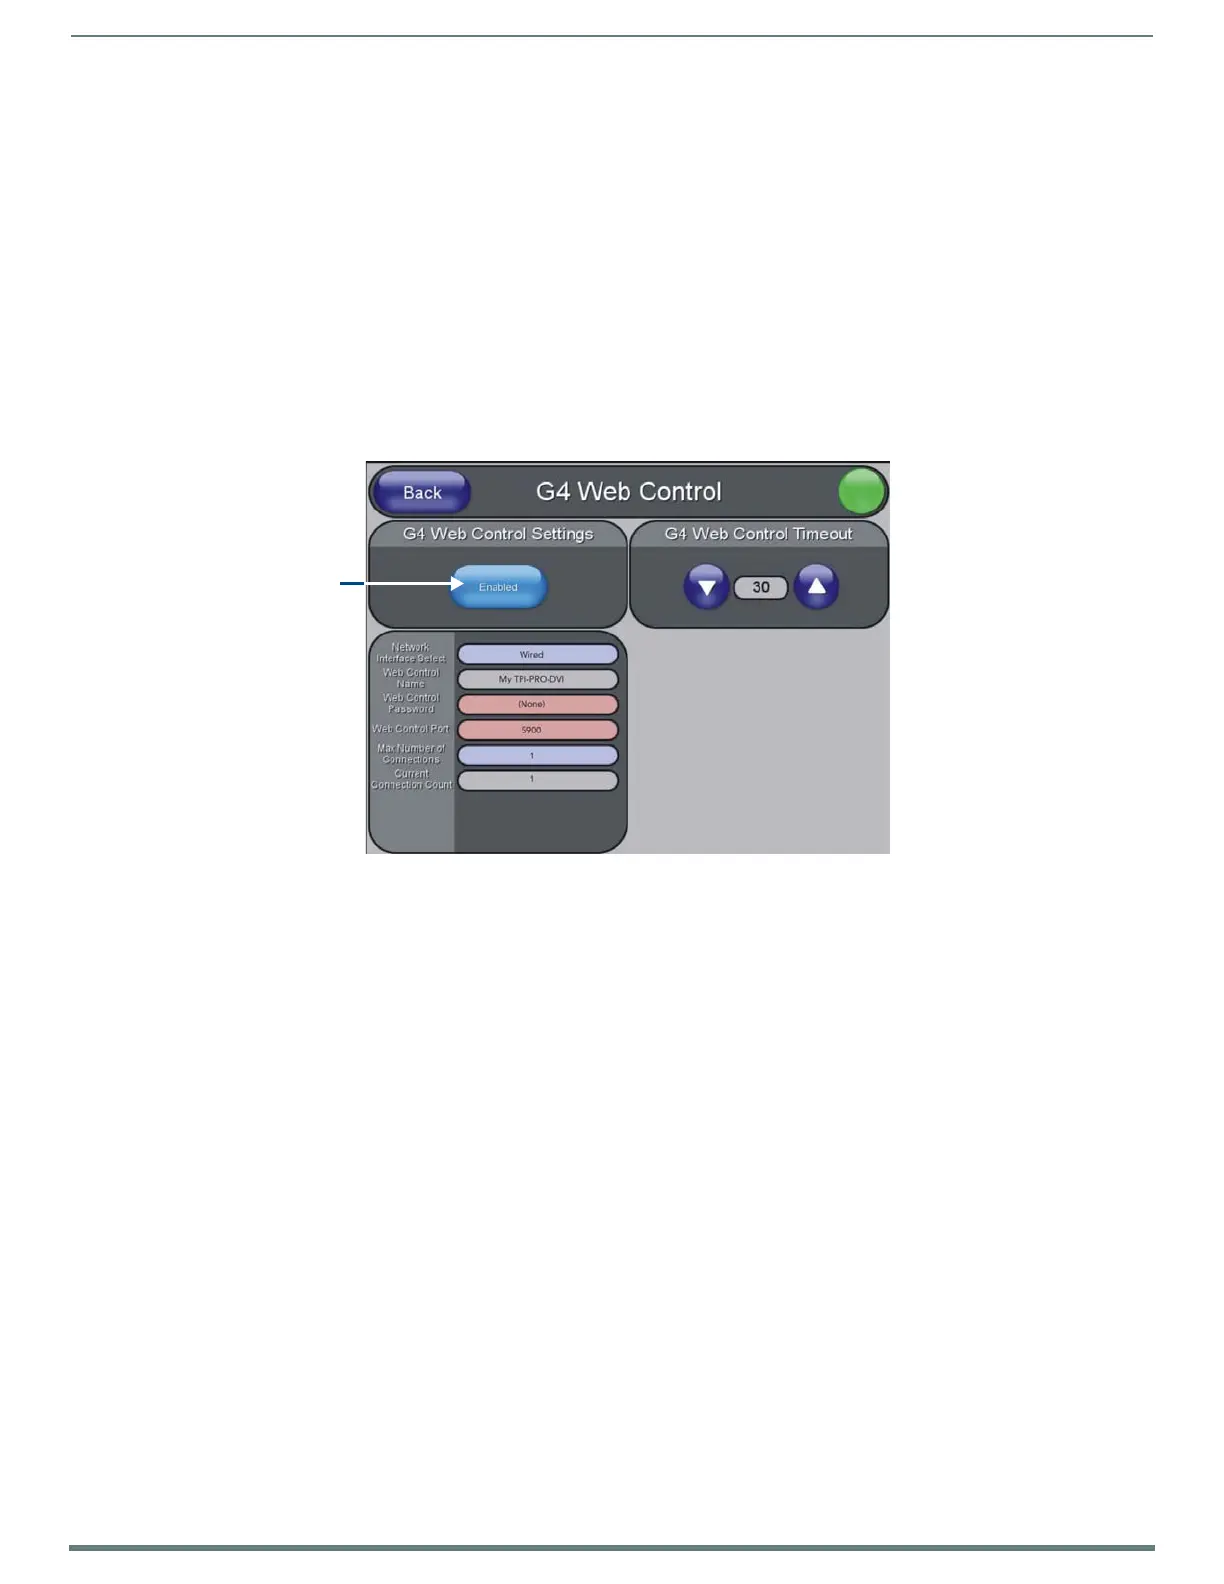
1. Open the G4 Web Control page (FIG. 84):
a. Press the front panel SETUP pushbutton to open the Setup page.
b. Press Protected Setup to open the Protected Setup page. This page is password-protected:
Use the on-screen keypad to enter the default password - 1988.
Press Done to close the keypad.
c. Press G4 Web Control to open the G4 Web Control page.
2. Press Enable/Enabled until it toggles to Enabled (as shown in FIG. 84).
NOTE: The Network Interface Select f ield is read-only - the TPI uses "Wired" as the default method of communication to the
web.The "Wireless option" is unavailable for the TPI.
3. Enter a G4 Authentication session password:
a. Press the Web Control Password field to open the on-screen keyboard.
b. Enter a unique alpha-numeric string, and press Done after you are f inished.
This password is saved as the G4 Authentication session password, associated with VNC web access of this
TPI.
4. Enter the port number of the Port on the TPI that the VNC Web Server is running on:
a. Press the Web Control Port field to open the on-screen keypad.
b. Enter a unique numeric value to be assigned to the port that the VNC Web Server is running on, and press Done after you
are finished.
The default Web Control Port is 5900.
NOTE: The remaining fields in the G4 Web Control Settings section are read-only. The name that appears in the Web Control
Name field is the device name entered in the main Protected Setup Page (as the "Device Name") - see the Protected Setup
Page section on page 64.
5. Press the Up/Down arrows to adjust the G4 Web Control Timeout value. This value determines the amount of time the TPI can
remain idle (no cursor movements) before the VNC session is closed and the user is disconnected.
6. Press the Back button to open the Protected Setup page.
7. Reboot the TPI (see the Rebooting the TPI section on page 51).
FIG. 84
G4 Web Control page
Press to toggle
Enable / Enabled

 Loading...


