Configuring Communication Settings
48
TPI-PRO-DVI - Instruction Manual
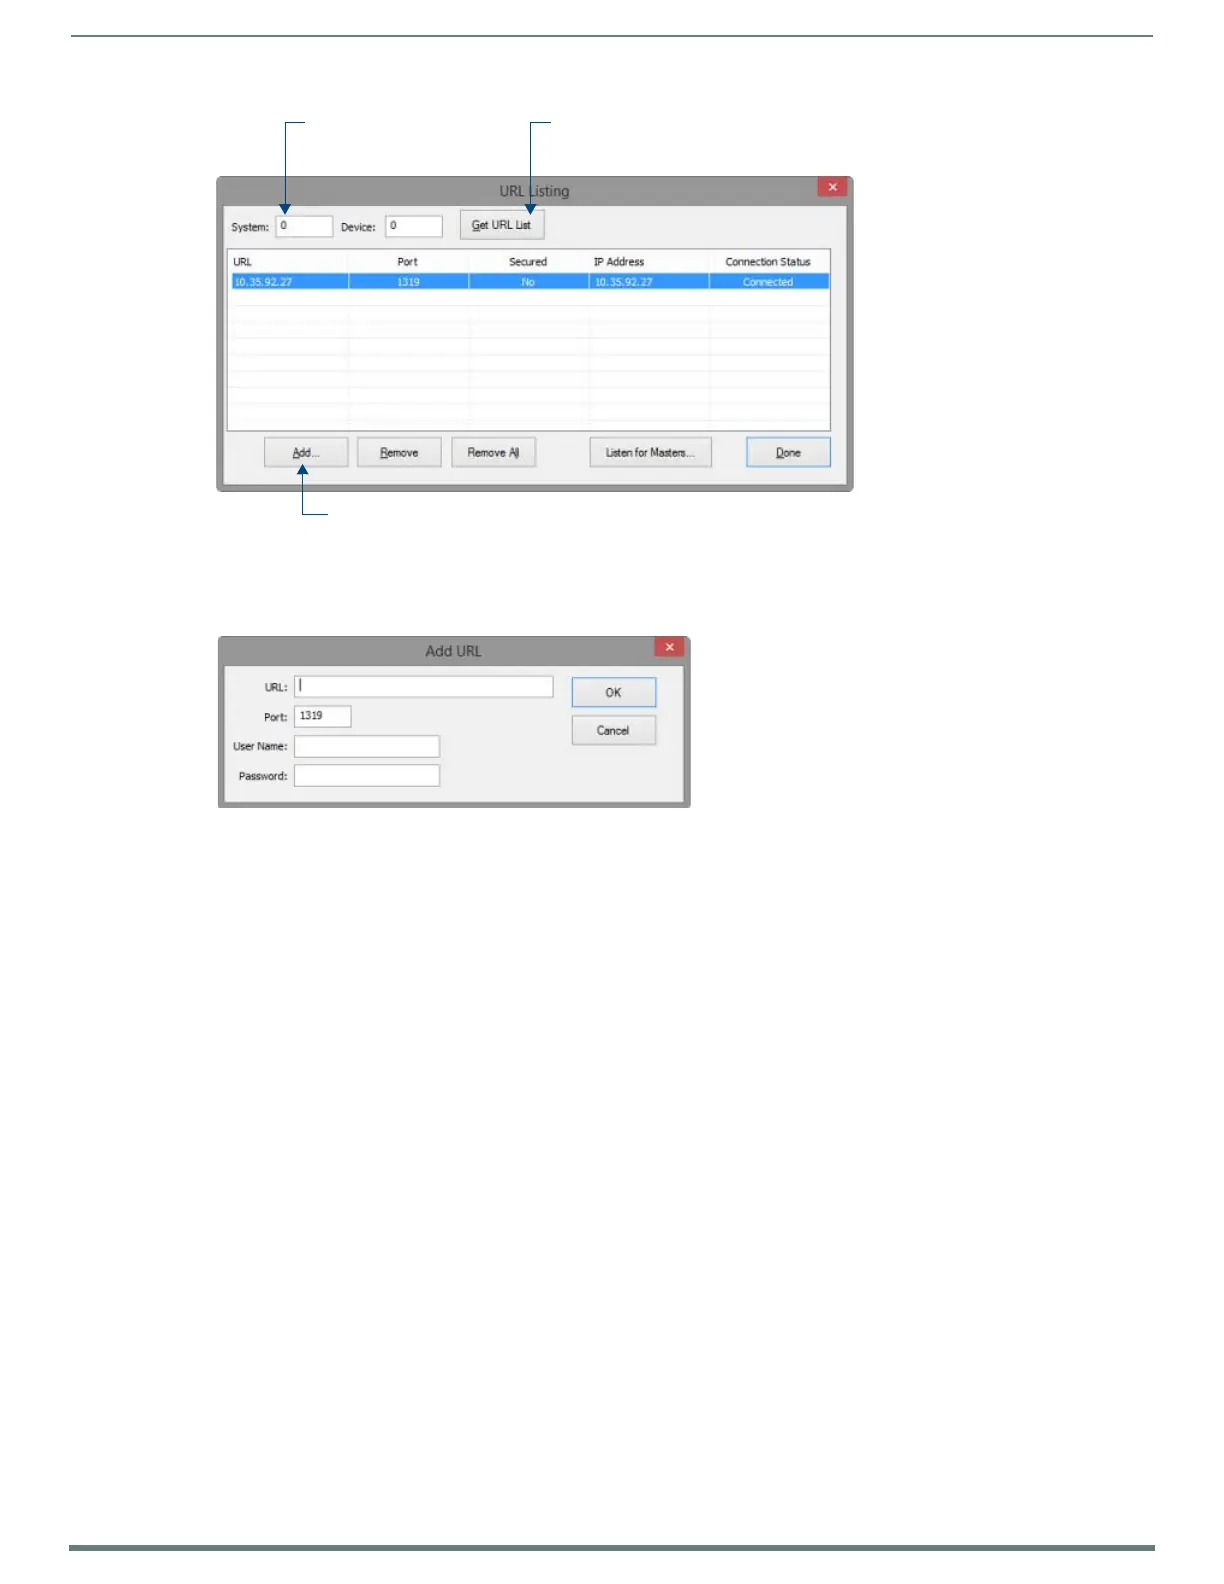
8. Enter the System and Device number for the NetLinx Master associated with your TPI, as indicated in NetLinx Studio’s Device
Addressing dialog (FIG. 44 on page 47).
9. In the URL Listing dialog, click Add to access the Add URL dialog, and enter the TPI’s IP address in the URL field (FIG. 47).
10. Click OK to add this IP Address to the Master’s URL List and close the Add URL dialog.
11. In the URL Listing dialog, click Done to save changes and close the dialog.
12. Reboot the TPI (see the Rebooting the TPI section on page 51).
NetLinx Master Ethernet IP Address - Auto Mode
Auto mode instructs the TPI to search for a Master with the same System Number and residing on the same Subnet as the TPI.
To place the TPI in Auto mode, you must enter the System Number of the NetLinx Master.
NOTE: The NetLinx Master and the TPI must share the same Subnet.
1. In the System Settings page, press Mode until the option cycles to Auto.
2. Press the System Number to open the on-screen keypad, and enter the System Number of the NetLinx Master.
The Master’s System Number can be derived from NetLinx Studio’s Device Addressing dialog (see FIG. 44 on page 47).
Do not alter the IP settings on the System Settings page for AUTO connection mode.
3. Press the Back button to open the Protected Setup page.
NOTE: If the Master has been secured, a Username and Password are required.
4. Reboot the TPI (see the Rebooting the TPI section on page 51).
5. Press the SETUP pushbutton (on the front panel) to open the Setup page and confirm there is an active connection.
NetLinx Master Ethernet IP Address - NDP (UDP) Mode
In NDP (UDP) mode, a connection is established via the NetLinx Master’s on-board WebConsole to bind the TPI to the Master.
NOTE: Refer to the NI Series NetLinx Integrated Controllers - WebConsole & Programming Guide (available at www.amx.com) for a full
description of the on-board WebConsole.
1. In the System Settings page, press Mode until the option cycles to NDP (UDP).
2. Reboot the TPI (see the Rebooting the TPI section on page 51).
3. Open the Master’s online WebConsole:
a. Open a web browser on a PC that has access to the Master to which you want to connect
b. Enter the IP address of the Master in the browser’s Address bar.
FIG. 46
NetLinx Studio - URL Listing dialog
FIG. 47 NetLinx Studio - Add URL dialog
System Address
(reflects the value set in
the Device Addressing tab)
Click to obtain the existing
URL List currently on the Master
Click to add TPI’s URL to the Master’s URL List (via the Add URL dialog)

 Loading...


