Section 9 User calibration
9-2
User calibration
9.1 Setting data for user calibration
• To perform user calibration, enter "1201" in "Move to user calibration" in Special setting level. The
controller will enter calibration mode and "adj" will appear in the display.
• If the "Move to user calibration" setting does not appear, set "Initial setting protect" to "0" in Protect level
and then move to Special setting level.
• Calibration is ended by turning off the power.
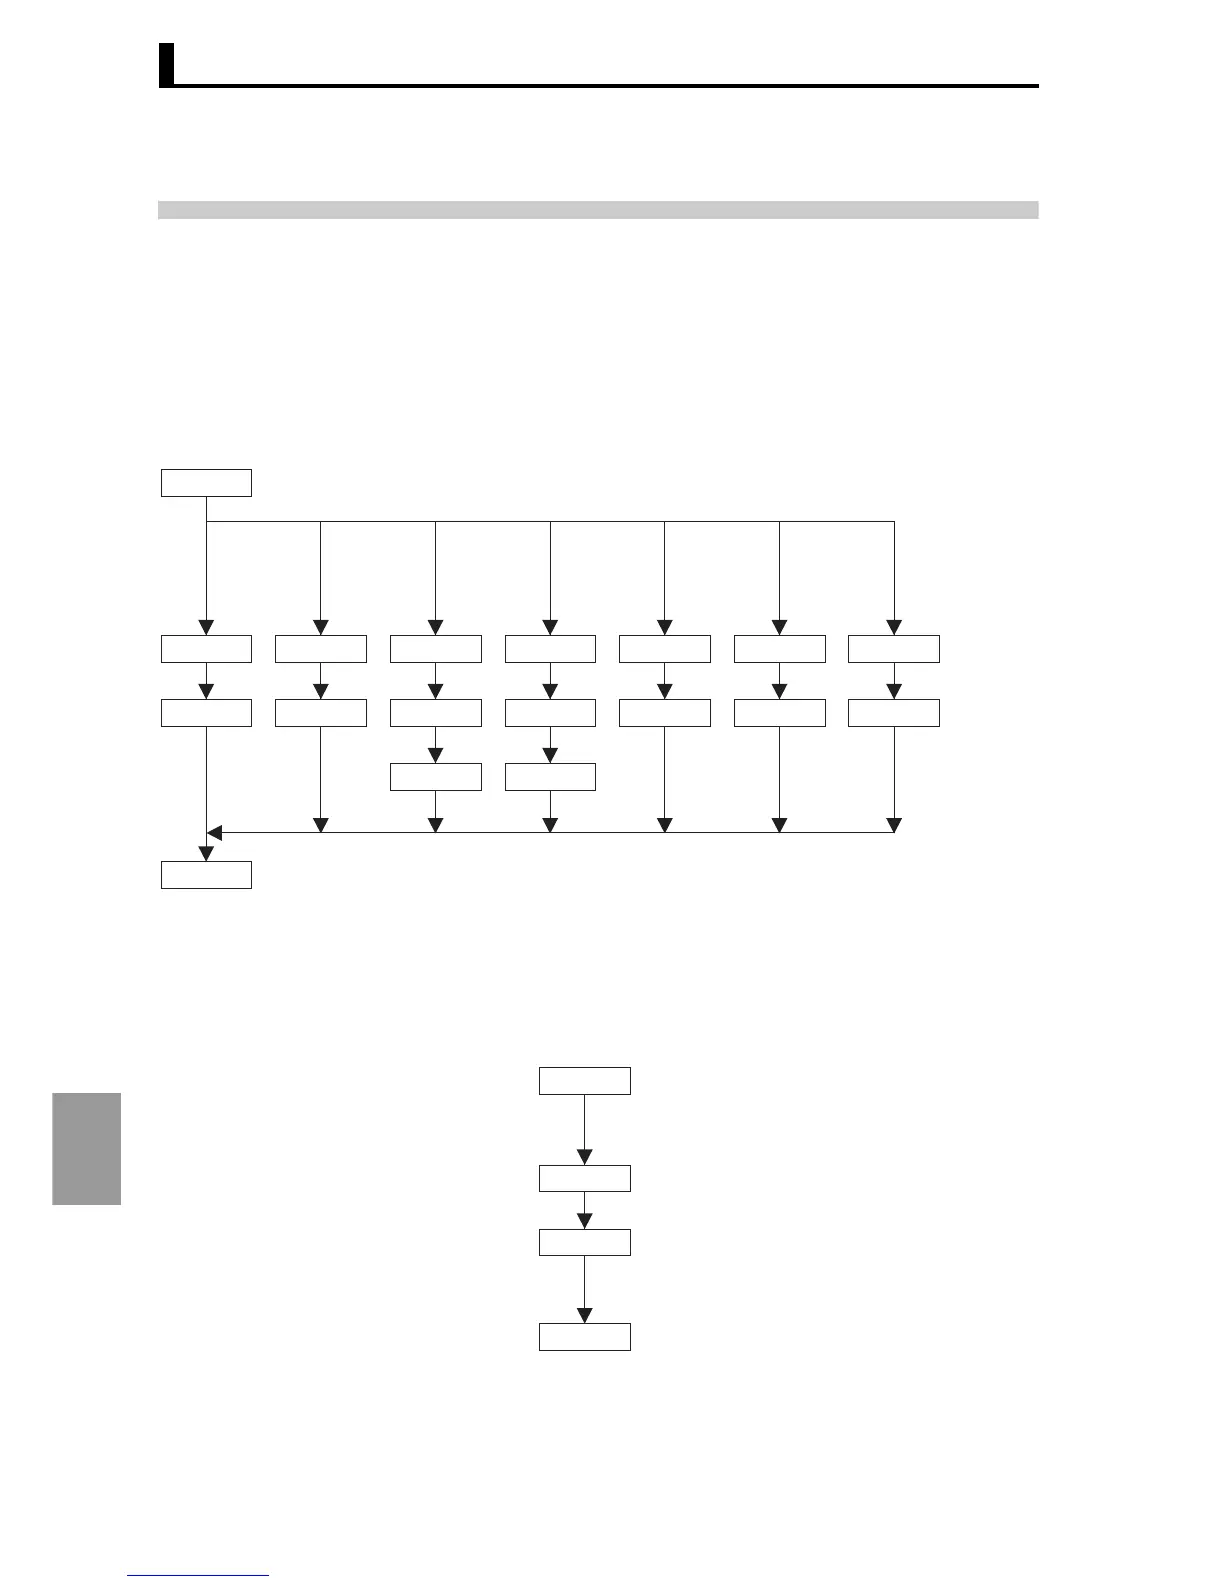
• The setting data for input calibration is shown below.
(The last digit of Display 1 shows the input number. The example below shows "1" for input 1. In the
case of input 2, the display would show "p390.2".)
◆ Output calibration setting data
The setting data for output calibration is shown below. The display
varies depending on the output type of each output.
(In the following example, the last digit of Display 1 shows "1" for
output 1. For output 2, this would be "oa20.2".)
adj
p390.1 p160.1 1t53.1 2t22.1 a 20.1 1V 5.1 2V10.1
p 20.1 p 40.1 1t-6.1 2t-6.1 a 1.1 1V 1.1 2V 1.1
bia5.1 bia5.1
str.i1
(Aging timer)
∗1: < > shows set value (in general) of input type.
Input type∗1
PT100 (1) <0> PT100 (2) <1>
K (1)<2>, J (1)<4>
E (1)<7>, L (1)<8>
N (1)<10>, W (1)<14>
K (2)<3>, J (2)<5>
T (2)<6>, U (2)<9>
R (2)<11>, S (2)<12>
B (2)<13>
4 to 20 mA <15>
0 to 20 mA <16>
1 to 5 V <17>
0 to 5 V <18>
0 to 10 V <19>
str.i1
oa20.1
oa 4.1
str.o1
(Store input calibration value)
At linear current output
 Loading...