FRU Disassembly 8-41
Left Tray Guide
(PL7.1.7)
1. Remove the Print Cartridge and Paper Cassettes.
2. Remove any optional 550-Sheet Paper Feeder(s) (page 8-93).
3. Remove the Front Cover (page 8-12).
4. Lay the printer on its left side.
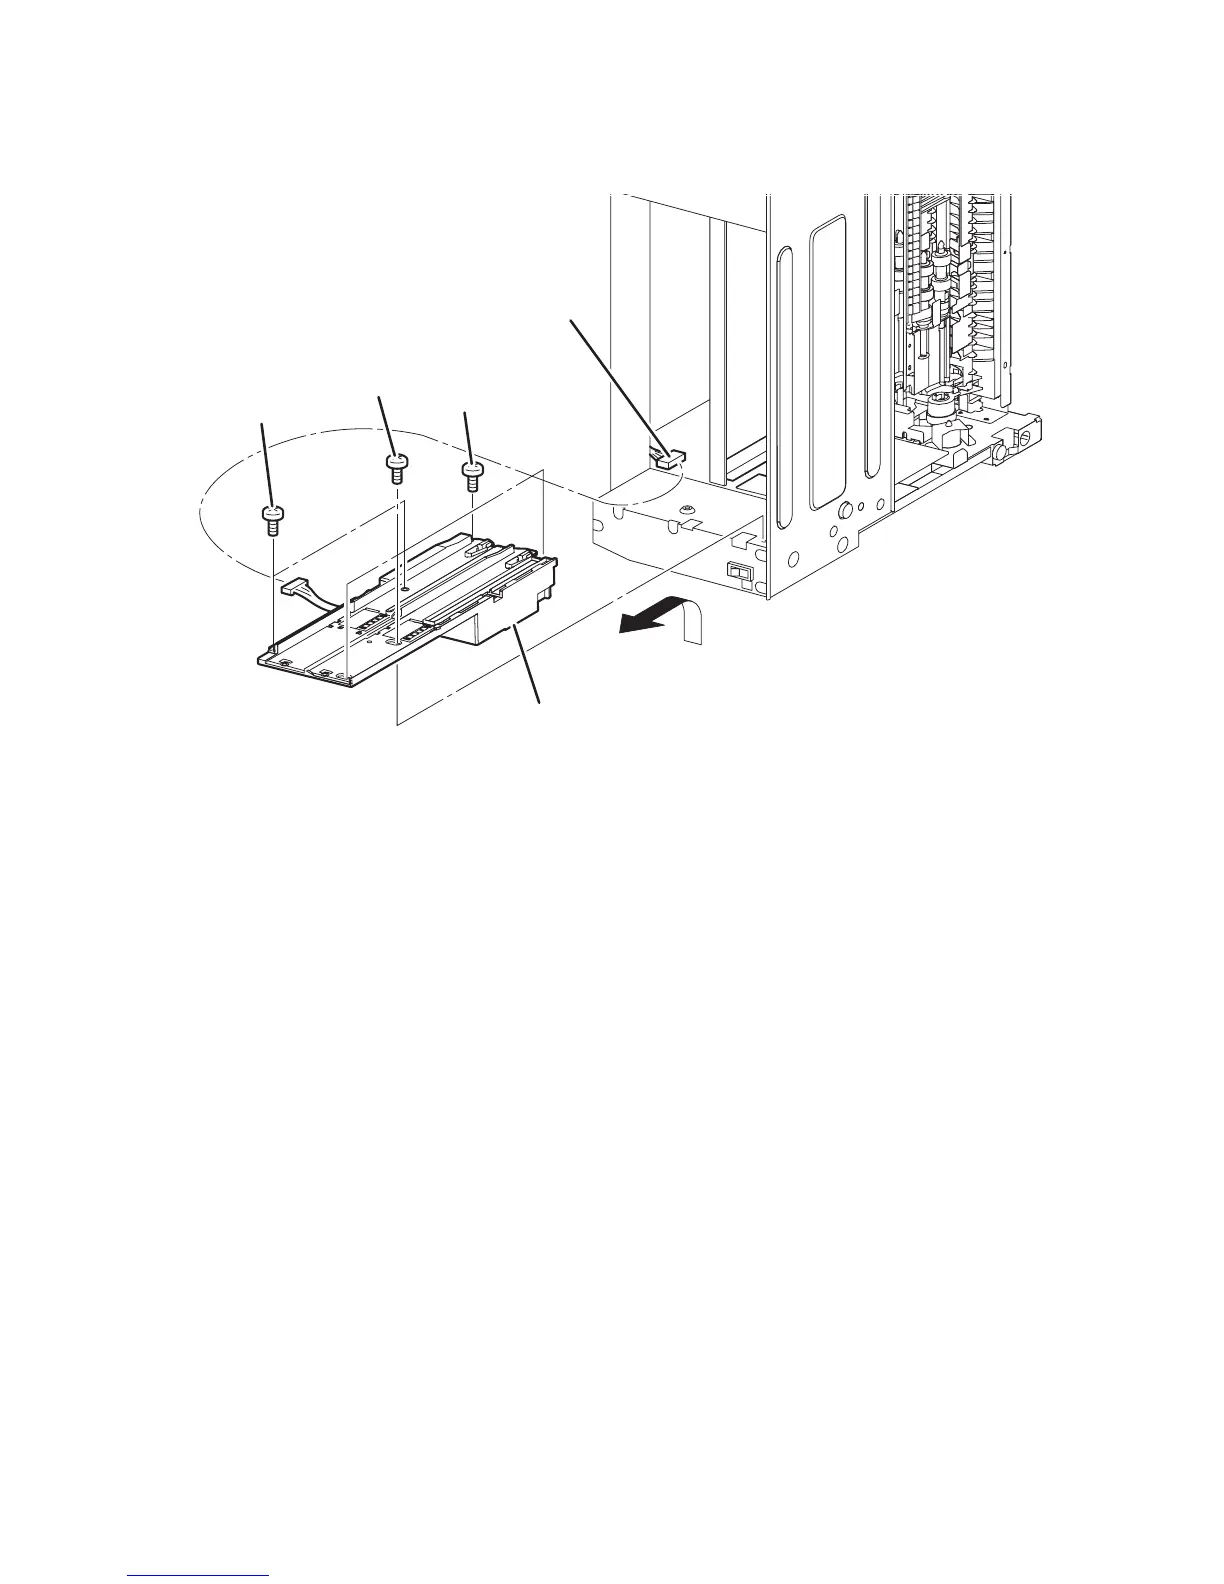
5. Unplug the Left Tray Guide Harness at connector P/J1821.
6. Remove the six screws (one gold tapping, 8 mm; two silver machine, 6 mm; three
gold machine, 6 mm) that attach the Left Tray Guide to the frame.
7. Swing the bottom edge of the Left Tray Guide up, then pull the guide out of the
frame as indicated by the arrow.
Replacement Note:
■ Three types of screws are used, and they are not interchangeable. Be sure to
install screws in the proper locations as indicated in the drawing.
1. Silver machine screw (6 mm) 3. Gold tapping screw
2. Gold machine screw (6 mm) 4. Left Tray Guide
s4500-109
1
2
3
P/J1821
4
 Loading...


