FRU Disassembly 8-49
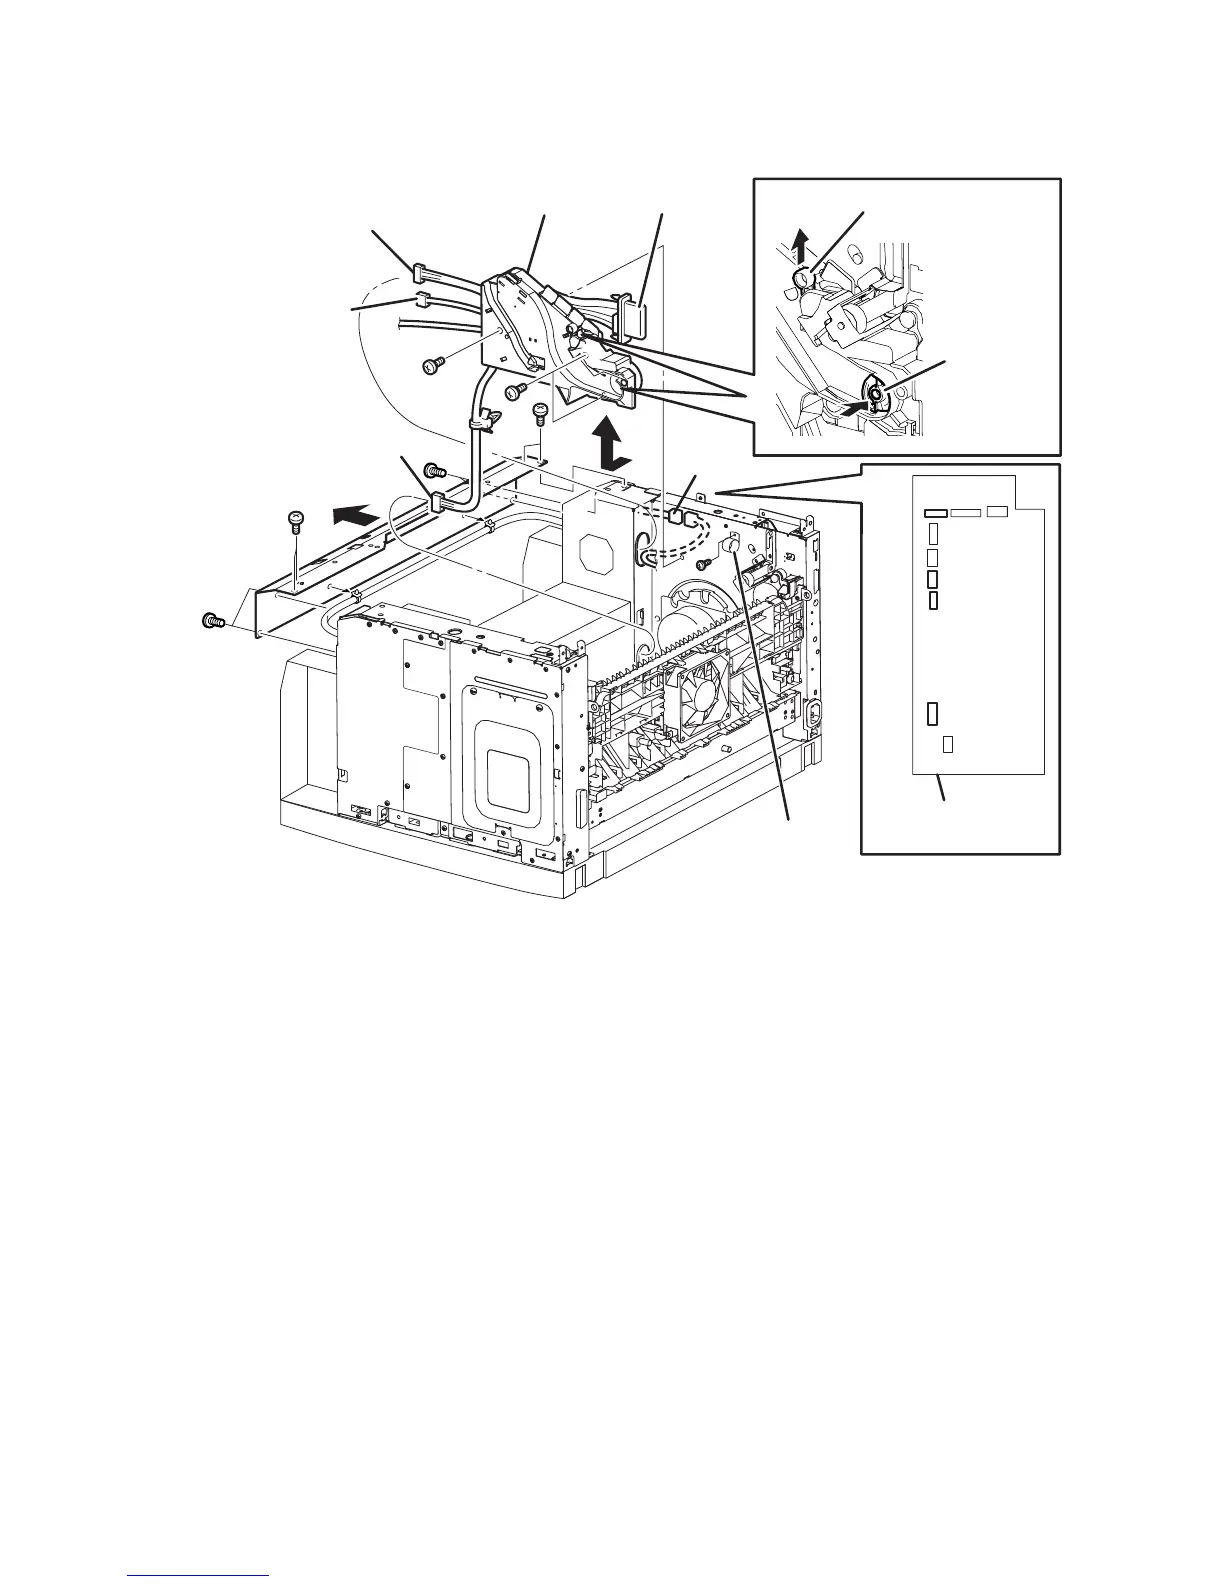
Print Cartridge Left Guide
(PL8.1.15)
1. Remove the Laser Unit Shield Plate (page 8-48).
2. Remove the Fuser Harness Clamp that secures the Fuser Harness to the frame.
3. Release the latch posts and free the Fuser Connector (P/J4647) from the frame.
4. Disconnect P/J142, which connects the 5 V Interlock to the LVPS Harness
Assembly (2-wire gray harness).
5. Remove the LVPS Shield Plate (page 8-75).
6. Unplug J45 from P45 on the LVPS to disconnect the Top Cover Switch.
7. Remove the three screws (gold machine, 6 mm) that attach the Print Cartridge
Left Guide to the frame.
8. Remove the Print Cartridge Left Guide from the frame. Continue with “Fuser
Harness Assembly” on page 8-50.
1. Print Cartridge Left Guide Assembly 4. Gear 3 Link
2. Fuser Connector (P/J 4647) 5. LVPS
3. Link Lever 6. Fuser Harness Clamp
s4500-115
3
4
2 (P/J 4647)
1
J45
J46
J47
P/J 142
P45
5
6
 Loading...


