January 2016
3-12
WorkCentre WorkCentre 4150/4250/4260WorkCentre 4150/4250/42604150/
IQ6, IQ7
Image Quality
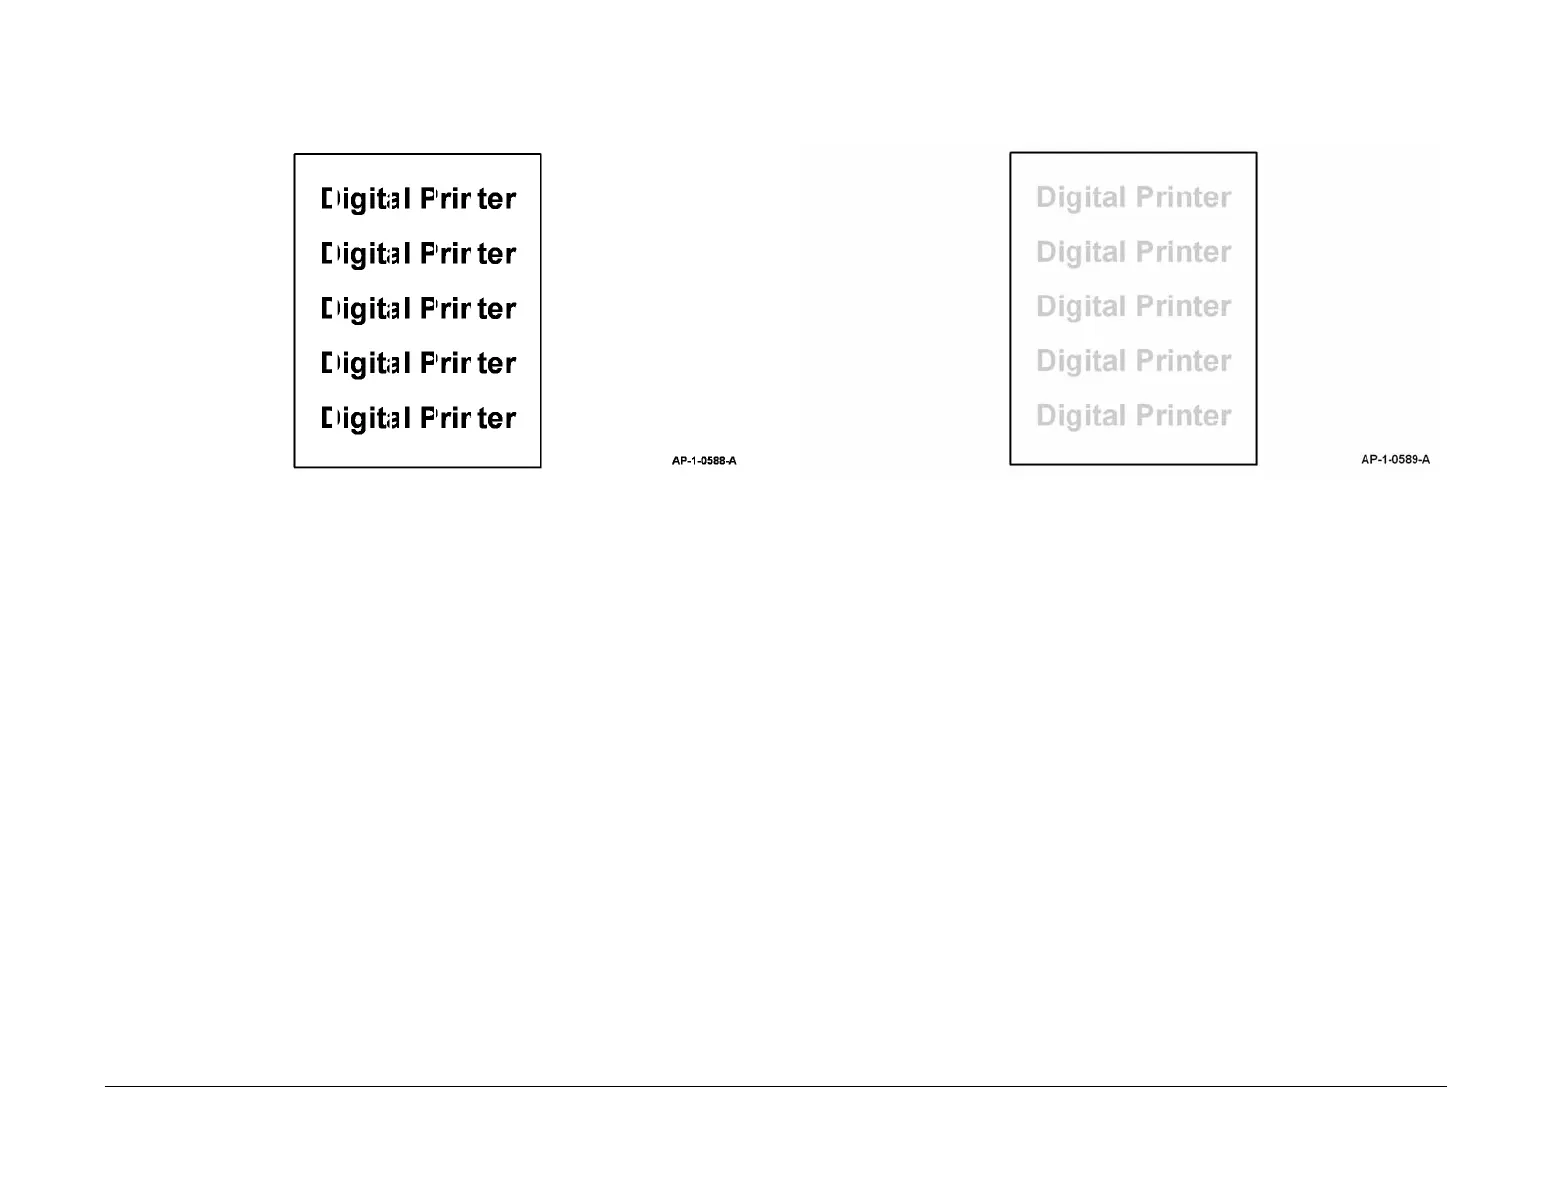
IQ6 Vertical White Lines RAP
Use this RAP when there are white lines along the process direction, as shown in Figure 1.
Figure 1 Vertical white lines
Procedure
WARNING
Switch off the electricity to the machine. Disconnect the power cord from the customer
supply while performing tasks that do not need electricity. Electricity can cause death or
injury. Moving parts can cause injury.
1. Remove the toner cartridge, PL 9.10 Item 2 and the xerographic module, PL 9.10 Item 1.
Ensure there are no obstructions that block the LSU from imaging the xerographic mod-
ule.
2. Remove the LSU, REP 6.1. Clean the LSU window using a clean, lint-free cloth. If neces-
sary, install a new LSU, PL 6.10 Item 1.
3. Install new components as necessary:
• Xerographic module, PL 9.10 Item 1.
• Toner cartridge, PL 9.10 Item 2.
4. If the defect appears only when copying from the DADF, install a new CCD module,
(4150) PL 14.10 Item 2 or (4250/4260) PL 14.13 Item 2.
IQ7 Light Image RAP
Use this RAP when the machine produces light images in all modes, as shown in Figure 1.
Figure 1 Light image
Procedure
WARNING
Switch off the electricity to the machine. Disconnect the power cord from the customer
supply while performing tasks that do not need electricity. Electricity can cause death or
injury. Moving parts can cause injury.
Go to the relevant procedure:
• 4150 Checkout
• 4250/4260 Checkout
• 4265 Checkout
4150 Checkout
NOTE: For solid print area specifications, refer to IQS 1 Solid Area Density.
Perform the following:
1. If the defect appears only when using the DADF, check that the scanner lock, PL 14.10
Item 20 is completely unlocked.
2. Ensure that the paper tray settings match the paper or media size in the trays.
3. Examine the toner cartridge, PL 9.10 Item 2 and xerographic module, PL 9.10 Item 1.
Ensure they are free from all packing or sealing material.
4. Perform ADJ 14.1 Shading Adjustment.
5. Remove the LSU, REP 6.1. Clean the LSU window using a clean, lint-free cloth. If neces-
sary, install a new LSU, PL 6.10 Item 1.
6. Refer to Wiring Diagram 2. Perform the following:

 Loading...


