January 2016
4-103
WorkCentre 4150/4250/4260WorkCentre WorkCentre 4150/4250/42604150/
REP 6.1
Repairs and Adjustments
REP 6.1 Laser Scan Unit (LSU)
Parts List on PL 6.10
Removal
WARNING
Switch off the electricity to the machine. Disconnect the power cord from the customer
supply while performing tasks that do not need electricity. Electricity can cause death or
injury. Moving parts can cause injury.
WARNING
Take care during this procedure. Sharp edges may be present that can cause injury.
WARNING
Avoid exposure to laser beam. Invisible laser radiation.
CAUTION
Before performing this procedure, refer to General Disassembly Precautions, GP 10.
1. Remove the Exit Tray Assembly, PL 28.10 Item 1 or the Finisher, REP 12.1.
2. Remove the Paper Exit Cover, PL 28.10 Item 4.
NOTE: A short, crosshead screwdriver, PL 26.10 Item 2 is required to remove the 4
screws that secure the LSU. The screwdriver is supplied in the service training kit. If the
screwdriver is not available, the DADF, scanner assembly, exit guide assembly and exit
assembly must be removed.
3. If necessary, remove the DADF. Refer to (4150) REP 5.1 or (4250/4260/4265) REP 5.3.
4. If necessary, remove the scanner assembly, (4150) REP 14.1 or (4250/4260/4265) REP
14.3.
5. If necessary, remove the exit guide assembly and exit assembly, REP 10.2.
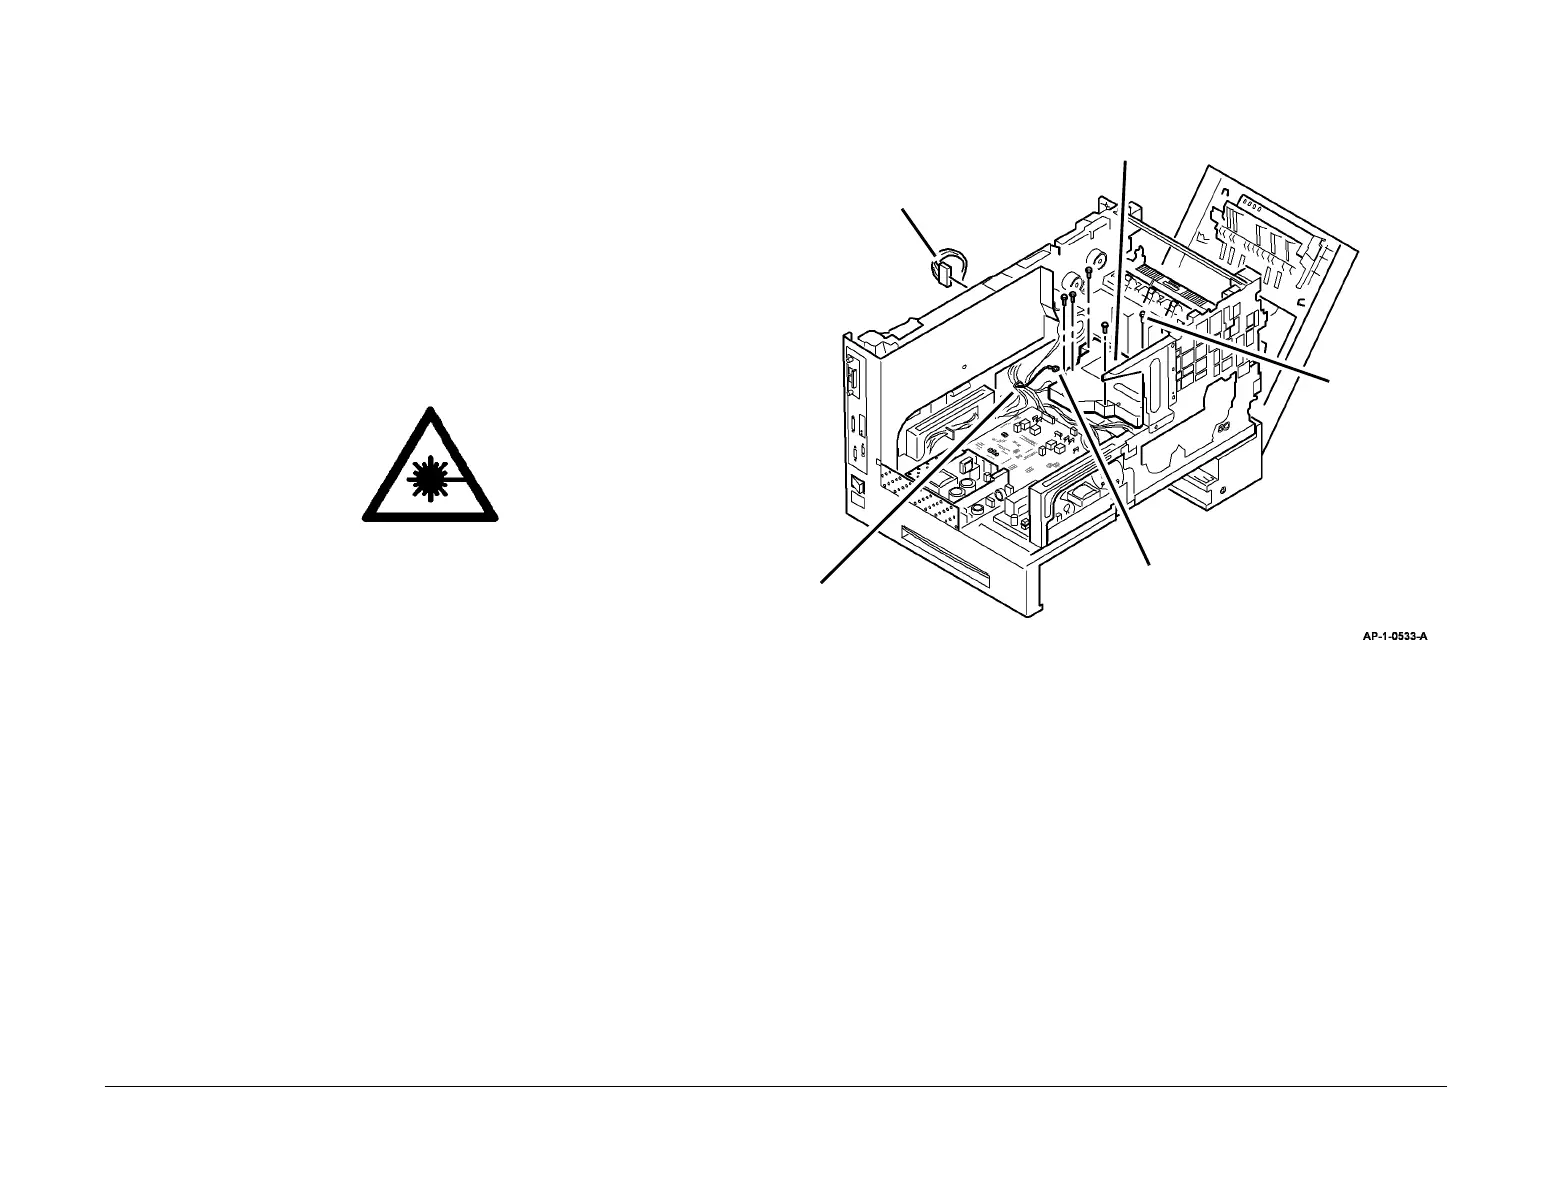
6. Remove the LSU (Figure 1).
Figure 1 Removing the LSU
Replacement
Replacement is the reverse of the removal procedure.
1
Disconnect (4150) CN5, (4250)
CN39 or (4260) CN4, and route
wire harness through the back
wall, to the LSU.
3
Remove the screw and disconnect
the ground harness.
4
Remove the
four screws.
2
Rout the wire harness
out of the cable clamp.
5
Lift the LSU, and remove
it from the machine.

 Loading...


