January 2016
4-199
WorkCentre WorkCentre 4150/4250/4260WorkCentre 4150/4250/42604150/
ADJ 5.1
Repairs and Adjustments
ADJ 5.1 DADF Side Edge Registration Adjustment
Purpose
To correctly set the DADF side edge registration.
Procedure
Go to the relevant procedure:
• 4150 Adjustment
• 4250/4260 Adjustment
• 4265 Adjustment
4150 Adjustment
Perform the following:
1. Raise the input tray assembly, PL 5.10 Item 5.
2. Remove the lower cover, PL 5.10 Item 11.
3. Loosen the screw that secures the pinion gear, PL 5.10 Item 9 until the pinion gear is
clear of the document guides.
4. Carefully move both document guides to the front or the rear to adjust the registration.
NOTE: Moving both document guides 1 tooth on the pinion gear will adjust the registra-
tion by approximately 3mm (0.1 inch).
5. Assemble the input tray assembly.
6. Use the DADF to make 10 copies of a document. Check the registration, refer to IQS 3
Registration. If necessary, re-adjust the registration.
4250/4260 Adjustment
Perform the following:
1. Raise the input tray assembly, PL 5.30 Item 11.
2. Remove the lower cover, PL 5.32 Item 12.
3. While lifting the inboard end of the document guides away from the pinion gear, carefully
move both document guides to the front or the rear to adjust the registration.
NOTE: Moving both document guides 1 tooth on the pinion gear will adjust the registra-
tion by approximately 3mm (0.1 inch).
4. Assemble the input tray assembly.
5. Use the DADF to make 10 copies of a document. Check the registration, refer to IQS 3
Registration. If necessary, re-adjust the registration.
4265 Adjustment
1. Power off the machine. Disconnect the power cord.
CAUTION
In the following activity the Input Tray will be dislocated from the DADF. There is no need to dis-
connect the wire/connector leading from the tray to the DADF PWB as long as caution is
observed and the upper part of the Input Tray is kept close to the DADF.
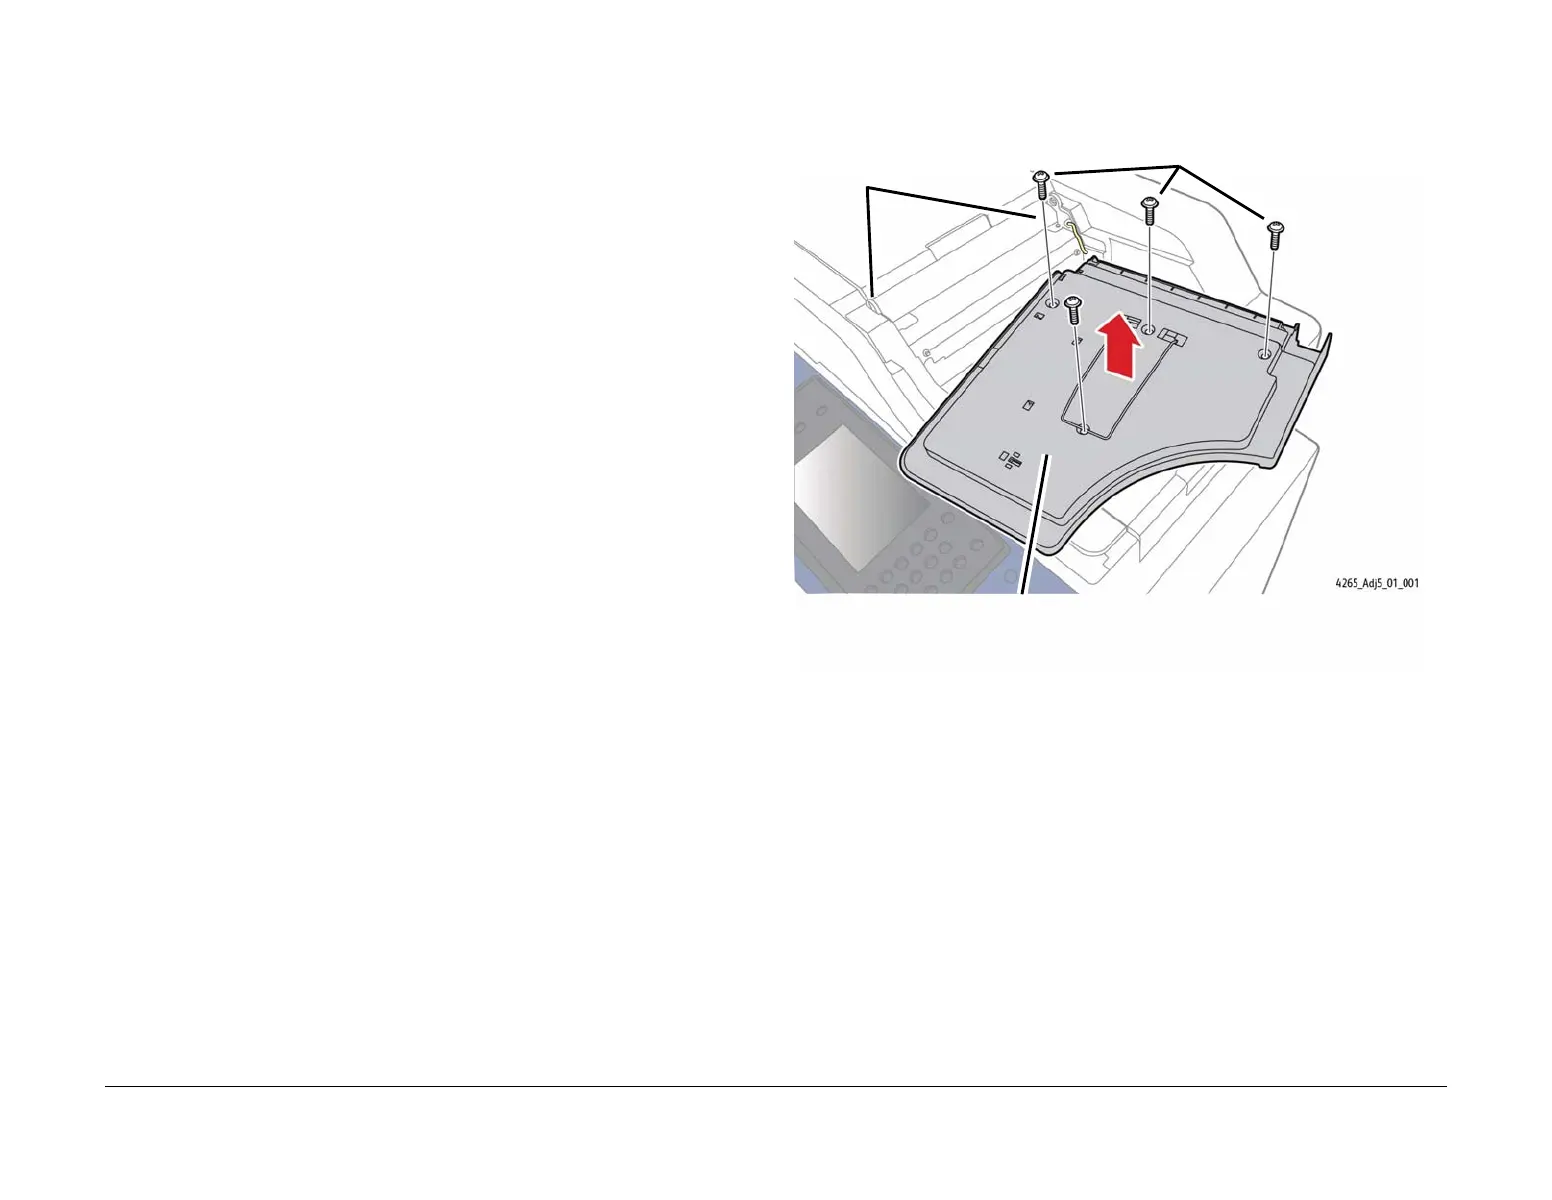
2. Remove the Input Tray Lower Cover (Figure 1).
Figure 1 Removing the Input Tray Lower Cover
1
Dislocate the Input Tray
from the retaining rings in
the DADF frame.
2
Invert the Input Tray and set it down on
the DADF as illustrated.
3
Remove the four mounting screws
and remove the Lower Cover.

 Loading...


