6-14
6
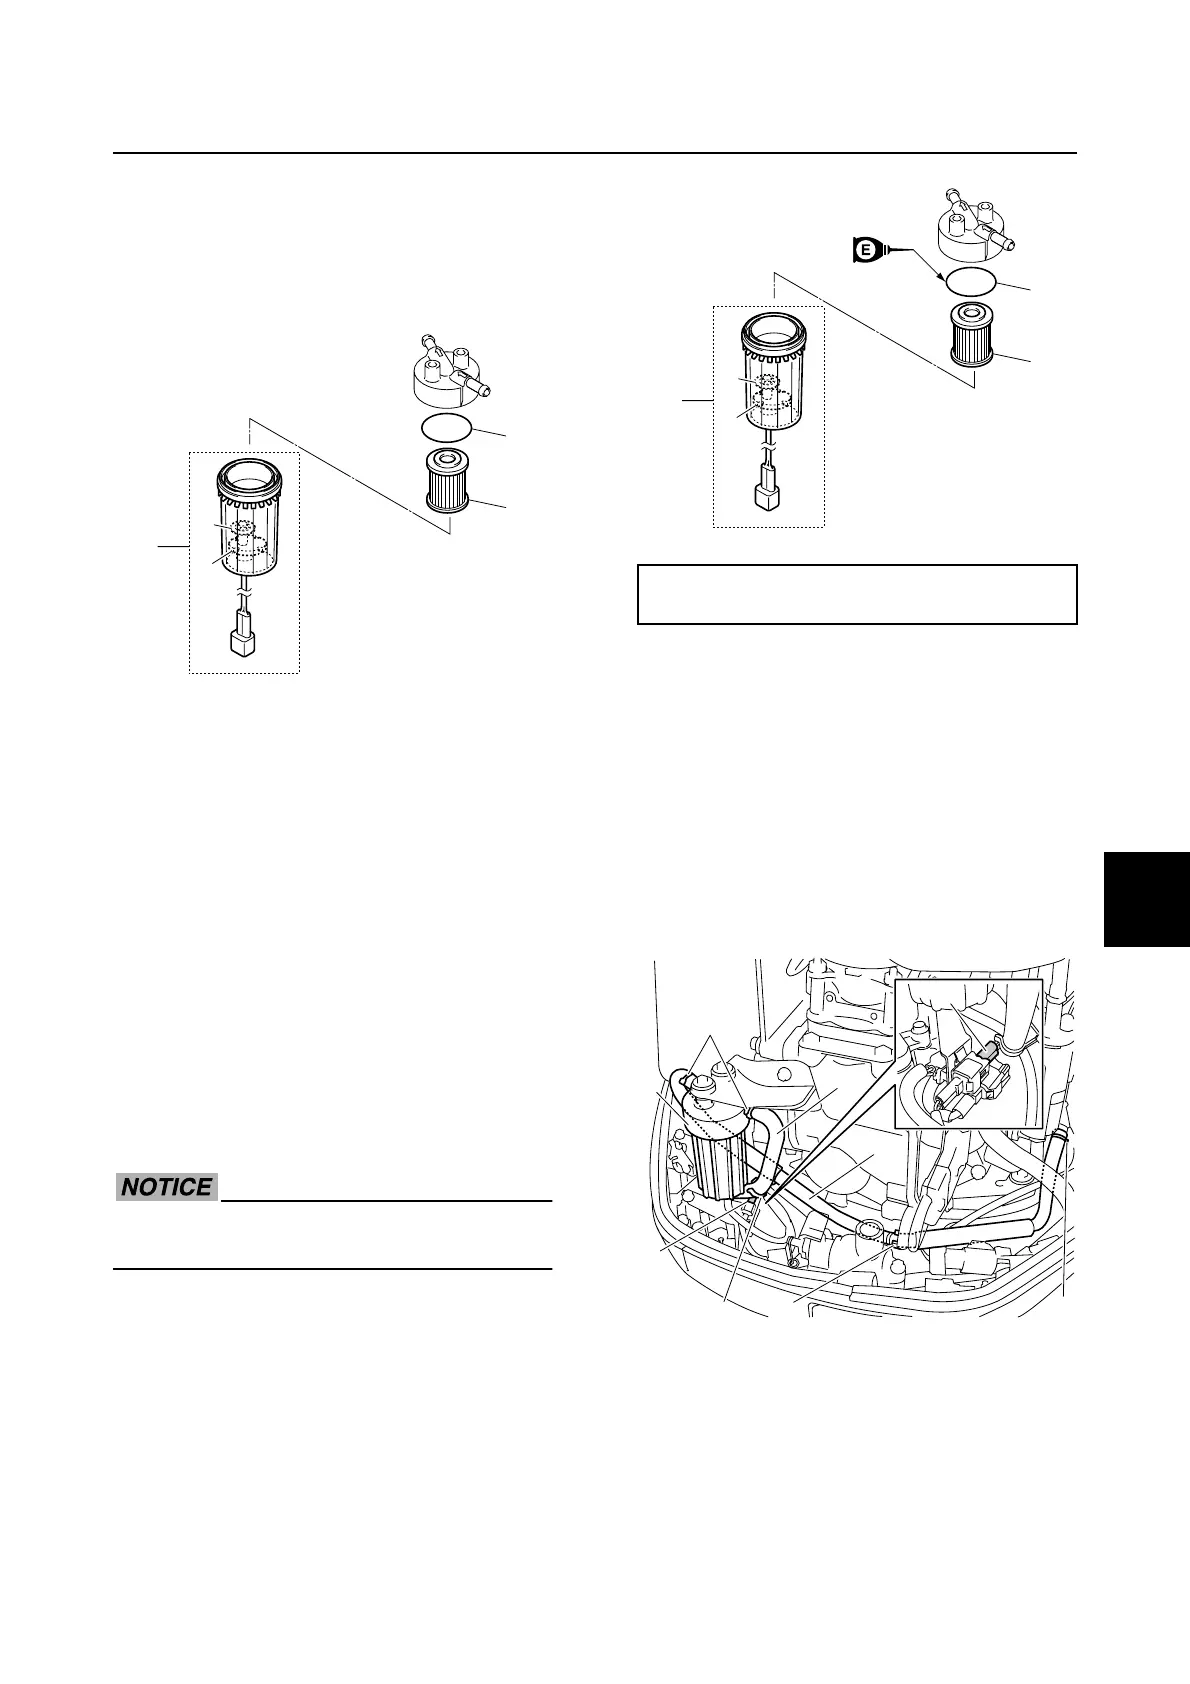
Disassembling the fuel filter
assembly
1. Remove the fuel cup assembly 1, O-ring
2, and fuel filter element 3, and then
remove the clip 4 and float 5.
Checking the fuel filter element
1. Check the fuel filter element. Replace if
there is dirt or residue.
Checking the fuel cup assembly
1. Check the fuel cup assembly. Clean
using straight gasoline if there is foreign
material or replace if cracked. NOTICE:
When cleaning the fuel cup assembly,
do not remove the clip and float.
2. Check the water detection switch. See
“Checking the water detection switch” (5-
43).
Assembling the fuel filter assembly
Do not reuse an O-ring, always replace it
with a new one.
1. Install the float 1 and clip 2 to the fuel
cup assembly 3.
2. Install the fuel filter element 4, a new O-
ring 5, and the fuel cup assembly 3,
and then tighten the fuel cup assembly to
the specified torque.
Installing the fuel filter assembly
1. Install the fuel filter assembly 1.
2. Connect the fuel hoses 2 and 3, and
then fasten them using the plastic ties 4.
3. Fasten the fuel hoses 2 and 3 using the
holders 5 and 6.
4. Connect the water detection switch cou-
pler a.
5. Install the intake manifold (PORT). See
“Installing the intake manifold” (6-18).
1
3
2
4
5
Fuel cup assembly 3:
5 N·m (0.5 kgf·m, 3.7 ft·lb)
3
4
5
2
1
a
a
1
4
2
3
6
4
5
Fuel filter assembly

 Loading...