6-32
6
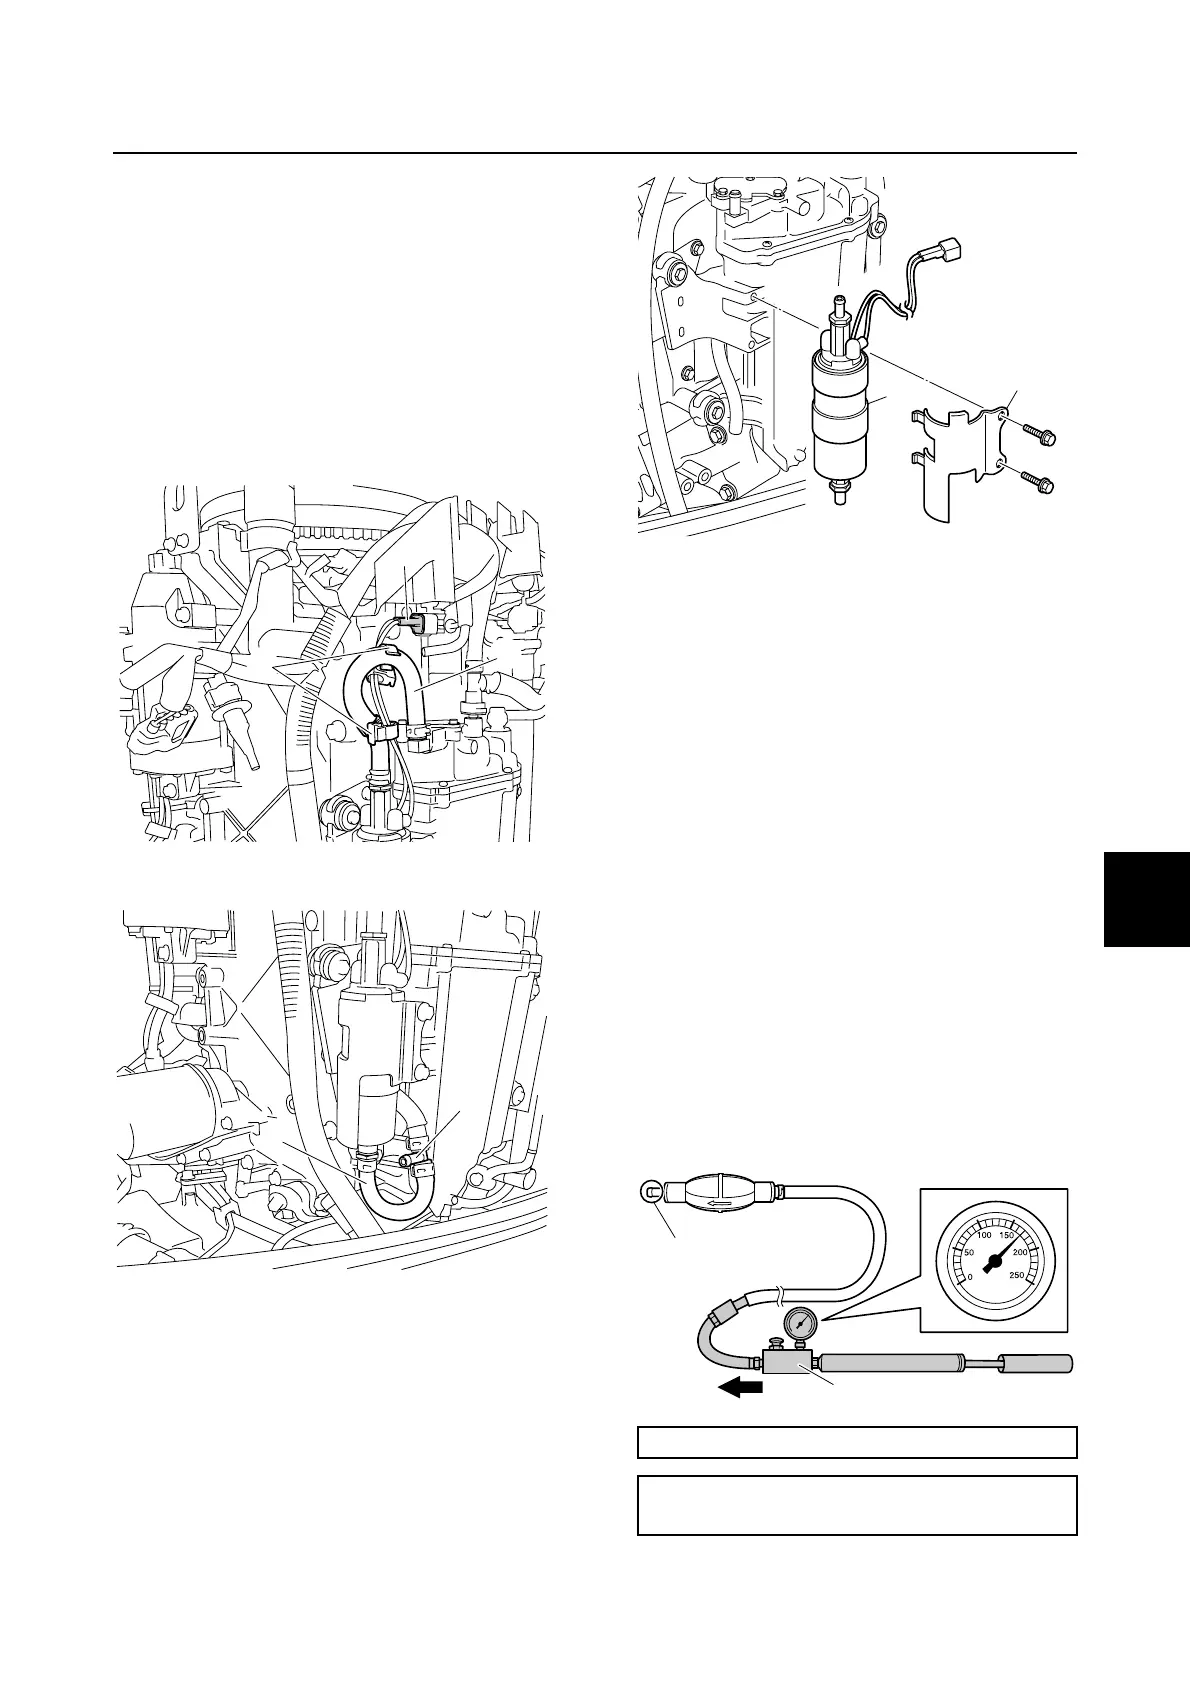
Removing the low-pressure fuel
pump
Cover the fuel components using a rag to
prevent fuel from spilling out.
1. Disconnect the low-pressure fuel pump
coupler a.
2. Remove the holders 1 from the fuel
hose 2, and then disconnect the fuel
hose 2.
3. Remove the fuel hose 3 and joint 4.
4. Remove the cover 5 and low-pressure
fuel pump 6.
Checking the low-pressure fuel
pump
1. Drain the fuel from the vapor separator
and check the condition of the fuel. See
“Draining the fuel” (6-35). If the fuel is
dirty, check and clean the fuel lines.
2. Check the low-pressure fuel pump. See
“Checking the low-pressure fuel pump
and high-pressure fuel pump” (5-46).
Checking the primer pump
1. Connect the special service tool 1 to the
primer pump inlet hose.
2. Cover the fuel outlet a.
3. Apply the specified positive pressure to
check that the pressure is maintained for
at least 30 seconds. Replace the primer
pump if it does not maintain pressure.
1
2
a
3
4
Leakage tester 1: 90890-06840
Specified positive pressure:
170.0 kPa (1.70 kgf/cm
2
, 24.7 psi)
5
6
a
1
Low-pressure fuel pump

 Loading...