23
DriveClutchGASOLINEVEHICLE-CLUTCHES
5.Inspecttheprimaryweights(8)andthehubcastingforwear.Iftheprimaryweightsshowsignstheyaretouching
thecasting,thetipsoftheweightshavewornbeyondspecicationandtheymustbereplaced.
6.Inspectthepinsontheprimaryweights(8).Thereshouldbenomeasurablewear.Replacethemiftheyare
worn,scratched,ordamaged.
7.Inspectthedrivebeltpulleysheavesforexcessivewearordamage.Ifthesheavesareexcessivelywornor
damaged,replacetheentirexedsheave.
DRIVECLUTCHASSEMBLY
1.Installthespring(15)intothecupoftheidlerspacer(17).
2.Installthespacer(14)ontotheshaftofthexedsheave.
3.Installanewspiralbackupring(11)ineachendoftheboreofthemoveablesheave(13).
4.Installthemoveablesheave(13)ontotheshaftofthexedsheave(18).
CAUTION
•Toavoiddamagingthespiralback-uprings,beverycarefulwheninstallingthemoveablesheave.
4.1.Rotatethemoveablesheaveclockwisewhileinstallingitontotheshaft.
4.2.Installtheretainingring(6)(Figure23-2,Page23-4).
5.Installtheprimaryweights(3)onthemountingpins(4)(Figure23-9,Page23-9).
6.Installawavewasher(1)oneachmountingpin(4).Makesurethattheconcavesideofthewasherfacestheside
oftheprimaryweight(3)withthesmallguidepinprotrudingfromit(Figure23-9,Page23-9).
7.Installthesecondaryweights(2)ontothemountingpins(4)withtheweightpinsonthesecondaryweights
pointingawayfromtheprimaryweights(3).Thewavewashersshouldbebetweentheprimaryandsecondary
weights(Figure23-9,Page23-9).
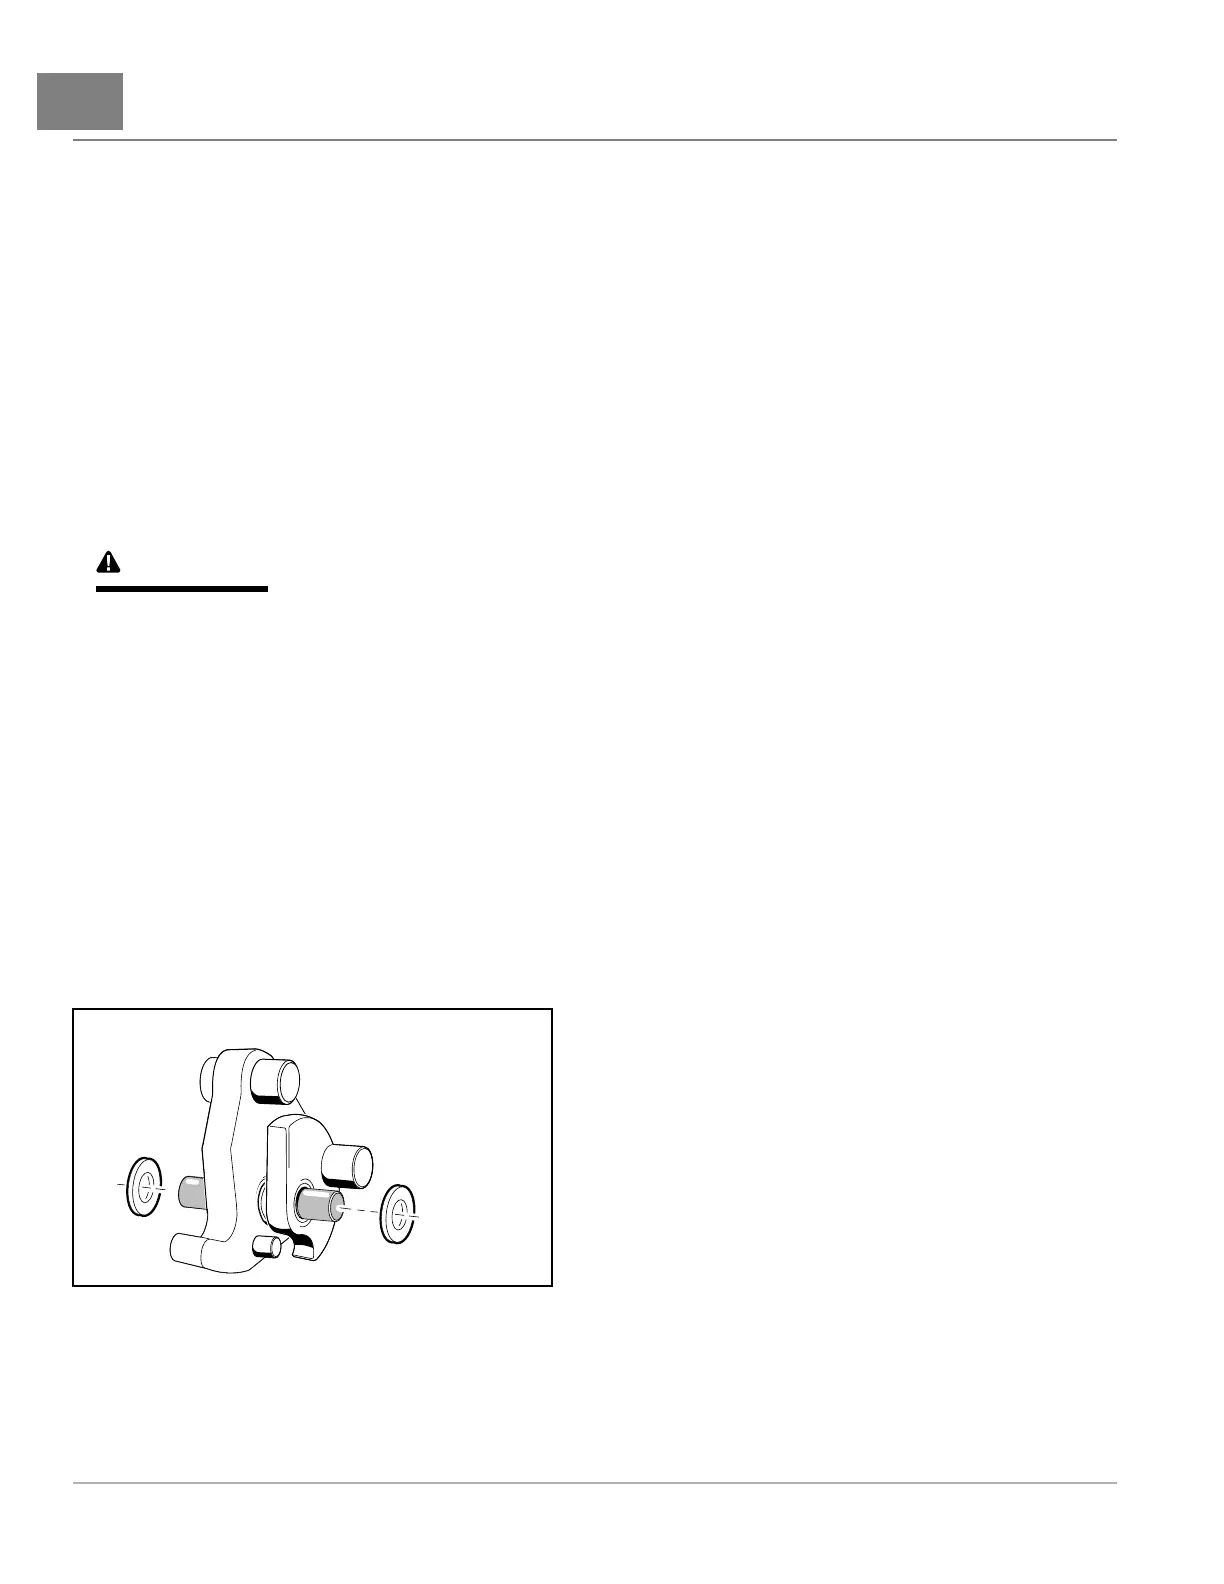
8.Installwhiteplasticatwashersoneachendofthemountingpinandpushthemagainsttheoutsidesurfacesof
theweights.Centertheweightsandwashersonthemountingpin(Figure23-11,Page23-10).
9.Installtheweightassembliesintotheslots(4)inthehubcasting(Figure23-8,Page23-8).Makesurethe
mountingpinprotrudesanequalamountoneachsideoftheweightswhentheassembliesareinposition
(Figure23-11,Page23-10).
606
Figure23-11InstallWhiteWashers
10.Installthe1/4-20bolts(1)andwashers(2)andtightenthemto10ft·lb(13N·m)(Figure23-8,Page23-8).
SeefollowingNOTE.
Page23-102020Precedent,Villager2and4MaintenanceandServiceManual

 Loading...