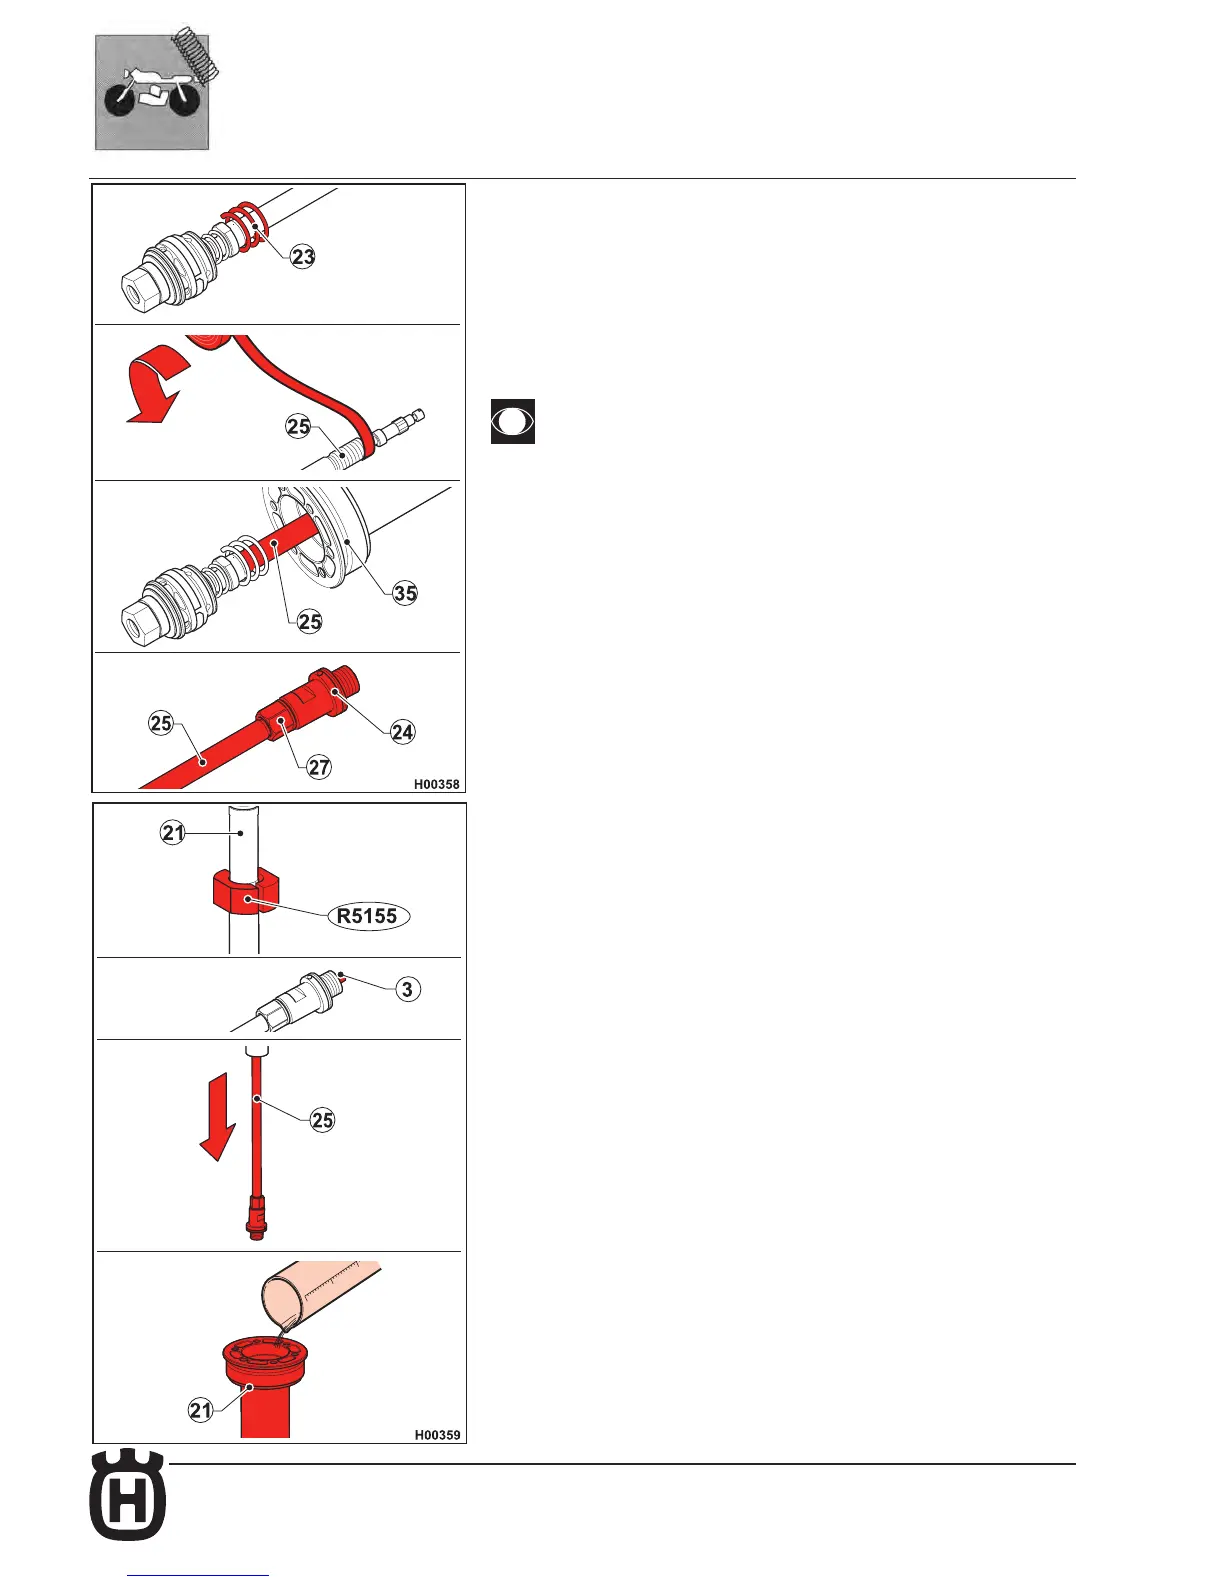
Cartridge assembly
Fit the spring (23) into place on the rod.
Apply adhesive tape over the threaded end of the rod (25). Apply one turn only,
stretching the tape taut and do not overlap it.
Grease the rod and lubricate the seals.
Insert the damper rod (25) into cartridge case (35).
Both damper units are tted with a seal; check seals for wear or damage
before assembly and replace as required. Use great care and use a small
at head screwdriver to ease the damper piston into the case if needed.
Piston should t without interference.
Remove the adhesive tape from rod end (25).
Turn the rebound adjuster to fully closed position (fully clockwise).
Tighten check nut (27) and rebound adjuster (24) nger tight onto the threaded
end of the rod (25).
Hold the rebound adjuster (24) using a 17 mm open-end wrench and tighten
the check nut (27) with another 17 mm open-end wrench to the specied torque
(see Tightening Torque Figures table).
Clamp the cartridge (21) in the vice as shown in the diagram using the suitable
protector (R5155).
Set the rebound adjuster (3) to 15 clicks from fully closed position.
Slide the damper rod (25) fully out (fully extended).
Fill the cartridge case (21) with oil up to about 20 mm below its top edge.
 Loading...