7 - 18 BeneVision N1 Patient Monitor Operator’s Manual
7.7.8.3 Showing ISO Point, J Point, and ST Point Markers
In the waveform area, the ISO point, J point, and ST point marker do not display on the ST segments by default.
To display these markers, follow this procedure:
1. Select the ECG numeric area or waveform area to enter the ECG dialog.
2. Select the ST tab→ select the Setup tab.
3. Switch on Show Markers.
7.7.9 Adjusting ST Measurement Points
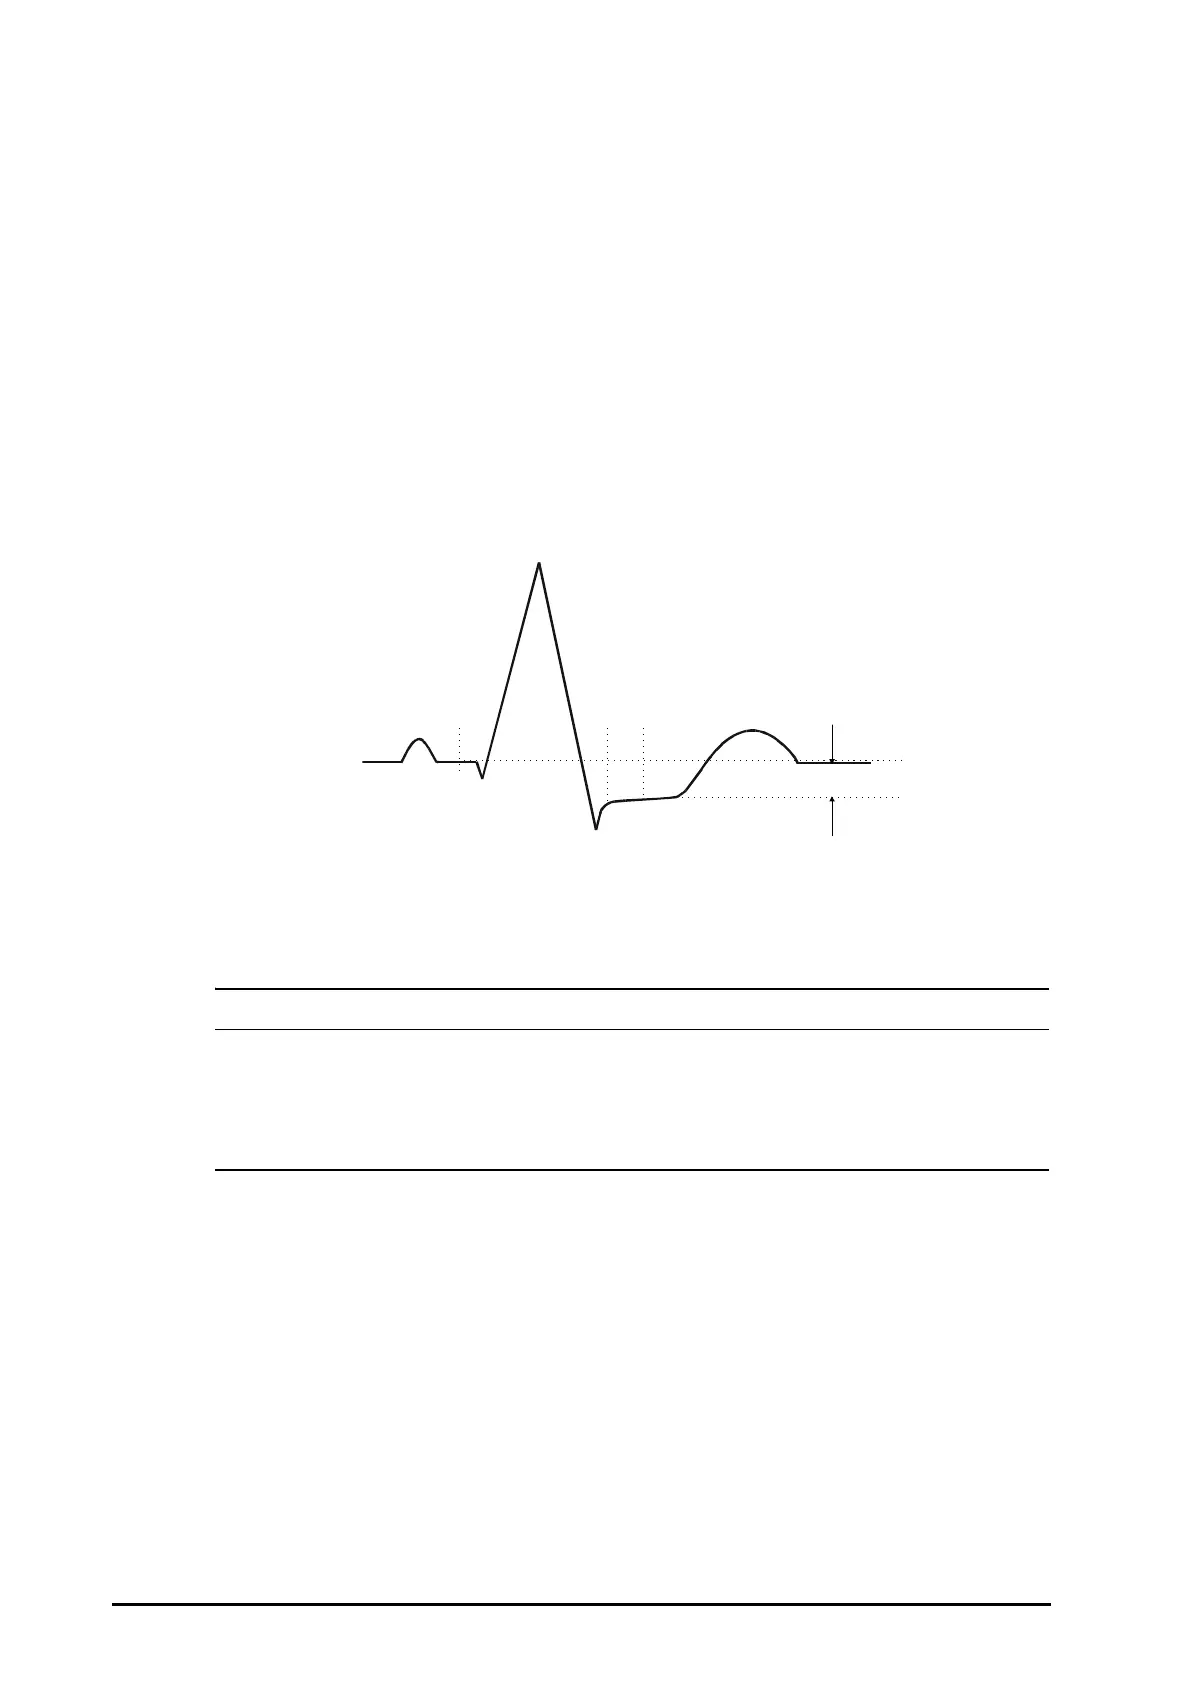
7.7.9.1 About ST Point, ISO Point, and J Point
The ST deviation value for each beat is the potential difference between the isoelectric (ISO) point and the ST
point. The ISO point provides the baseline. The ST point is located between the J point and the start of the T-
wave. The J point is the end of the QRS complex. As the ST point is at a fixed distance away from the J point (40,
60, 80 etc msec), manually adjusting the J point helps you correctly position the ST point.
7.7.9.2 Setting ST Point, ISO Point, and J Point
• If Auto Adjust is Off, or if the patient's heart rate or ECG morphology changes significantly, the ISO
and ST points need to be occasionally adjusted because this may affect the QT interval and thus the
location of the ST point. False ST segment depression or elevation may occur if the isoelectric point
or the ST point is incorrectly set.
• Always ensure that the locations of ST points are appropriate for the patient.
To set the ST point, ISO point, and J point, follow this procedure:
1. Select the ECG numeric area or waveform area to enter the ECG dialog.
2. Select the ST tab→ select the Adjust tab.
3. Set ST Point.
The setting for Auto Adjust defines the method of adjusting the ISO and J point locations. Auto Adjust is
enabled by default. In this case, the locations of the ISO point and J point are automatically determined by the
algorithm. When Auto Adjust is disabled, you need to manually adjust the position of the ISO point and J point
using the arrows at the right sides of ISO and J.
■ The ISO point (isoelectric) location shown is relative to the R-wave peak. Position the ISO point in the
middle of the flattest part of the waveform (between the P and Q waves).
■ The J point location is indicated relative to the R-wave peak. Position the J point at the end of the QRS
complex and the beginning of the ST segment.
( 1 ) IS O p o i n t (2 ) J p o i nt (3 ) S T p o i n t (4 ) S T d e v i a t i o n
 Loading...