When there are multiple camera images in a file, as for a logging image when multiple cameras
are connected, use the << and >> buttons to switch images.
6
Click OK.
The path and file name of the image are displayed under Select image.
7 In the Main Window (layout 0), click the Re-meas. button under Image file meas..
Measurement of the selected image is performed.
Additional Information
About Automatic Remeasurement
Displayed images can be automatically remeasured by selecting Auto Re-meas..
Precautions for Correct Use
When remeasuring an image with the Controller, it is necessary to have a Camera connected
that is appropriate to the image size. For example, if the image file for remeasurement contains
2-megapixel images and a 0.3-megapixel Camera is connected to the Controller or if a Camera
is not connected, measurement will not be performed correctly due to a memory deficiency.
Perform remeasurement after connecting a Camera appropriate to the image size.
6-3-4
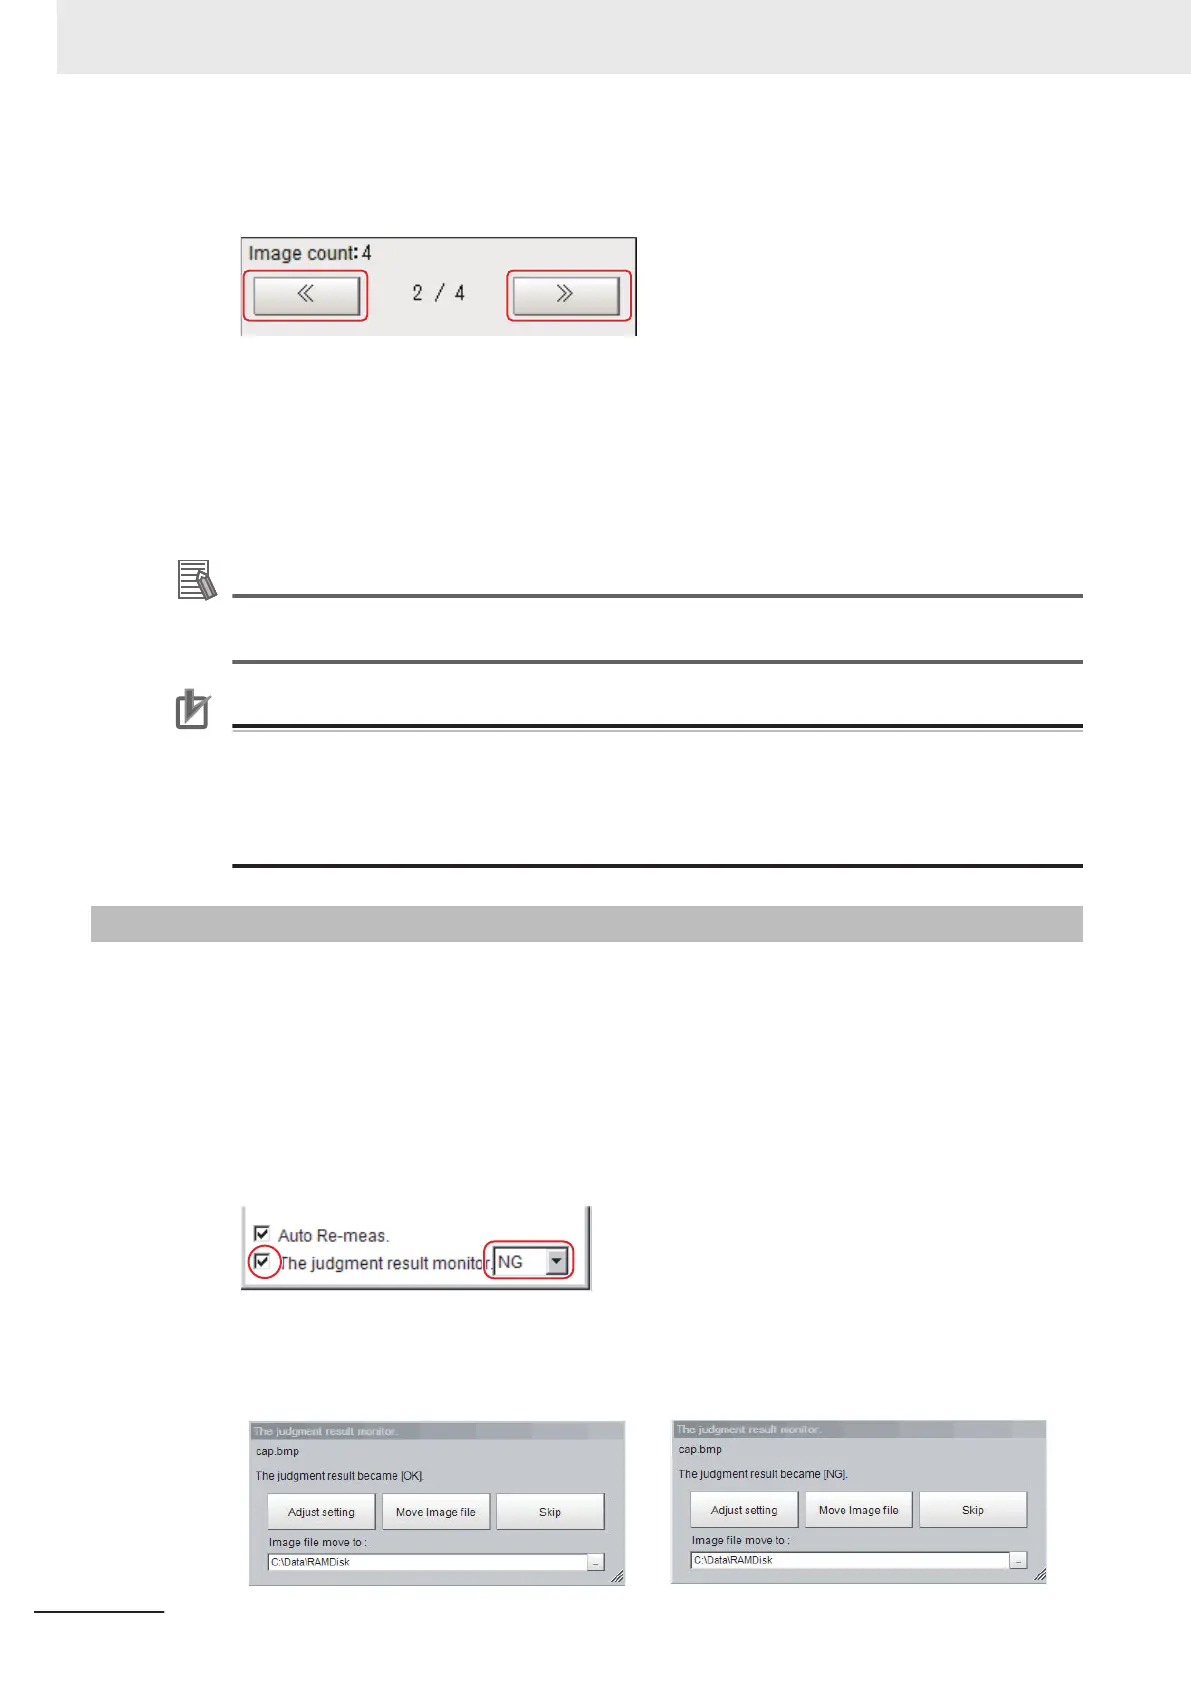
Improving Adjustment Efficiency [Judgement result monitor]
You can make adjustments more efficiently when you need to measure a large amount of image sam-
ples and classify or perform adjustments with each judgement. Files in which there are both NG error
files and OK files can be continuously remeasured automatically, with the system stopping at images
with a specified condition (OK/NG) and moving those files.
1 In the Main Window (layout 0), click the Image file meas. button in the Measurement Pane.
2 Select The judgment result monitor and set the judgement conditions for identification.
If the specified judgement condition is achieved when continuous measurement is performed,
measurement stops and the following message is displayed.
If OK Is Selected If NG Is Selected
6 Performing Measurement and Adjustment
6 - 24
FH/FHV Series Vision System User’s Manual (Z365-E1)
 Loading...