SmartPAC 2 User Manual 1126700
SmartView C-9
4. Click in the Press Name window, and type “Demo Press 1” as shown in Figure C-5.
5. Click on the Add button. Your entries are displayed in the large window beneath the
Network Name and Press Name windows.
6. Click in the User Name window, and type your name.
7. Click on the Submit Changes button.
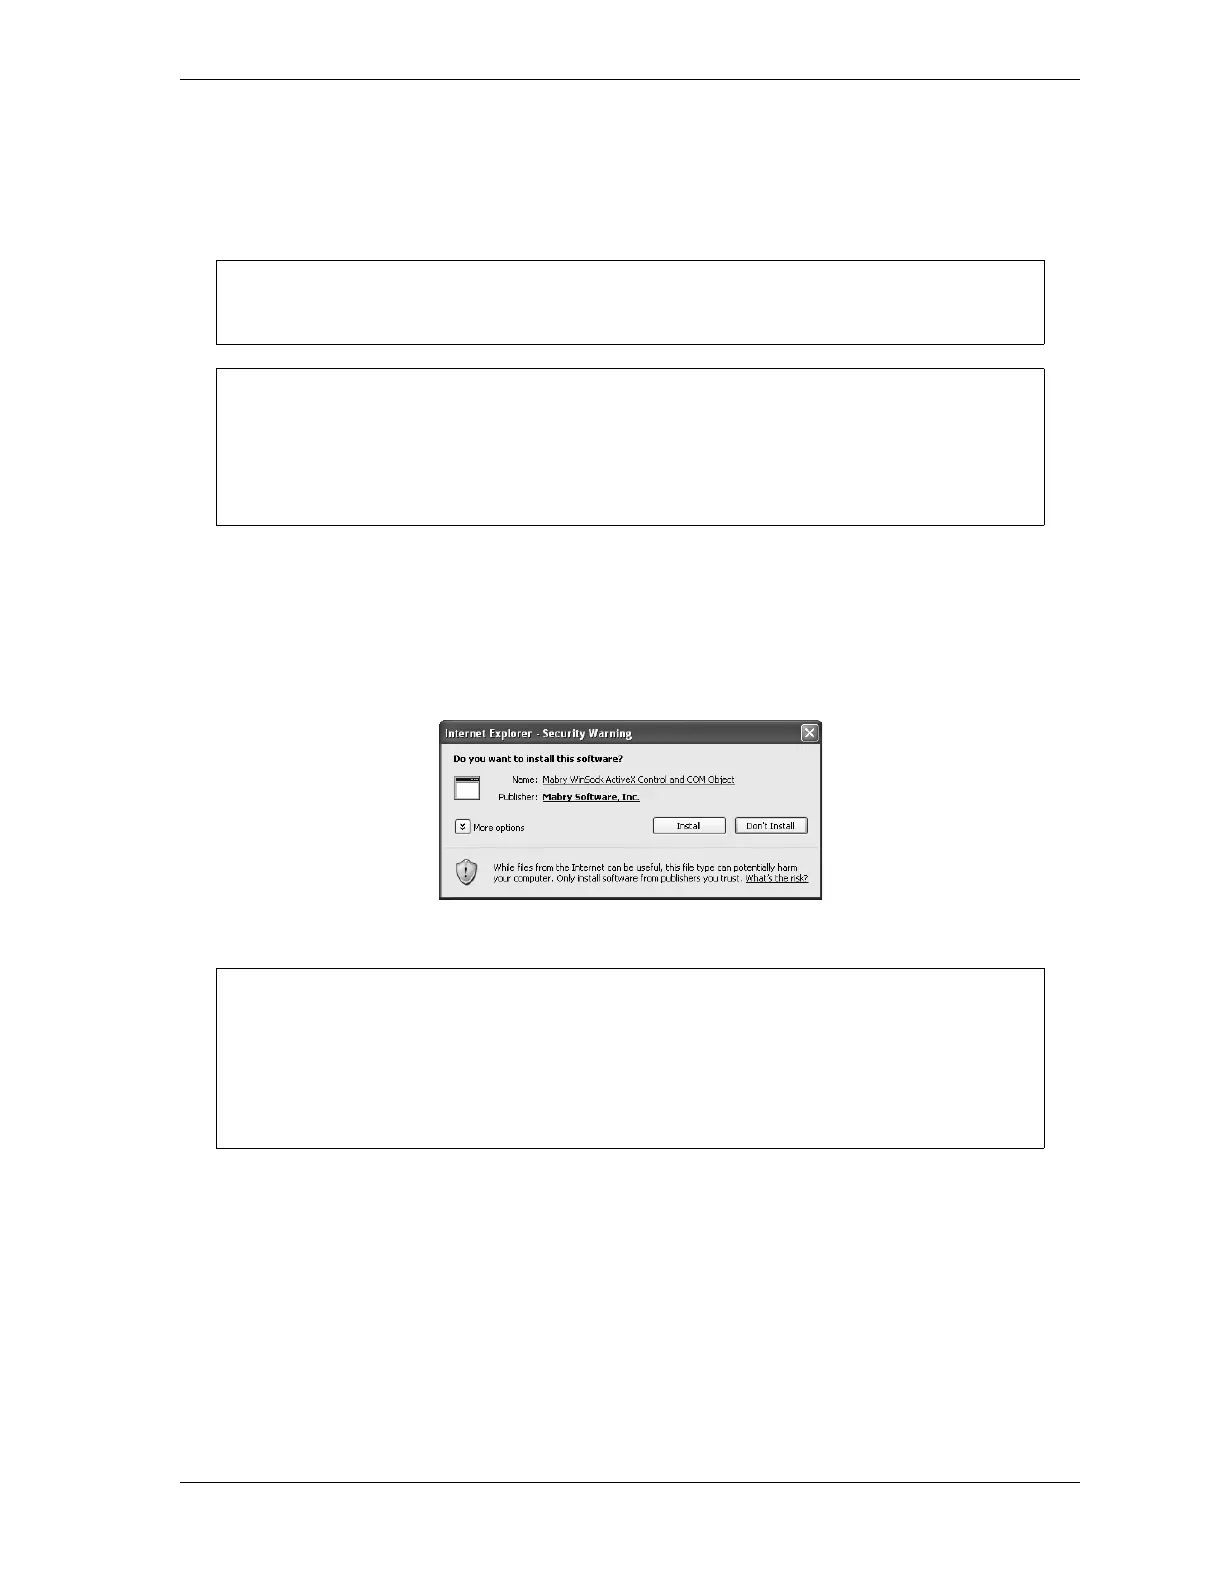
8. When the window shown in Figure C-6 displays, asking if you want to download the
Mabry WinSock ActiveX control, click on the Install button.
9. The SmartView Main Page (see Figure C-7, page C-10) should now appear. Click on the
Add to Favorites button to save this web site for future use.
You can also type network and press names directly into the large window.
Additional Demo Press simulations are available. To add these simulations, repeat steps
3 through 5, but instead of using “Demo1,” type “Demo2,” etc. in the Network Name field.
You can enter names with up to two digits (e.g., Demo Press 35) in the Press Name
window. These Demos are for testing and demonstration purposes.
Figure C-6. Mabry Winsock ActiveX Control Window
The Mabry WinSock ActiveX control enables you to run SmartView on your browser. This
software must be installed on your computer in order for SmartView to function properly.
You may be prompted to install the software prior to this step. If you are not prompted to
install this control, check to make sure your browser security settings are correct (see step
5, page C-7), or contact your IT department for more information.
 Loading...