1126700 SmartPAC 2 User Manual
2-32 Installation
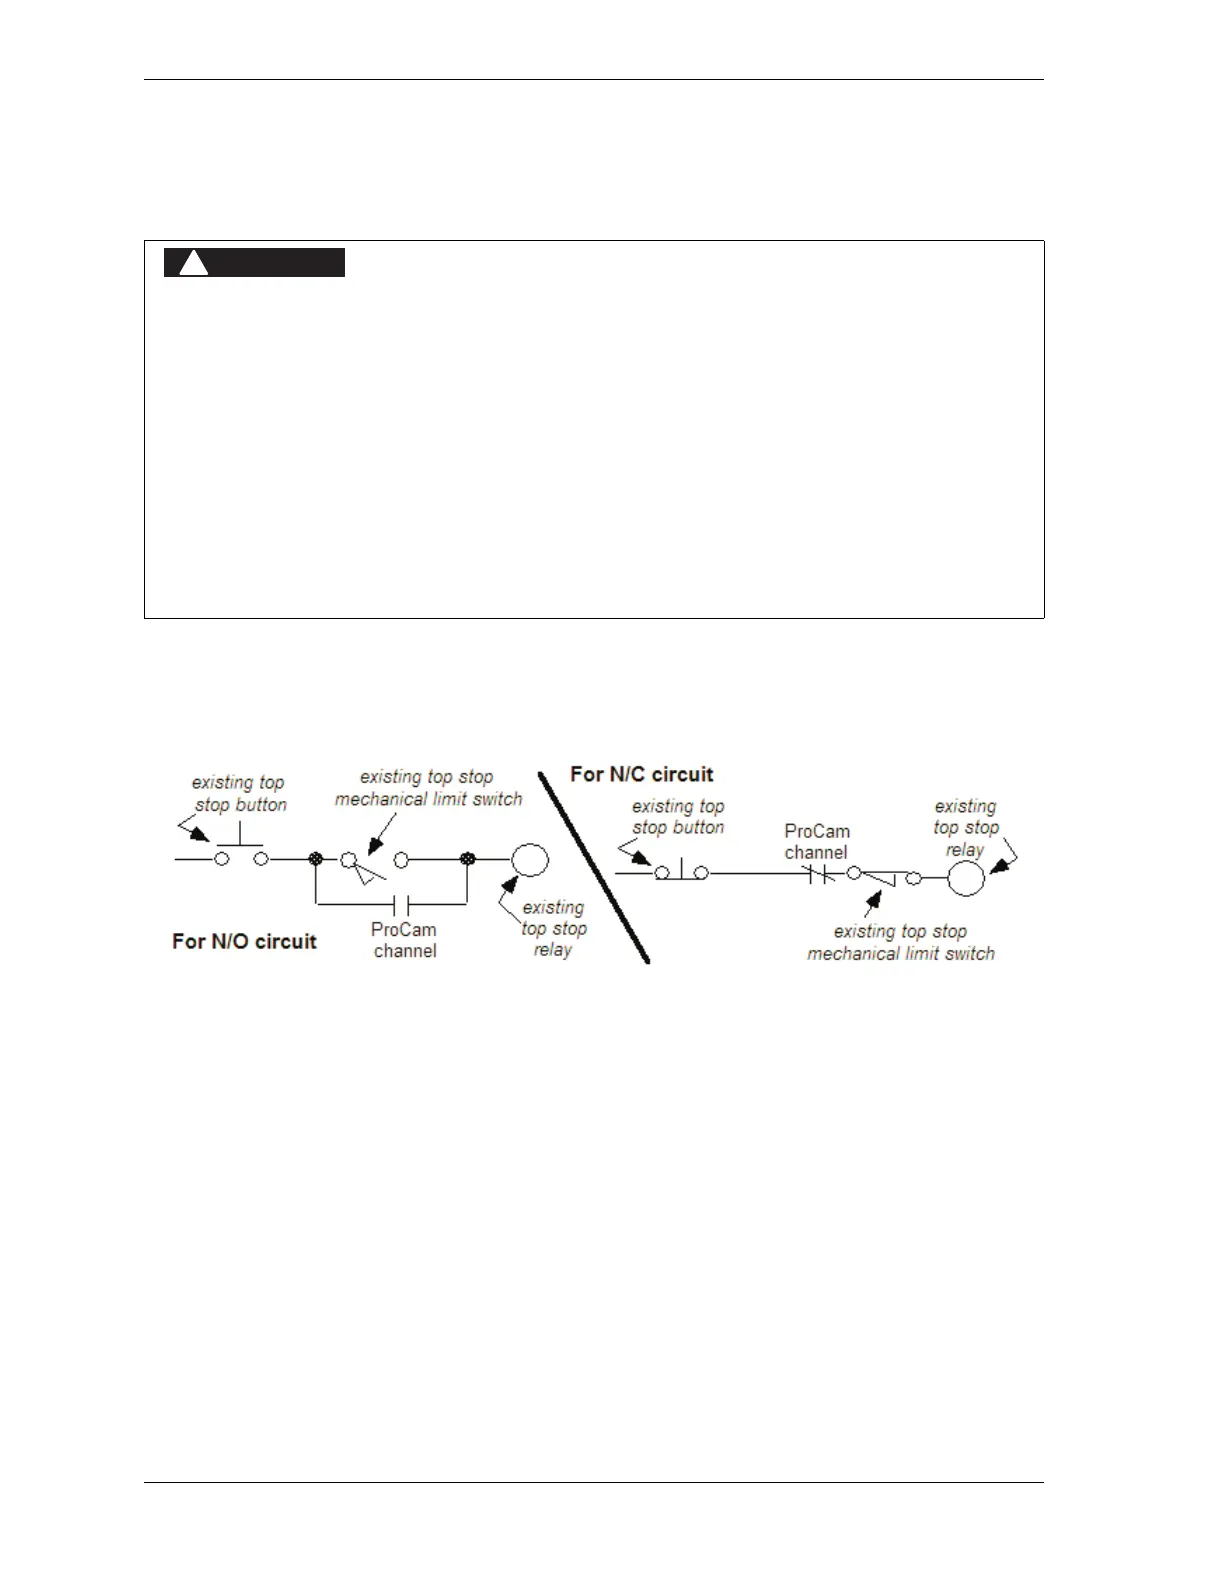
Wiring the ProCamPAC Output with Your Mechanical
Top Stop Cam Switch (Optional)
The diagrams provided in Figure 2-19 show how to wire ProCamPAC and your mechanical
cam switch for Top Stop. This optional top-stop wiring only aids in adjusting the top stop and
in utilizing the auto advance feature to mimic Auto-compensated Top Stop (ACTS).
Check your wiring by performing the appropriate test:
• For an N/O circuit: Temporarily program the ProCamPAC channel used for this wiring so
that it is “off” (open) all the time (i.e., On = 0°, Off = 0°). Confirm that the press will top-
stop.
• For an N/C circuit: Temporarily program the ProCamPAC channel used for this wiring so
that it is “on” (closed) all the time (i.e., On = 1°, Off = 0°). Confirm that the press will top-
stop.
PROGRAMMABLE CAM SWITCH NOT FOR SAFETY USE
• Use SmartPAC 2’s programmable cam switch to control auxiliary functions only. The
SmartPAC 2 programmable cam capability should never be used to provide timing
signals for any safety use including clutch/brake control or muting of light curtains.
• Ensure that the clutch/brake control is control reliable on its own. The wiring shown
below does not affect or improve the safety of the system. This optional top-stop wiring
only aids in adjusting the top stop and in utilizing the auto advance feature to mimic
Auto-compensated Top Stop (ACTS).
• Test the system after wiring, as described below, to ensure proper functioning of the
Top-stop circuit.
Failure to comply with these instructions will result in death or serious injury.
Figure 2-19. Optional Top-Stop Wiring
 Loading...