1126700 SmartPAC 2 User Manual
2-10 Installation
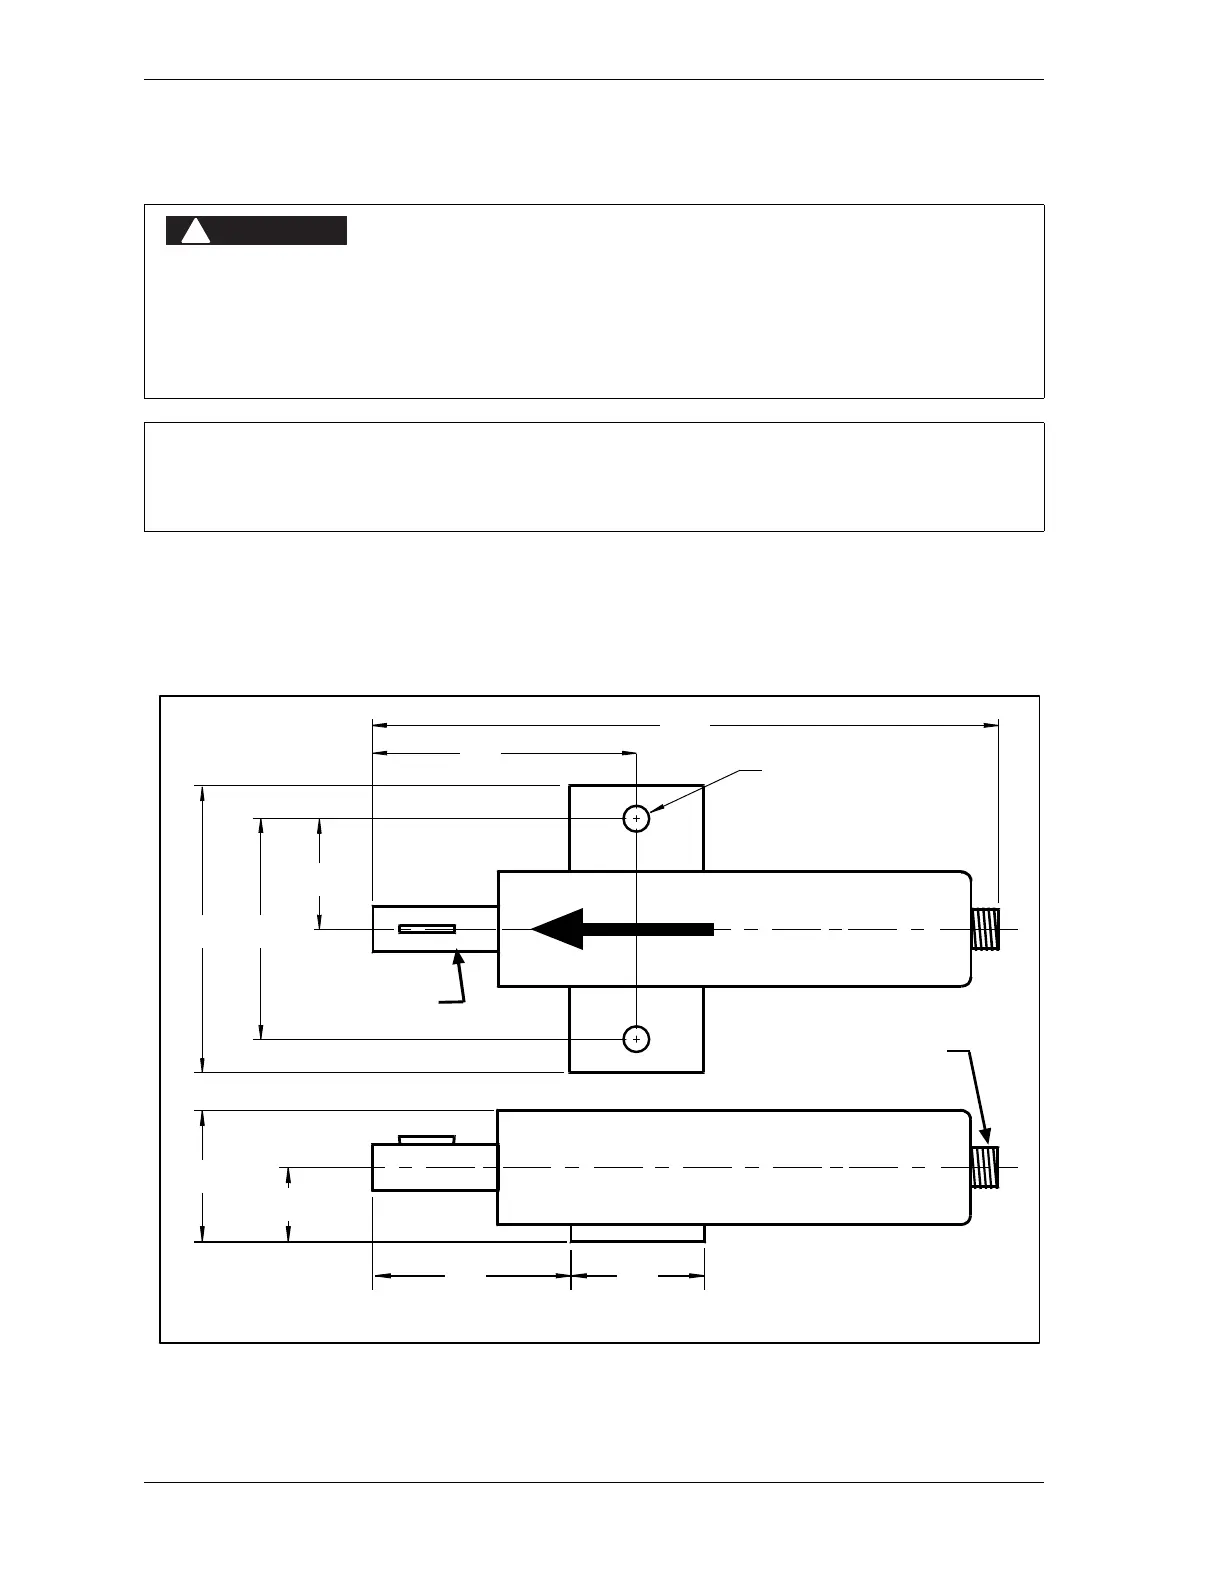
Installing the Resolver
The resolver (see Figure 2-6 for dimensions) provides SmartPAC 2 with the exact position of
the crankshaft at every angle throughout the stroke (see Resolver-based Operation, page 1-4).
To deliver this precision, the resolver must be driven smoothly at a 1:1 ratio with the
crankshaft.
RESOLVER OUT OF SYNCH WITH CRANKSHAFT
Retain the sprockets on the crankshaft and resolver shaft mechanically so they cannot shift or
move out of radial alignment. Be sure that the key on the resolver shaft retains the resolver
sprocket. Use a pin or other method to fix the location of the sprocket on the crankshaft.
Failure to comply with these instructions will result in death or serious injury.
If you are replacing a resolver, follow the instructions below to install the new resolver, then refer to
Zeroing the Resolver, page 2-35 for additional instructions.
Figure 2-6. Resolver Dimensions (“Military-style” Connector)
Resolver shown in zero-degrees position, with key perpendicular to base
3.62
(91.9)
0.34 (8.6) dia holes
2 places
RESOLVER IS AT ZERO WHEN
KEYWAY IS ALIGNED WITH ARROW
3.00
(76.2)
3.75
(95.3)
1.50
(38.1)
9.16
(232.7)
2.75
(69.9)
1.06
(26.9)
1.75
(44.5)
2.00
(50.8)
Electrical connector
for cable
3/4” dia. shaft (19.05)
standard key in keyway
 Loading...