1126700 SmartPAC 2 User Manual
2-6 Installation
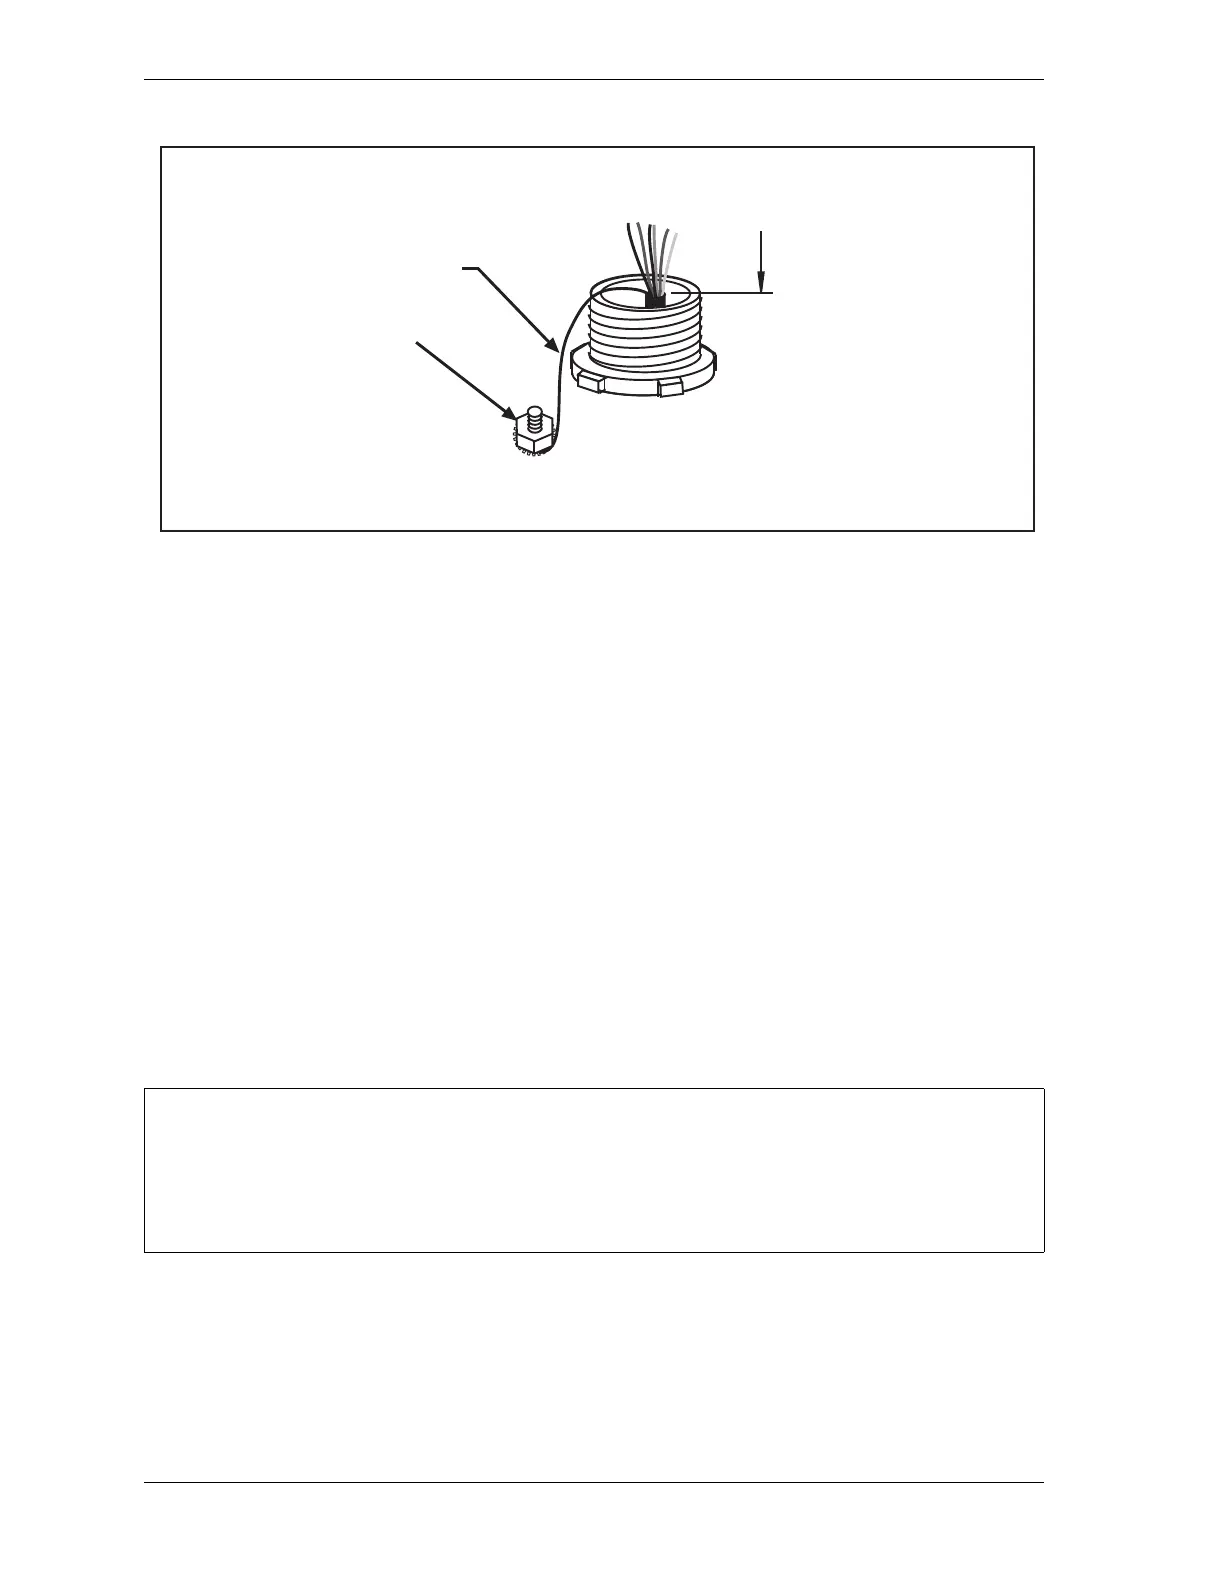
For each shielded cable, perform the following steps, referring to Figure 2-3.
1. Strip the cable jacket as far as the end of the conduit fitting.
2. Cut the drain wire to a length that allows it to wrap at least once around the nearest
grounding stud. Loosen the nut on the stud, wrap the drain wire clockwise around the
stud, and tighten down the nut.
3. Connect the rest of the wires in the cable to the terminal block.
Checking the Press
Before starting the installation, remove the die from the press and run the press in all its
operating modes–Inch, Single-stroke, and Continuous. Make sure the press has working top-
stop and emergency-stop circuits. Verification that the press operates and stops properly is
extremely important because SmartPAC 2 will be connected to the press stop circuits. Do not
forget to mark on your electrical prints where you connect SmartPAC 2. Set the press ram to
top dead center (TDC).
Figure 2-3. Connecting Shield Drain Wire to Ground Stud
NOTICE
MOVE RAM TO TDC BEFORE INSTALLING SMARTPAC 2
This is an important step because the press must be at top dead center (TDC) when you make
final adjustments for the resolver. Be accurate when setting the press to TDC. Set to 0° ±2°. Use
a dial indicator on the face of the ram if necessary.
Secure drain wire
under nut on
ground stud
Drain wire
Strip cable jacket
as far as end of
conduit fitting
 Loading...