5. ROUTES
5-3
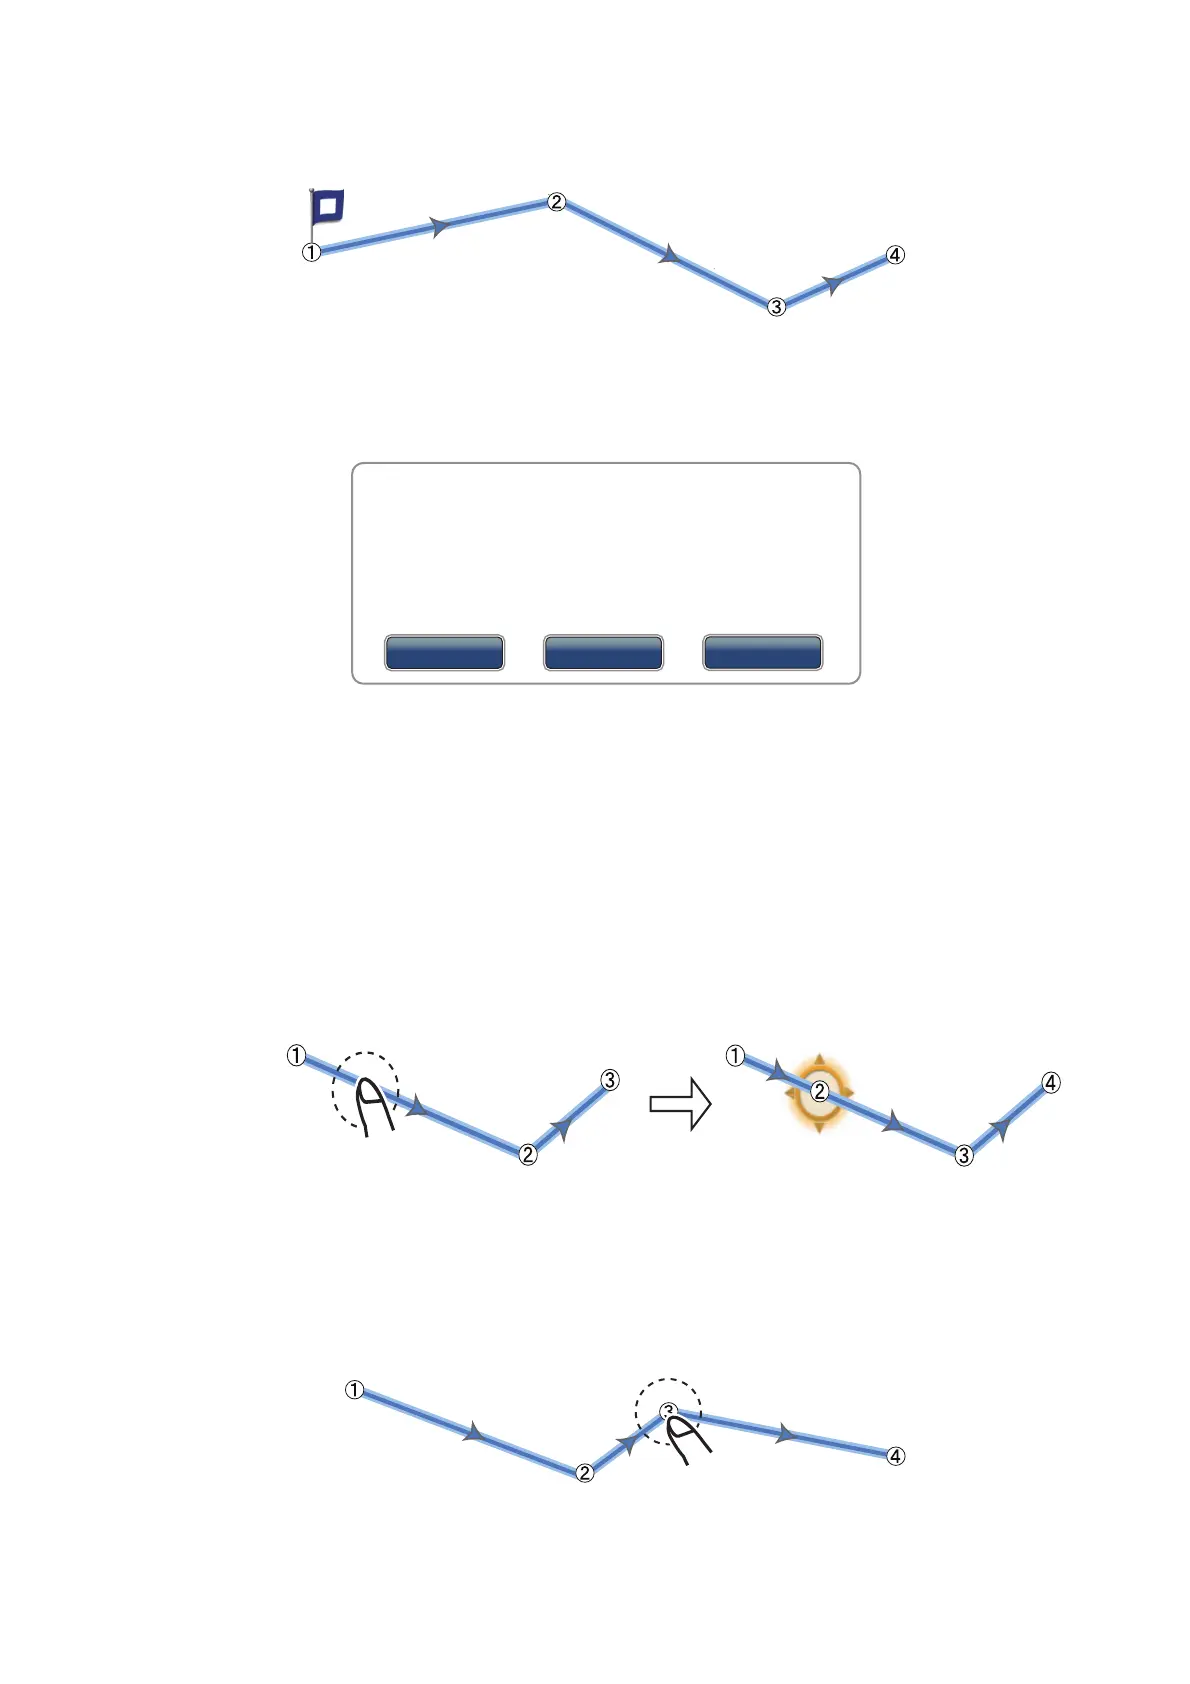
4. Select the next route point in the route.
Repeat this step to enter all route points. Each route point is numbered.
5. At the last route point, select [End Route] at the top right-hand corner of the screen
to complete the route. The flag mark disappears and the following window ap-
pears.
The route is automatically named. The default route name is “RTE” plus the date
(e.g. RTE 2012-03-01). Select [Save]. If necessary, select [Rename] to change
the route name. The route is saved to the routes list.
5.2.3 How to insert a route point on a route
You can insert a new route point on a route leg.
1. Select a position on a route leg to insert a route point.
2. Select [Insert] from the pop-up menu. The blue square marks the position selected
and is highlighted. The route point is numbered according to its position in the
route, and the succeeding route points are renumbered.
3. Select [End Move] at the top right-hand corner of the screen.
5.2.4 How to move a route point on a route
You can move a route point on a route.
1. Select a route point on a route to display the pop-up menu.
1st route point (starting point)
2nd route
point
3rd route point
4th route point
A new route has been created under this name:
Rename
Save
Cancel
RTE 2012-03-01
 Loading...