1. OPERATIONAL OVERVIEW
1-30
1.17 How to Enter Heading
Choose manual or automatic heading input as follows:
1. Right-click anywhere in the Sensor information box to show the context-sensitive
menu.
2. Click [Select Sensor] then click [Setting].
3. Use the arrow buttons to select the [HDG] page.
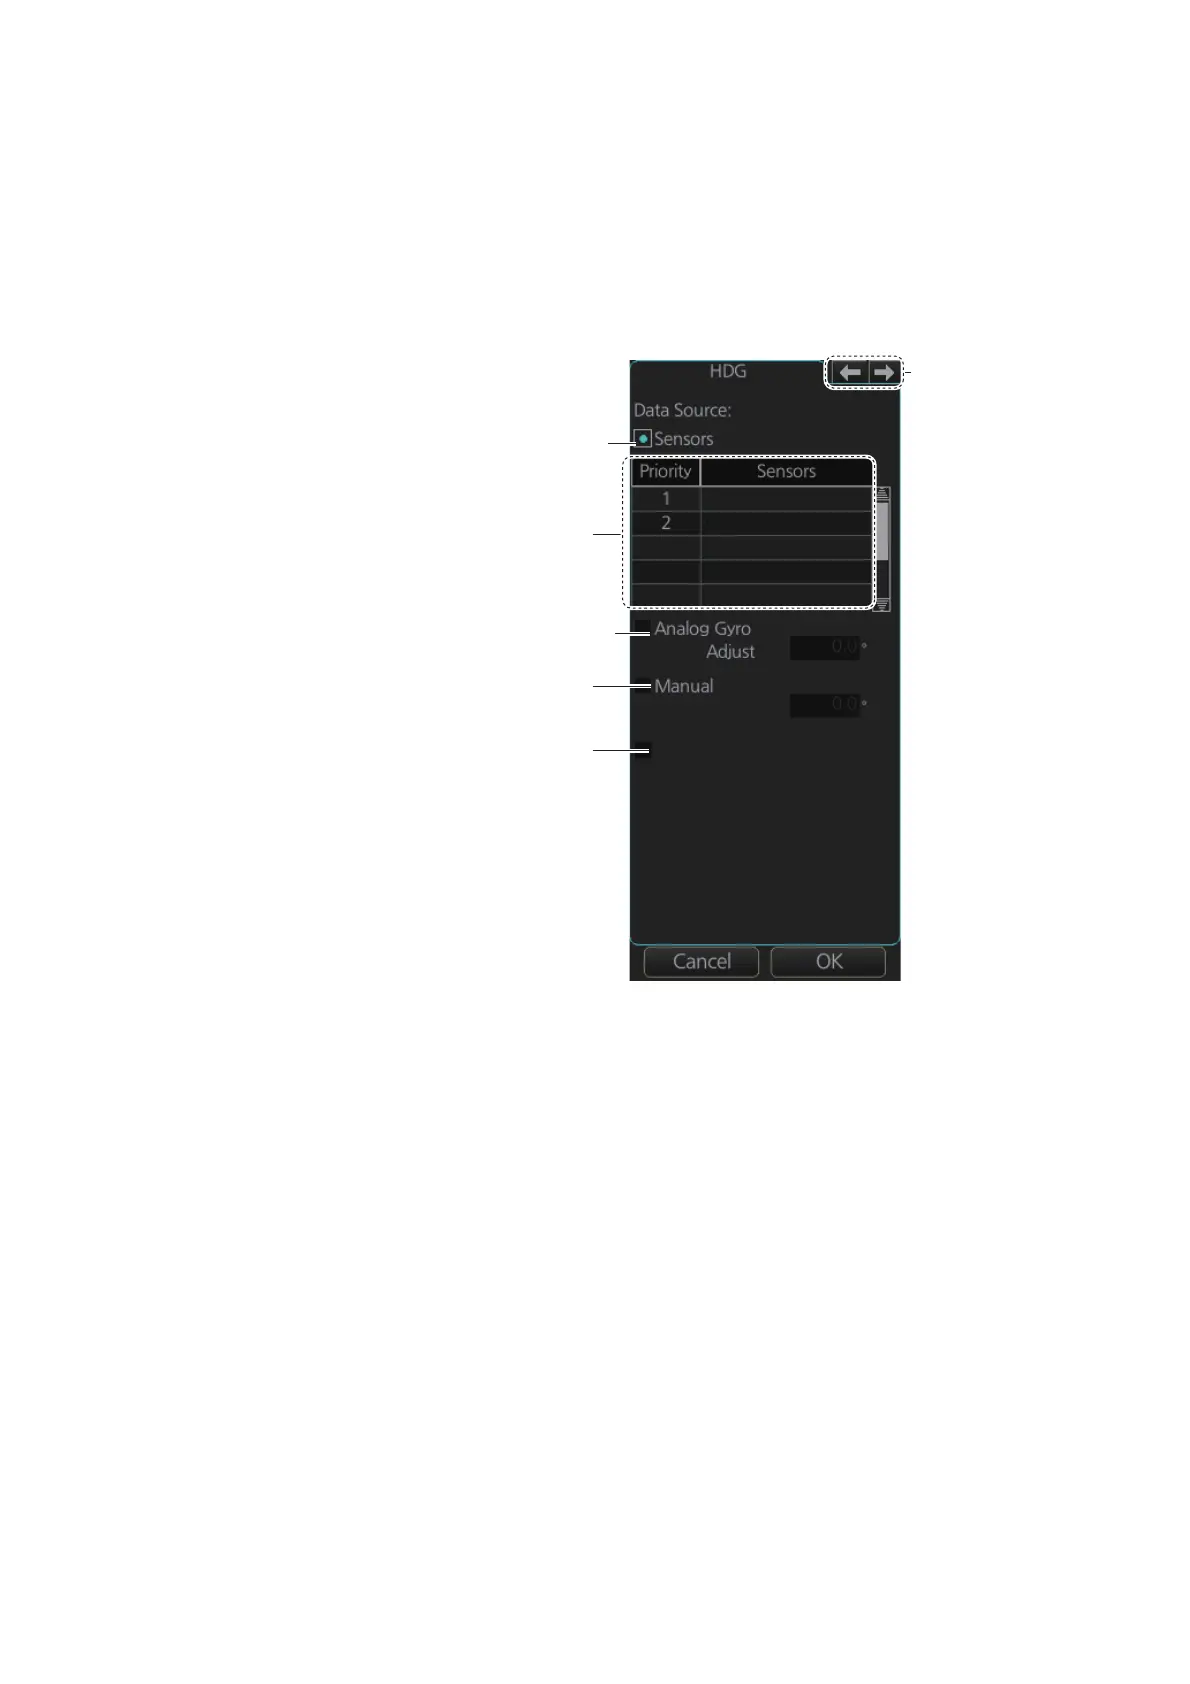
HDG page
4. For automatic input, follow the procedure below. For manual input, go to step
5.
1) Check [Sensors].
2) Set the priority for the heading sensors. Click the triangle on any line then se-
lect the sensor to set as the primary source of heading. All other sensors are
then set as secondary source. Only one sensor can be primary while the oth-
ers can be secondary. If a heading sensor is changed from secondary to pri-
mary state and another heading sensor was selected as primary, then that
sensor previously selected to primary state is then automatically selected to
secondary state.
3) Go to step 6.
5. For manual input, check the [Manual] box. Click the heading input box to show
the up and down arrows. Click the arrows to set heading.
6. Click the [OK] button to save the settings then click the [MENU] bar to close the
menu.
Heading sensor list
Analog gyro heading
Check for automatic heading input
GY001
2
Manual heading input
(not shown on IMO type)
Gyro Correction
[Gyro Correction] is shown when a
autopilot which is compliant with
IEC 62065 Ed. 2 is connected.
 Loading...