5-10 Published 7-23-2020, Control # 668-02
SET-UP AND INSTALLATION GRT9165 OPERATOR MANUAL
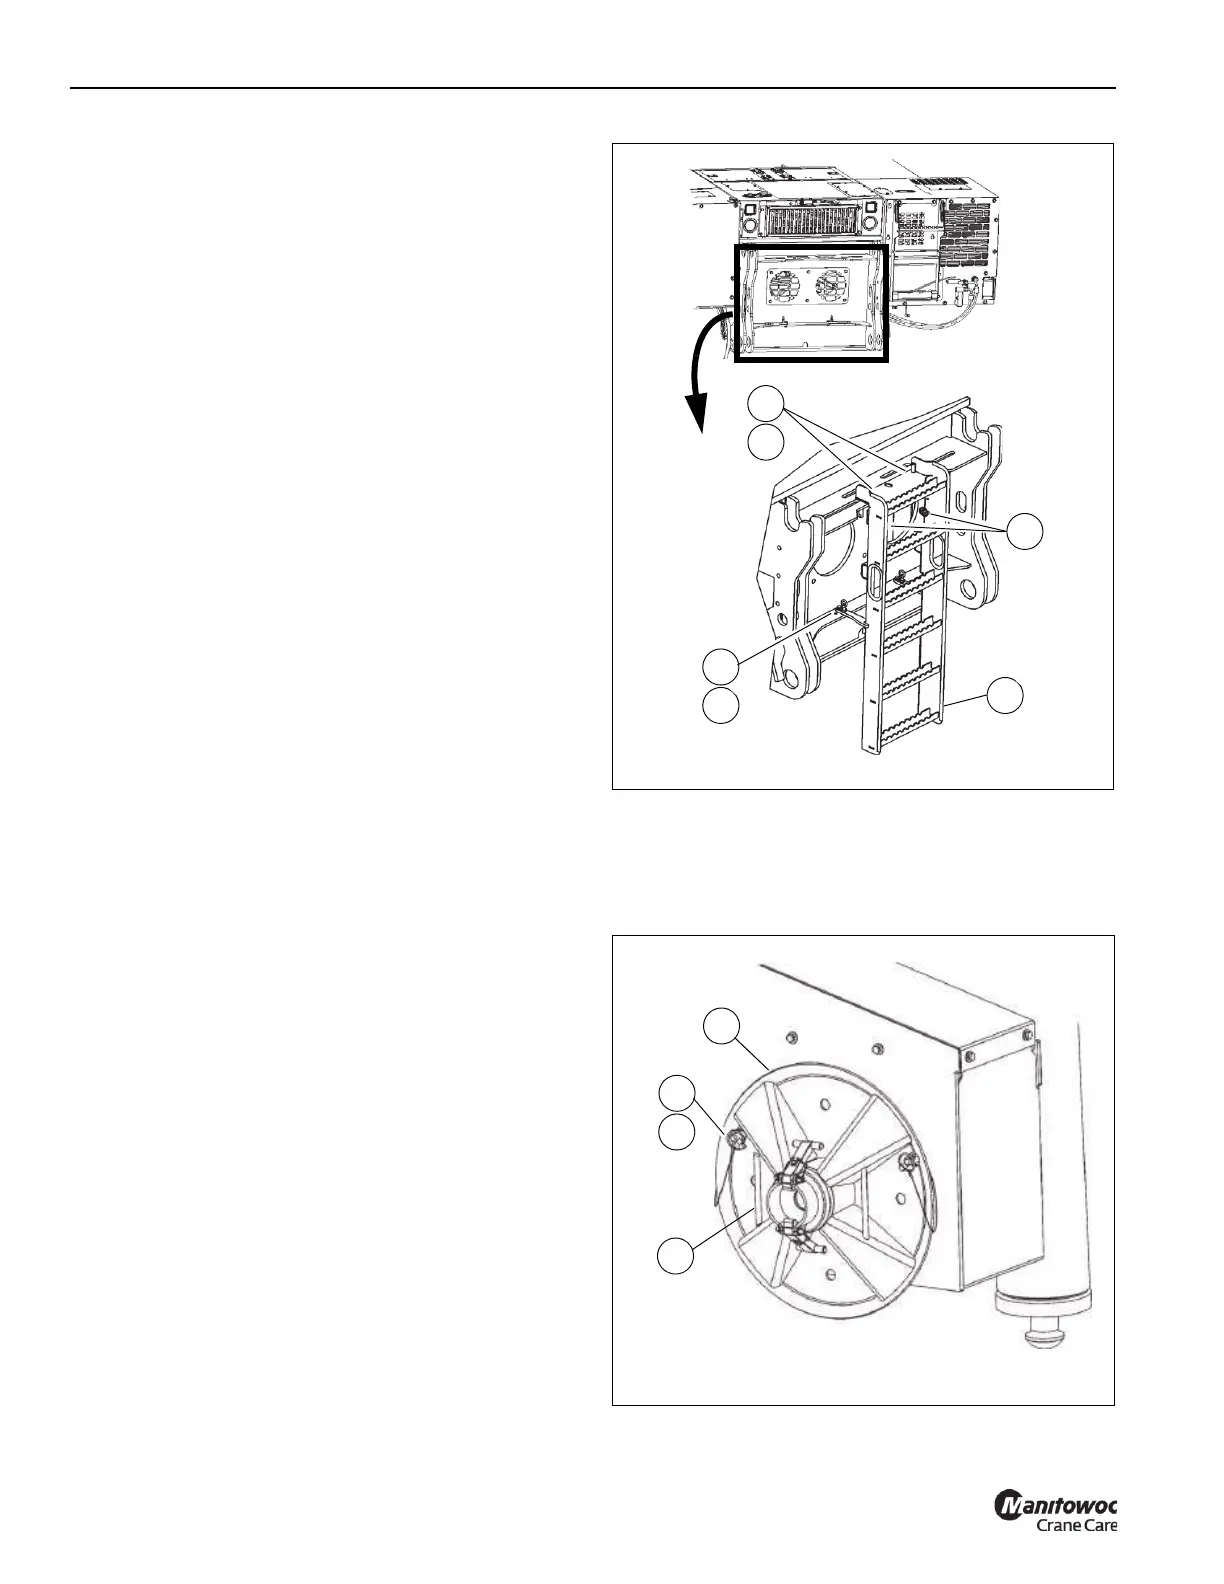
Stowing the Auxiliary Ladder for Transport
NOTE: The auxiliary ladder weighs approximately 11.5 kg
(25.0 lb).
1. Remove the auxiliary ladder (1, Figure 5-8) from the
installed position.
2. Slide the auxiliary ladder (1) in to the stowage bracket
(2).
3. Secure the auxiliary ladder (1) to the bracket with the
ladder quick pin (3). Secure the other ladder quick pin as
necessary.
Installing the Auxiliary Ladder
Use this procedure to install the auxiliary ladder (1,
Figure 5-8) in the front and rear locations. Use the front and
rear ladder locations to access the crane decking.
NOTE: The auxiliary ladder weighs approximately 11.5 kg
(25.0 lb).
1. Remove the quick pin (3, Figure 5-8). Remove the
auxiliary ladder (1) from the stowage bracket (2).
2. Insert ladder installation pins (4) in holes (5) at the front
or rear ladder location.
3. Secure the ladder (1) with pins (3).
Auxiliary Ladder Rear Maintenance Location
Use the following procedures to install and remove the
auxiliary ladder in the rear maintenance location. Install the
auxiliary ladder in the rear maintenance location to check
and add engine fluids, such as the engine coolant.
Installation
1. Pull the pins (1, Figure 5-9) and rotate the ladder
support plates (2) into position.
NOTE: The auxiliary ladder weighs approximately 11.5 kg
(25.0 lb).
2. Remove the quick pin (3, Figure 5-8). Remove the
auxiliary ladder from the stowage bracket (2).
3. Insert ladder quick pins (3, Figure 5-9) in holes (4) at the
rear maintenance location.
4. Secure the ladder (5) with pins (6).
Removal
1. Remove pins (6, Figure 5-9) and ladder from the rear
maintenance position.
2. Stow the ladder for transport. For more information, see
Stowing the Auxiliary Ladder for Transport, page 5-10.
3. Pull the pins (1, Figure 5-9) and rotate the ladder
support plates (2) to the stowed position.
Outrigger Floats
The outrigger floats (1, Figure 5-10) are stowed on the
outrigger boxes. The outrigger floats must be stowed prior to
transport.
1
FIGURE 5-10
2 Places
4
Transport Position
9952
3
2

 Loading...


