Grove Published 7-23-2020, Control # 668-02 3-7
GRT9165 OPERATOR MANUAL OPERATING CONTROLS AND FEATURES
Push the Turn Signal Lever down. The turn signal lights on
the carrier, to the left of the operator, will flash. Push the Turn
Signal Lever up. The turn signal lights on the carrier, to the
right of the operator, will flash.
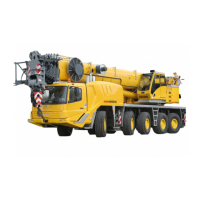
The GRT9165 crane can be driven in the Standard Driving
Configuration—with the boom centered over the front (single
axle) or, in the Alternate Driving Configuration—with the
boom centered over the rear (tandem axles).
The turn signal lever control can be reversed to allow it to
operate intuitively when driving in these two directions,
Before driving the crane in the Alternate Driving Config-
uration—with the boom centered over the rear (tandem
axles), push the Steering Reversal Switch (16, Figure 3-9)
one time to reverse all driving controls, including the turn
signal lever control. The Steering Reversed Indicator in the
Alerts Area (1, Figure 4-74) and Crane Status Area
(4, Figure 4-74) of the Operator Display Module (ODM)
comes on to indicate that all driving controls, including the
turn signal lever control, are reversed
.
When the boom is swung back and centered over the front
(single axle), push the Steering Reversal Switch again to set
the turn signal lever control back to its normal operation. The
Steering Reversed Indicator on the ODM goes off to indicate
that the turn signal lever control is not reversed
.
Before driving the crane, read, understand, and follow the
directions found in these sections of this Operator
Manual:Steering Wheel, page 3-5
• Standard Driving Configuration, page 3-5
• Alternate Driving Configuration, page 3-6
• Turn Signal Lever and Horn Controls, page 3-6
• Transmission Shift Lever, page 3-8
• Steering Reversal Switch, page 3-14
• Rear Steer Switch, page 3-28
Parking Brake Switch
The Parking Brake Switch (3, Figure 3-2) is located on the
front of the steering column.
This two-position, locking rocker switch (ON/OFF) is used to
apply and release the parking brake on the drive line.
To apply parking brake, first slide the red switch at bottom of
rocker switch forward, then push top of rocker switch. Push
bottom of switch to release the parking brake.
The Parking Brake Indicator in the Alerts Area
(1, Figure 4-74) and Crane Status Area (4, Figure 4-74) of
the Operator Display Module (ODM) comes on to indicate
the parking brake is applied.
The buzzer comes on if the parking brake is applied and the
Transmission Shift Lever (7, Figure 3-2) is in the forward (up)
or reverse (down) position. Always place Transmission Shift
Lever in neutral (center) position before applying the parking
brake.
NOTE: Parking brake must be applied before outriggers
can be operated.
Headlights Switch
The Headlights Switch (4, Figure 3-2) is located on the front
of the steering column.
This three-position rocker switch (OFF/Park/Headlight)
controls the operation of the switch LEDs as well as the
headlights, marker lights, and taillights on the front and rear
of the crane.
Push bottom of switch to cause the headlights, marker lights,
and taillights to go off. Set rocker switch to center position to
cause the marker and taillights to come on. Push top of
switch to cause the headlights on the front and back of the
crane to come on.
Drive Axle Selector Switch
The Drive Axle Selector Switch (5, Figure 3-2) is located on
the front of the steering column.
This two-position rocker switch is used to select two-wheel
drive (high range) or four-wheel drive (low range).
Push top of switch to engage four-wheel drive (low range).
Push bottom of switch to engage two-wheel drive (high
range).
NOTE: To change between drive modes, operator must set
the Transmission Shift Lever (7, Figure 3-2) to the
center Neutral position and push and hold the
Service Brake Pedal (2, Figure 3-26).
The Four-Wheel Drive Indicator in the Crane Status Area
(4, Figure 4-74) of the Operator Display Module (ODM)
comes on to indicate that the drive mode is set to four-wheel
drive. The indicator changes back to the Two-Wheel Drive
Indicator when the drive mode is set to two-wheel drive.
The Transmission Not-In-Neutral Indicator in the Alerts Area
(1, Figure 4-74) of the ODM comes on when the operator
attempts to shift between drive modes without first shifting
the transmission shift lever to neutral and pushing and
holding the service brake pedal.
CAUTION
Avoid Crane Damage!
Do not engage the parking brake while the vehicle is
moving. Damage to the crane can occur.
Disengage the parking brake before driving. Damage to
the crane can occur.

 Loading...


