5-24 Published 7-23-2020, Control # 668-02
SET-UP AND INSTALLATION GRT9165 OPERATOR MANUAL
c. The superstructure swings the cylinders out of the
counterweight mounting posts.
d. When the lift cylinders are fully retracted (0%),
release the controller. When the cylinders are fully
retracted, the counterweight is installed on the
carrier platform.
10. Update the RCL code to a Load Chart that does not
feature a counterweight. For more information, see
Enter Rigging Code, page 4-159.
11. Remove the counterweight from the carrier platform as
needed. For more information, see Removing the
Counterweight from the Carrier Platform, page 5-17.
12. Disassemble the counterweight for transport as needed.
For more information, see Disassembling the
Counterweight for Transport, page 5-14.
Installing the Counterweight on to the
Superstructure (Automatic Mode)
NOTE: When possible, lift and lower the counterweight in
automatic mode
Use the following procedure to install the assembled
counterweight on the superstructure.
1. Fully extend the outriggers. For more information, see
Using the Outriggers, page 4-21.
2. Assemble the counterweight. For more information, see
Assembling the Counterweight for Operation, page
5-14.
3. Install the counterweight on the front of carrier. For more
information, see Installing the Counterweight on the
Carrier Platform, page 5-16.
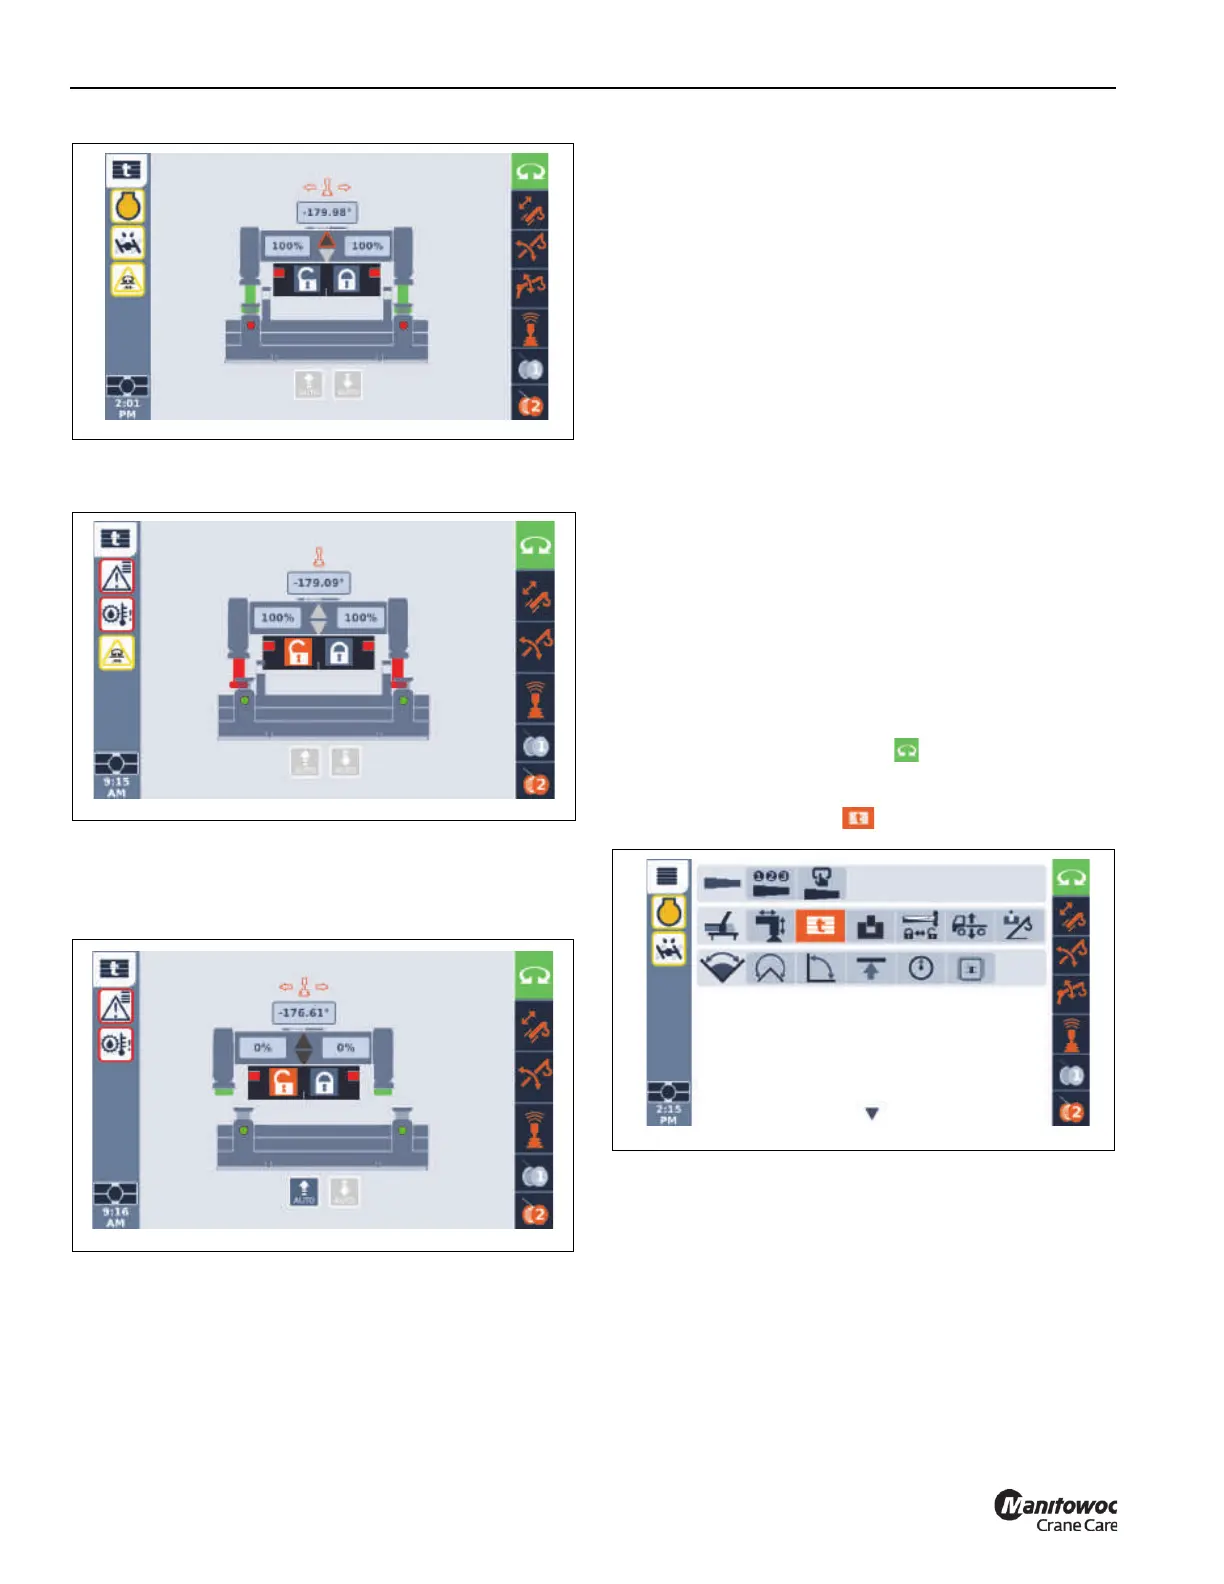
4. Make sure the Turntable Swing Pin Lock Control is
unlocked.
5. Enable the Swing Enable/Disable Switch located on the
left armrest.
The Swing Enabled Indicator is enabled (green).
6. In the ODM, use the ODM keypad or jog dial to highlight
the counterweight icon .
7. Press the OK button on the ODM keypad or press the
jog dial.
The Counterweight screen appears.
8. Rotate the superstructure so the rear is over the
counterweight platform on the front of the carrier. When
within range, the Auto icon becomes active. The valid
range to activate Automatic mode is -176.5° to 176.5°.

 Loading...


